Wheel Wells etc!
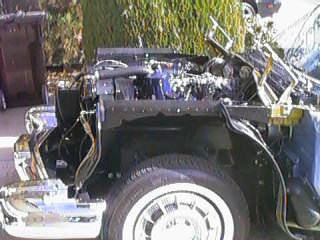
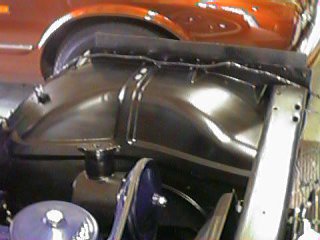 I had already bead blasted and painted all the wheel well sheet metal,
so the only work was getting the mud flaps and fender welt installed and finding
all the correct hardware to bolt the parts on. This is the Driver's side wheel
well with the top mud flap.
I had already bead blasted and painted all the wheel well sheet metal,
so the only work was getting the mud flaps and fender welt installed and finding
all the correct hardware to bolt the parts on. This is the Driver's side wheel
well with the top mud flap.
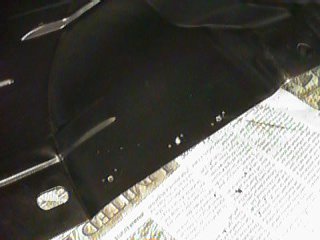 When the car shipped it had all of the mud flaps and body welt attached
with staples. This was not an option for me since I didn't have access to the
original high powered steel staple machine that could punch the staples through
sheet metal. I opted for pop rivets, and drilled holes between the staple holes
for each. Rivets worked well, and after installing them I sprayed them black so
that they wouldn't be easily seen.
When the car shipped it had all of the mud flaps and body welt attached
with staples. This was not an option for me since I didn't have access to the
original high powered steel staple machine that could punch the staples through
sheet metal. I opted for pop rivets, and drilled holes between the staple holes
for each. Rivets worked well, and after installing them I sprayed them black so
that they wouldn't be easily seen.
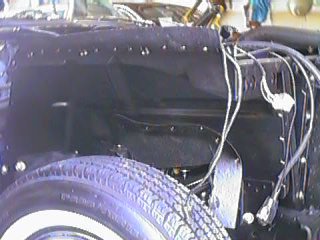 Here you can see most of the mud flaps. I bought a kit which contained
most of the mud flaps from McVey's $100ish. I did have to buy a small amount of
rubber for the radiator spill guard, which wasn't included in the kit. I also
bought and installed fender welting from Steele rubber.
Here you can see most of the mud flaps. I bought a kit which contained
most of the mud flaps from McVey's $100ish. I did have to buy a small amount of
rubber for the radiator spill guard, which wasn't included in the kit. I also
bought and installed fender welting from Steele rubber.
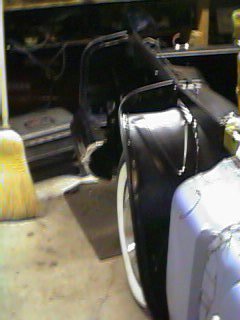 Not the best picture, but this is shows the fender welt, or body cushion
on the front front and rear wheel well. This should form a tight seal when
the fender is in place.
Not the best picture, but this is shows the fender welt, or body cushion
on the front front and rear wheel well. This should form a tight seal when
the fender is in place.
 OK the wheel wells are on and it drives under its own power!! I had
to do major brake rework, and a number of other fixes to get the car driving,
but now I can safely drive around my neighborhood. You wouldn't believe the
looks you get when you drive by people in a 59 caddy without a front clip.
OK the wheel wells are on and it drives under its own power!! I had
to do major brake rework, and a number of other fixes to get the car driving,
but now I can safely drive around my neighborhood. You wouldn't believe the
looks you get when you drive by people in a 59 caddy without a front clip.
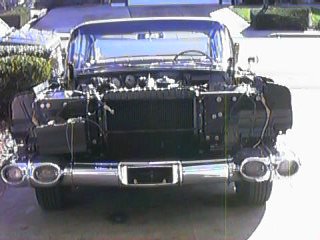
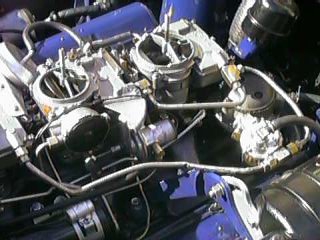 Now that I'm able to get some good outside light on the engine, I had
to take a couple of pics of it. Note the fuel line with the crimp in it. I had
to bend a new one and flange the ends. Not a big problem but several specialized
tools were required.
Now that I'm able to get some good outside light on the engine, I had
to take a couple of pics of it. Note the fuel line with the crimp in it. I had
to bend a new one and flange the ends. Not a big problem but several specialized
tools were required.
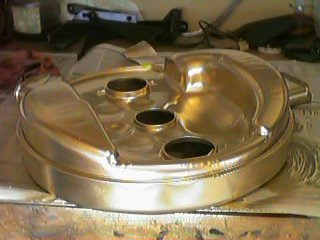 Painting the air cleaner was easy enough, I found a very close match to
the original paint at my local hardware store. After laying the gold on, I sprayed
a couple of coats of clear heat resistant paint. It now looks pretty much OEM.
I bead blasted the old finish off first, and then fixed polished the metal with
a wire wheel.
Painting the air cleaner was easy enough, I found a very close match to
the original paint at my local hardware store. After laying the gold on, I sprayed
a couple of coats of clear heat resistant paint. It now looks pretty much OEM.
I bead blasted the old finish off first, and then fixed polished the metal with
a wire wheel.
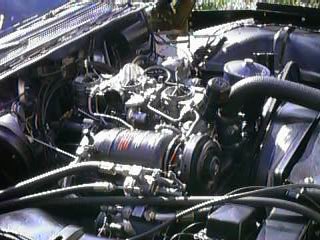 I found after installing the AC compressor that the clutch wasn't working.
I couldn't turn it off!, So it seemed like a good time to yank the compressor
and send it out for a rebuild, and update to the latest refrigerant. It should
run a couple hundred to get the compressor and expansion chamber updated.
I found after installing the AC compressor that the clutch wasn't working.
I couldn't turn it off!, So it seemed like a good time to yank the compressor
and send it out for a rebuild, and update to the latest refrigerant. It should
run a couple hundred to get the compressor and expansion chamber updated.
 There she is on the first day out of the garage after 1.5 years of work!
Notice the slight misadjustment of the front suspension. It sits a little higher
on the drivers side. Also notice that I haven't gotten the blinker nodes aligned
yet. One is pointing up and the other is straight. Projects, projects.
There she is on the first day out of the garage after 1.5 years of work!
Notice the slight misadjustment of the front suspension. It sits a little higher
on the drivers side. Also notice that I haven't gotten the blinker nodes aligned
yet. One is pointing up and the other is straight. Projects, projects.
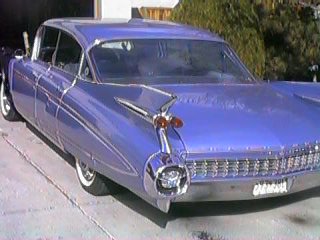 The paint looks great from here, but unfortunatly it has lots of small
nics and dings, I'll probably end up painting the entire car, but that will
be the next installment. The Horrors of Body Work! At least it purrrs like
a kitten!
The paint looks great from here, but unfortunatly it has lots of small
nics and dings, I'll probably end up painting the entire car, but that will
be the next installment. The Horrors of Body Work! At least it purrrs like
a kitten!
Home
Author: Bill McKenna
email bill@mckennasgarage.com