Stripping the Chrome!
 Getting the chrome off of this beast wasn't hard, it just took lots of
time. Rule number one is take your time. I bent a few things by not looking for
hidden nuts holding them in place. Be careful that you don't let the parts get
disorganized. My perception at the time was that I could mostly remember where
and how everything was supposed to go back together, boy was I wrong.
Getting the chrome off of this beast wasn't hard, it just took lots of
time. Rule number one is take your time. I bent a few things by not looking for
hidden nuts holding them in place. Be careful that you don't let the parts get
disorganized. My perception at the time was that I could mostly remember where
and how everything was supposed to go back together, boy was I wrong.
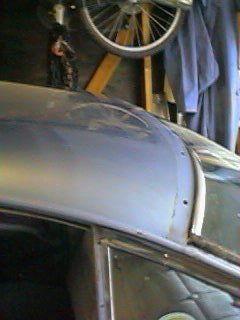 The roof rail chrome was a challenge. The inside chrome must first be removed,
then the headliner was pulled back to reveal the nuts. The nuts were glued in
with body putty Once I had all of the chrome off I stuck all of the parts into
zip lock bags by job and put descriptions on each bag. This approach works well,
but don't put to much in one bag. It is allot easier to dig through a bunch of
bags until you find what you need, than it is to dig through one huge bag and
figure out what belongs where.
The roof rail chrome was a challenge. The inside chrome must first be removed,
then the headliner was pulled back to reveal the nuts. The nuts were glued in
with body putty Once I had all of the chrome off I stuck all of the parts into
zip lock bags by job and put descriptions on each bag. This approach works well,
but don't put to much in one bag. It is allot easier to dig through a bunch of
bags until you find what you need, than it is to dig through one huge bag and
figure out what belongs where.
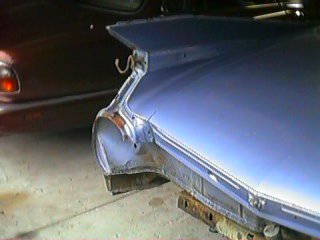 The rear bumper was a real problem, The bolts which held it on had
rusted so badly that they were almost impossible to get off. First I soaked
them in WD40, then heated them up with a butane torch, before putting the
impact hammer on them. I tend to used the impact hammer with over 100 psi
and with the highest setting possible for most things. After I got the bumper
off taking it apart was pretty quick, but lots of complex parts. I can not
say loudly enough, take lots of pictures, and buy a digital camera!! I have
hundreds of pics, and still find myself looking at every 59 I can find for
details.
The rear bumper was a real problem, The bolts which held it on had
rusted so badly that they were almost impossible to get off. First I soaked
them in WD40, then heated them up with a butane torch, before putting the
impact hammer on them. I tend to used the impact hammer with over 100 psi
and with the highest setting possible for most things. After I got the bumper
off taking it apart was pretty quick, but lots of complex parts. I can not
say loudly enough, take lots of pictures, and buy a digital camera!! I have
hundreds of pics, and still find myself looking at every 59 I can find for
details.
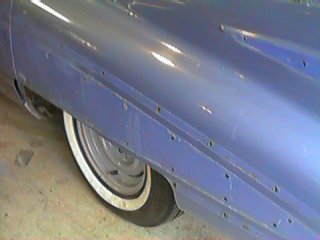
 The blisters were really easy to get off, once the tail light units were
off. My car had been backed into something and had a slight bend in the fin. It
was fixed fairly well somewhere along the way, but some of the original hardware
was changed out. Also the tail light unit had slight damage, but that's old cars,
little problems pop up everywhere.
The blisters were really easy to get off, once the tail light units were
off. My car had been backed into something and had a slight bend in the fin. It
was fixed fairly well somewhere along the way, but some of the original hardware
was changed out. Also the tail light unit had slight damage, but that's old cars,
little problems pop up everywhere.
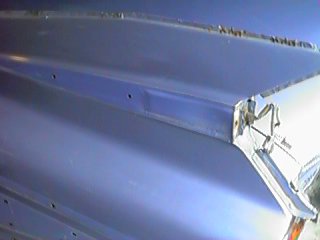
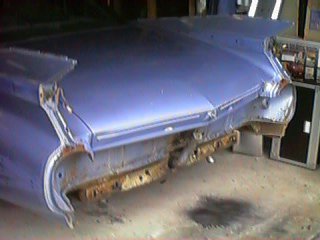 Not so nice to look at without the chrome, but taking it apart was a must
for a good paint job. To get all of the chrome off of the back, the entire trunk
lining was removed. Found about six inches of dirt in the lower fenders. This
was dry when I found it, but I'm sure it had been wet before. Dirt build up inside
the fenders is a leading cause of rust out.
Not so nice to look at without the chrome, but taking it apart was a must
for a good paint job. To get all of the chrome off of the back, the entire trunk
lining was removed. Found about six inches of dirt in the lower fenders. This
was dry when I found it, but I'm sure it had been wet before. Dirt build up inside
the fenders is a leading cause of rust out.
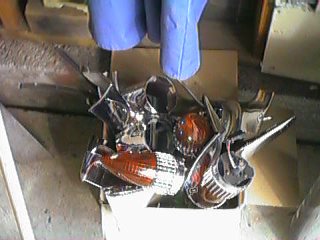 Well The result of all of this work was a number of boxes full of parts.
Each part was polished, cleaned and fixed as best it could be while the car was
at the paint shop. This took a couple of months. Fortunately most of the chrome
was in really good shape so I didn't have to visit the chrome shop.
Well The result of all of this work was a number of boxes full of parts.
Each part was polished, cleaned and fixed as best it could be while the car was
at the paint shop. This took a couple of months. Fortunately most of the chrome
was in really good shape so I didn't have to visit the chrome shop.
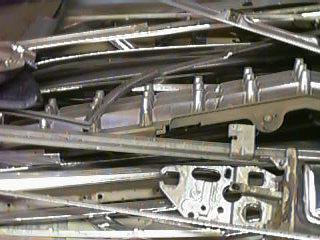 Chrome here, chrome there, big piles of chrome everywhere, All of
it in dirty grimy shape. Now that all of the chrome is off I sanded down
all of the door jams, pulled all of the old weather stripping off, and sent
her off to the paint shop. 9 months later I got her back with paint that
looked like new! So click on to the next page!
Chrome here, chrome there, big piles of chrome everywhere, All of
it in dirty grimy shape. Now that all of the chrome is off I sanded down
all of the door jams, pulled all of the old weather stripping off, and sent
her off to the paint shop. 9 months later I got her back with paint that
looked like new! So click on to the next page!
Home
Author: Bill McKenna
email bill@mckennasgarage.com