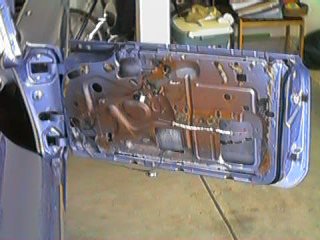
Installing all of the Chrome!
 It was pretty easy going installing the chrome as I had already polished
and repaired it while the car was out getting painted. I evaluated all of the
clips and replaced all broken or rusty parts. Restoration specialties and supply
has all of this stuff. (814) 467-9842 You can see that I've got the tail light
blister and one door handle on at this point. The hardest part with installing
the chrome was to decide what to do first. I started by putting all of the easy
stuff on and things that made it easier to work on.
It was pretty easy going installing the chrome as I had already polished
and repaired it while the car was out getting painted. I evaluated all of the
clips and replaced all broken or rusty parts. Restoration specialties and supply
has all of this stuff. (814) 467-9842 You can see that I've got the tail light
blister and one door handle on at this point. The hardest part with installing
the chrome was to decide what to do first. I started by putting all of the easy
stuff on and things that made it easier to work on.
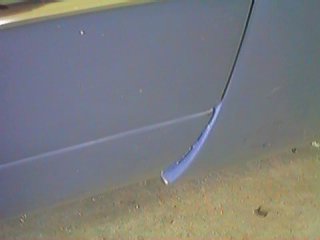
 At the same time I was installing chrome I also was installing new
rubber. It was pretty simple to do, but you need a couple tubes of special
3M adhesive. I got all the rubber from Steele rubber (www.steelerubber.com).
At the same time I was installing chrome I also was installing new
rubber. It was pretty simple to do, but you need a couple tubes of special
3M adhesive. I got all the rubber from Steele rubber (www.steelerubber.com).
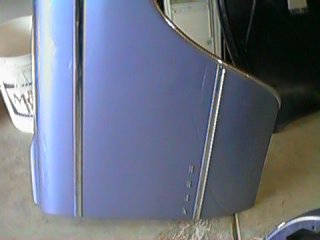
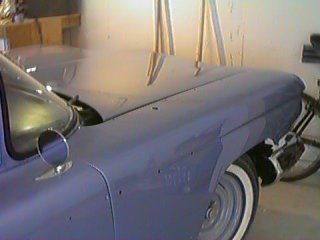 The Front fenders were installed when the car was painted, but were just
hung roughly in place to get the correct metallic paint flow on the entire car.
I had to take them off both to get chrome installed and to get them shimmed up
so that they would fit correctly.
The Front fenders were installed when the car was painted, but were just
hung roughly in place to get the correct metallic paint flow on the entire car.
I had to take them off both to get chrome installed and to get them shimmed up
so that they would fit correctly.
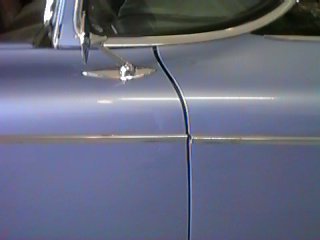
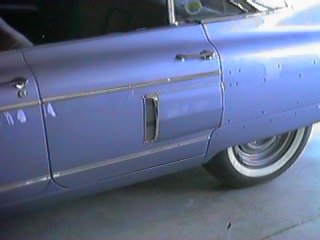 Most of the chrome on the doors was pretty quick to install, the hardest
part was figuring out which piece went where. The patented fake air ducts were
just a few nuts and bolts to install, but the aluminum trim on the sides was tough.
It was installed originally by little tabs that bent over the metal. These were
easy to break when removing and reinstalling, and several were lost in the process,
so I used some silicon rubber to help keep the parts in place.
Most of the chrome on the doors was pretty quick to install, the hardest
part was figuring out which piece went where. The patented fake air ducts were
just a few nuts and bolts to install, but the aluminum trim on the sides was tough.
It was installed originally by little tabs that bent over the metal. These were
easy to break when removing and reinstalling, and several were lost in the process,
so I used some silicon rubber to help keep the parts in place.
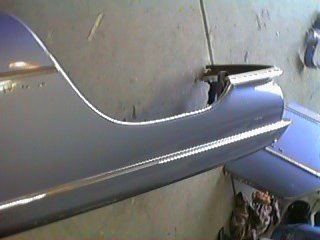
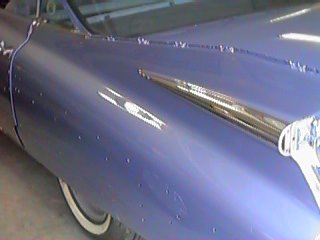 The tail light blisters were easy to install with just nuts and bolts,
and the chrome on top of the fin just snaps on with clips. The rear bumper
was a real pain in the A!! to get on, but after several hours of adjustment
and sweat it was back in place. There aren't any particular tips to give
on it, just lots of wood blocks and shims holding the bumper in place before
you can tighten it down.
The tail light blisters were easy to install with just nuts and bolts,
and the chrome on top of the fin just snaps on with clips. The rear bumper
was a real pain in the A!! to get on, but after several hours of adjustment
and sweat it was back in place. There aren't any particular tips to give
on it, just lots of wood blocks and shims holding the bumper in place before
you can tighten it down.
 This is the way to install chrome! No busted knuckles, no lost nuts!
After I got all the chrome on the fender, head lights and all I hung it on
the car. It took about 2 hours per fender to get it completely ready to go.
Most of this time was spent trying to remember where I stored the nuts that
held the chrome on.
This is the way to install chrome! No busted knuckles, no lost nuts!
After I got all the chrome on the fender, head lights and all I hung it on
the car. It took about 2 hours per fender to get it completely ready to go.
Most of this time was spent trying to remember where I stored the nuts that
held the chrome on.
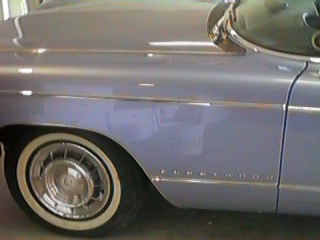
 Half of the letters are on now. I bought new fender letters from Mcveys
(www.mcveys.com) They have pretty much anything you'll ever need in the way of
Cadillac jewelry.
Half of the letters are on now. I bought new fender letters from Mcveys
(www.mcveys.com) They have pretty much anything you'll ever need in the way of
Cadillac jewelry.
 This is the kind of problems you find when installing body panels. The
contour of the panel isn't quite right for the rest of the body. These corners
were cut out and replaced when the car was painted. (rust) So they somehow got
the shape slightly wrong. It took some doing, but I was able to bend them in place
and bolt it down. Fortunately the mounting bolts on the bottom would hold the
panel just where it needed to be.
This is the kind of problems you find when installing body panels. The
contour of the panel isn't quite right for the rest of the body. These corners
were cut out and replaced when the car was painted. (rust) So they somehow got
the shape slightly wrong. It took some doing, but I was able to bend them in place
and bolt it down. Fortunately the mounting bolts on the bottom would hold the
panel just where it needed to be.
 Another common problem when mounting fenders! The gap is to large at the
top of the fender. This required several refits with different numbers of shims
under the front of the fender to raise it into the right place on the back.
Another common problem when mounting fenders! The gap is to large at the
top of the fender. This required several refits with different numbers of shims
under the front of the fender to raise it into the right place on the back.
 OK getting closer. Still not quite right, but its looking good! Car restoring takes patience!
Home
Author: Bill McKenna
email bill@mckennasgarage.com