Powder coating is similar to plating in that it is a process which requires a good bit of prep work and setup and is serial with the bottle neck being the oven. Each batch of powder coated parts takes about 30 minutes in the oven. I try to do powder coating and plating at the same time so I can dove tail the wait periods and maximize time.
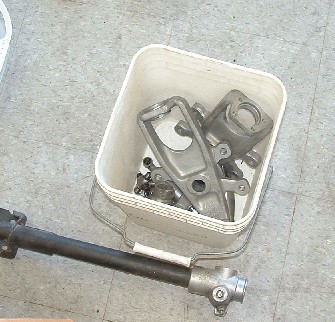
Powder coating is like painting in that finish quality is completely dependent on the prep work. The cleaner the surface the better, I can't stress that enough, clean clean clean is a must. The first step is bead or sandblasting the parts down to bare metal. I use a bead blasting cab for this, typically I go over parts two or three times to get all of the rust, paint, plate, scale off. After blasting the parts, I hose them down with water to get any dust and beads of the part. As soon as the part has been washed, I blow it dry with compressed air and spray a phosphate metal wash on it to prevent flash rust. As soon as the metal wash is dry I store the parts in clean cardboard boxes until I'm ready to powder coat. If the parts sit more than about a week, I need to put them back in the bead cab and start over.
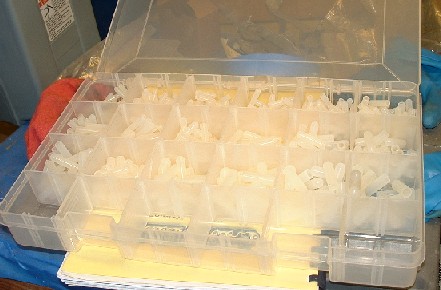
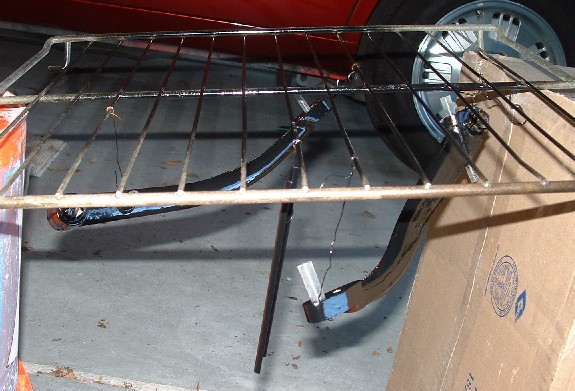
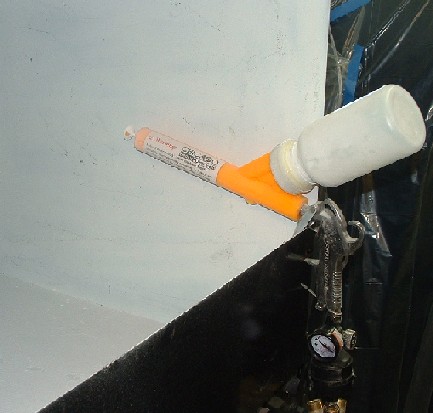
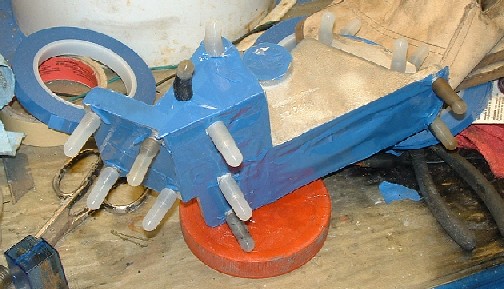
The second step of the process is masking or plugging any areas where you don't want powder to go. Powder coating unlike painting, produces a thicker build typically and is much harder to get off once its cured. It is almost impossible to bead blast off, and standard paint stripper cuts it very slowly. I cut it off with a knife or dremel tool when I miss a spot with tape or plugs, When I strip an entire part, I first heat the part for an hour at 600 in the oven and then bead blast and strip with paint stripper. This often takes four or five cycles between stripper and blasting. Its tough stuff! This is a picture of a plug kit I use for filling small holes or capping threads on parts. After masking up all the treads and plugging the holes I wire the parts to an oven rack making sure I get good electrical contact between the part and the rack. The powder coating gun works based on very high voltage electrical current. The part is connected to negative (ground) and the powder gets a positive charge. As the powder comes out of the gun it is instantly attracted to the part, without current most of the powder falls off.
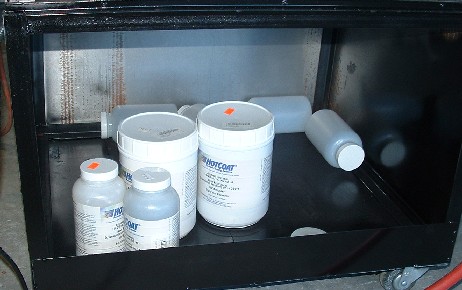
Powder selection is a long subject, most under hood parts can be done in polyurethane, polyester TGIC, or epoxy with good results, I used all with good results. Here's a mix of Eastwood Hotcoat powders. There are hundreds of colors and types available, but in my restoration its all gloss black, silver, clear, and white etc. I tend to try and keep the common colors in the bottle I will use to shoot them. then I just clean the gun and thread the new color bottle on. I have a Harbor Freight powder gun which works fine, and was a good bit cheaper than the Eastwood models. Unlike painting the powder coating gun isn't critical for a good finish. It just spews the powder out and the electrical charge does the rest.
Once I have all the parts masked up, hung on the rack and the powder gun loaded. I pre heat the oven to about 400 degrees, and pre heat the parts for five to ten minutes. Pre heating helps in several ways. It boils off any moisture which may be left on the parts and the pre heated part accepts the powder from the gun better than a cool part. Usually the powder starts to melt as soon as it hits the part keeps more powder on the part especially in the low places which are typically harder to cover. I use a standard oven thermometer to monitor the temp. In my case the built in thermostat is slightly cooler than the oven thermometer, once I got familiar with the delta in shown temp. verses actual I didn't really need the thermometer any more. I tend to run the oven about 400 degrees for most powders and have had good results. Slight over heating is better than under heating in my experience, and over baking a part to cure it is better than under curing.
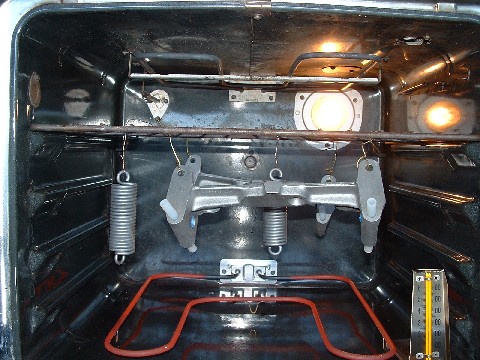
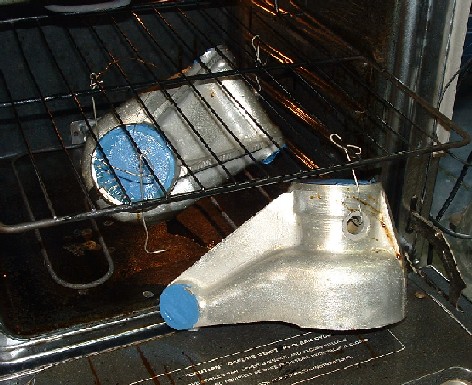
After pre-heating the parts I shoot the powder. This is done at very low pressure 5-10 psi and with a negative charge on the part. The powder is positively charged and sticks to the heated metal. It is possible to load a thin or thick coat of powder on the part just by continuing to spray the powder after the part is coated. I tend to put a thin coat of powder on parts which are more visible under the hood, and heavier on suspension parts where I know they will take more abuse. When I really load the powder on the parts I get some orange peel in the cured powder. In this picture I'm cooling a rack of parts after baking for 25 minutes. Cooling takes about 30 minutes, but can take longer for large or heavy parts.
Here is a great example of what not to do when powder coating! First my wire hangers were poorly done and the part fell off as I was taking it out of the oven messing up the finish. Second, notice the brown streak on the hub carrier, that is oil that was inside the body. I didn't realize I had some small amount of grease inside the part Once heated it turned into oil and streamed out of the part. It totally ruined the clear powder coat on this part. Oil and powder coating do not mix. Even the smallest amount of grease inside will cause problems. It is very easy to have trapped dirt and oil in parts even after bead blasting. One good way to fix this is to put the part through a longer pre-heating process at higher temp. This will melt or burn off the oil. Then cool the part, go over again with glass bead to get any micro oil off, Then wash with water, spray with Phosphate "metal wash" coat and mask.
Here is the powder gun loaded up and ready to shoot clear polyester gloss! The spraying technique isn't at all like paint. The powder comes out in a cloud and which is generally moving towards the part. The material doesn't have the forward pressure which wet paint does, so it is difficult to get into hidden or recessed areas. I try to shoot at several angles to get build in these places. Also the tip of the gun has a very high voltage low current charge, so if you get it very close to the part electricity will arc off onto the part. This doesn't seem to cause any problems but can scare you at first.

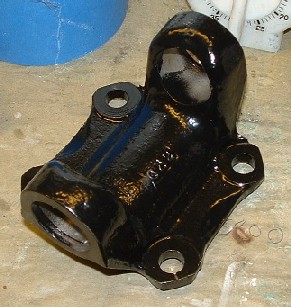
Here is a typical drive train part with gloss black polyester powder. Tough as nails and very pretty!
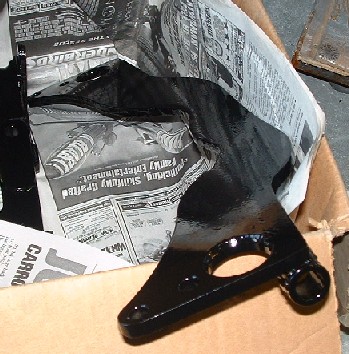
Another heavy part, This one has some orange peel, I coated it extra heave because it is a part which will be taking some abuse!
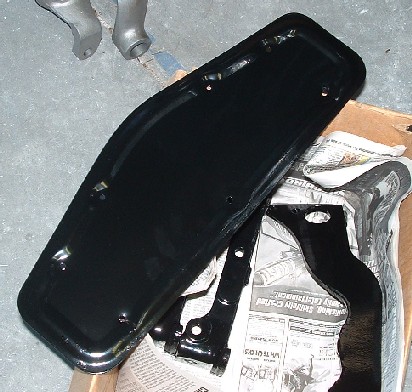
Interior parts like this cover for the hand brake adjustment, is done in thinner powder coat and has a near mirror gloss. My goal is to have no paint on the car except for the body work. I'm sure there will be a few plastic parts which must be painted but all the metal will hopefully get powder coating.
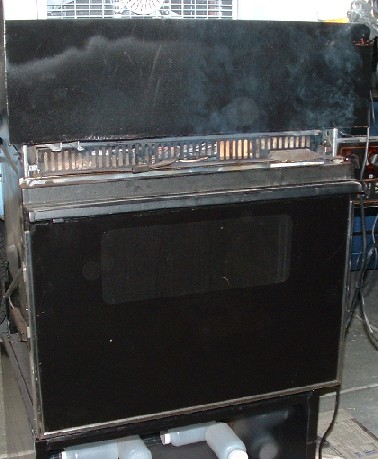
Baking in action! I am cooking some clear polyester in this picture and you can see it smoking. Some powders give off more odor and smoke than others. I use clear, and black allot, both tend to smoke a good bit when being cured, If I notice allot of smoke coming out I open the door on the oven slightly to let the smoke escape To much smoke could discolor the powder being baked on. especially clear coats.