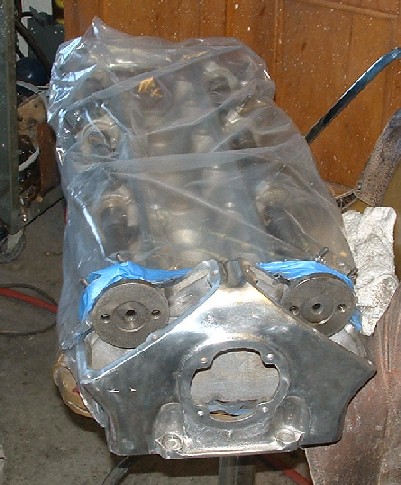
Engine back from the shop!!
The engine
machine work is one of the few things you really can't do in a garage, especially
on this motor. It was a mess, I replaced the crank, had the engine re-sleeved,
had major welding done on both the head and the block due to water jacket rust
and corrosion. The shop put in 20 hours of labor just on the head. The entire
bill for machine work and parts was something like $5600. $2500 parts and the
rest labor.
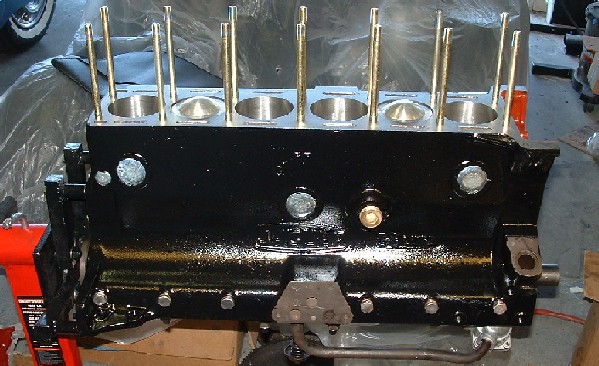
The block
on this car was in reasonable shape but the engine had been bored two or three
times so I had to put in new sleeves. I got bought them from LA sleeve. I
had the shop install the sleeves and bore them out to standard. I got new
standard size AE pistons, and had a replacement crank from another 3.8 Liter
engine ground .010 under on the mains and rods. The crank was balanced as
were the rods and pistons statically before assembly. The shop put in the
freeze plugs, but I did the block paint and the rest of the bock prep myself.
I used glyptol where I could, and put new copper washers on all the oil galley
bolts. I installed the new head bolts and torqued them down using the 2 bolt
technique.
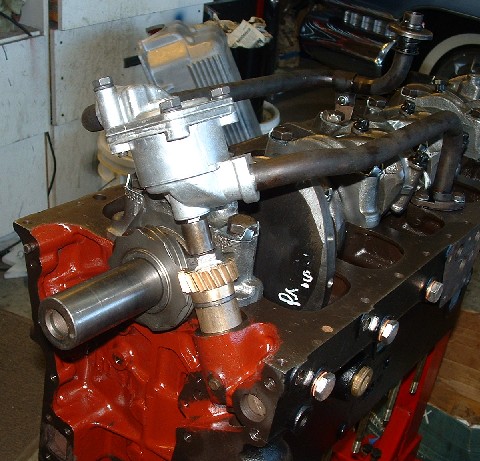
I installed
a new distributor drive gear, and oil pump next. Its important when working
with any of the bearing cap bolts to have a good quality torque wrench and torque
down the main bolts to the correct setting. I installed new Woodrift keys and
put the gears on the crank next. Things come together pretty quickly if you
have all the parts you need up front. I shot oil into the pump and galleys as
much as possible to help get the prime up on the pump. One mistake I made at
this point is not getting the distributor shaft aligned to be at the right angle
when the engine is at top dead center on number six piston. This mistake cost
me some time and a oil pan gasket.
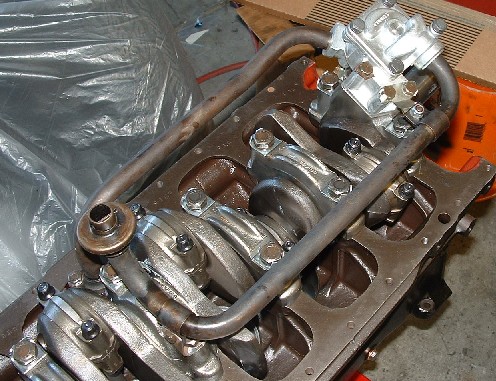
The
New oil pump was from a later 4.2 liter Jaguar engine and has a larger displacement
than many of the original pumps. It required a custom adapter to be added
to the oil pickup pipe shown here. I used new tab washers all around when
putting these parts in. the last thing I need is something coming apart in
the oil pan!

I'm just about
ready to put on the oil pan now, I just need to clean up the mating surface
and put down some gasket dressing. The engine shop didn't use glyptol in the
crank case, even though I asked for it, but otherwise did a good job. They had
the oil pan on the motor when I picked it up so I didn't notice it until I got
home. Not the end of the world I guess, since it didn't have it from the factory.
The
next step is getting the timing chains in. I started off by getting the lower
timing chain tensioners in and torqued down. Then put the upper chain assembly
together!
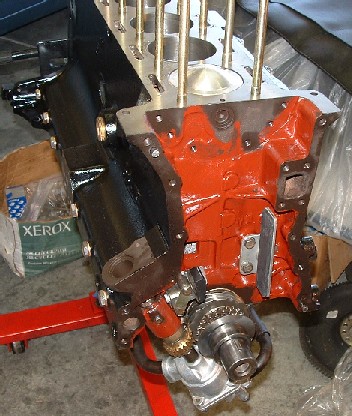
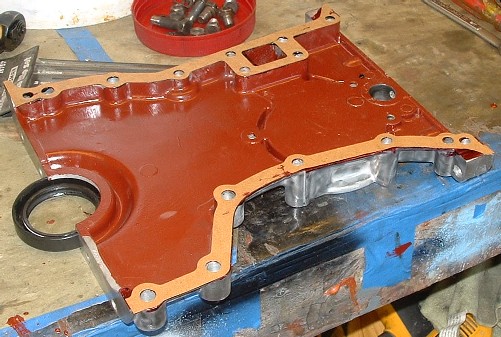 Here is a quick
shot of the cam chain cover with the output shaft gasket. I stuck with the original
style gasket. Many Jag owners go to a later Teflon type seal which requires a
slight mod to the crank. I didn't want to mod the engine so I stuck with the original.
Hope it doesn't leak to much!
Here is a quick
shot of the cam chain cover with the output shaft gasket. I stuck with the original
style gasket. Many Jag owners go to a later Teflon type seal which requires a
slight mod to the crank. I didn't want to mod the engine so I stuck with the original.
Hope it doesn't leak to much!
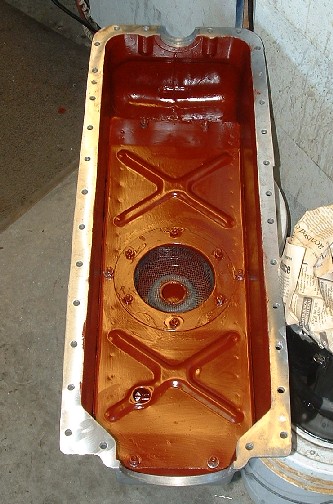
Here
is the oil pan all glyptoled up and ready to install.
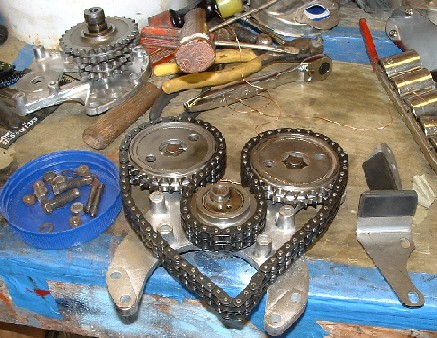
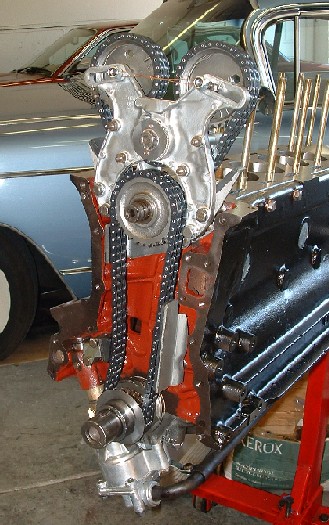
The timing
chain gear assembly was a bit of a challenge to figure out but nothing a little
reading in the shop manual couldn't solve. Its really quite a complex setup
for its day! Most car engines in this era wouldn't have something like this.
Notice the new chain tensioners on the right side. All of the timing chain parts
are relatively inexpensive. About $200 for everything.
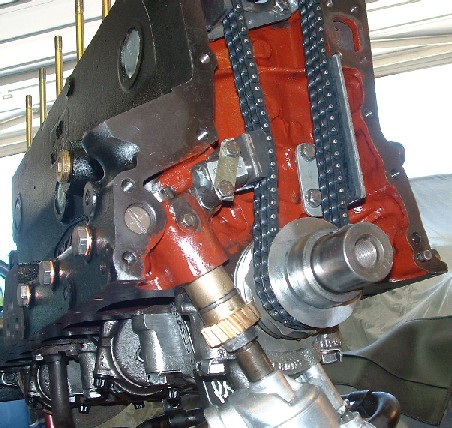 Here is a nice
shot of the lower cam chain and the hydraulic chain tensioner. The tensioner on
the left side, is spring loaded and has to be installed while the spring plunger
is locked, after you get the chain in you take the bolt out of the back of the
block and release the spring with an allen wrench, then replace the bolt and lock
it down with its lock tab. Also notice the oil slinger and oil sealing spacer
on the crank. This spacer is a common wear part which is often replaced. mine
was in good shape.
Here is a nice
shot of the lower cam chain and the hydraulic chain tensioner. The tensioner on
the left side, is spring loaded and has to be installed while the spring plunger
is locked, after you get the chain in you take the bolt out of the back of the
block and release the spring with an allen wrench, then replace the bolt and lock
it down with its lock tab. Also notice the oil slinger and oil sealing spacer
on the crank. This spacer is a common wear part which is often replaced. mine
was in good shape.
I'm ready go
put the timing chain cover on now. I used Red lock tight and new lock washers
on everything that didn't have lock tabs.
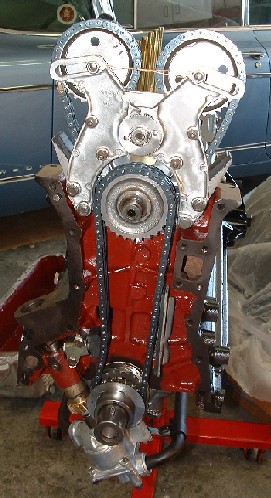
One more shot
of the timing chain area. I need to get the head ready to install next.
Here is the
head back from the shop. This puppy was a major mess. I didn't take any pictures
of the water jacket before and after, but it was corroded to a point where most
people would have tossed it. Of course it had the correct matching numbers so
I didn't want to do this, so the engine shop had to do some major work on it.
They cut a hole in the deck and welded up an area where the water jacket had
corroded into the intake. Welded all the water ports. Pulled .030 of warp out
of the head in 4 stages. Replaced the seats, valve guides, bucket guides, buckets,
springs and valves. Decked off .010. They did a cc check and found 102 CC per
cylinder, They did pressure test on the completed head and it all checked out.
APM put in 20 hours of labor on a head is about 15 more than they usually take,
This head had 5 hours of welding alone. I'm buffing out the front.

After the head
was buffed out I cleaned it with grease and wax remover and shot the gold paint.
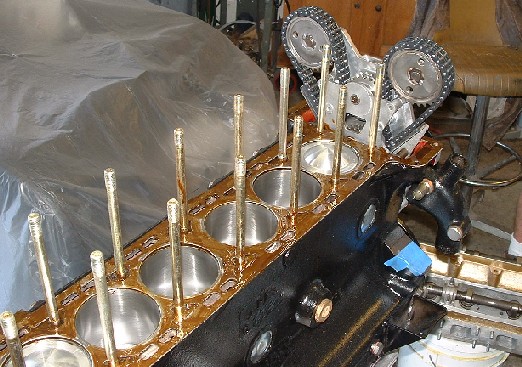
I used one
of the Cometic head gaskets which was .051 thick based on calculations done
by the shop. The calculation is based on .025 total cut from the head and .020
skim off the block. The shop had to first weld the block up around the water
ports where it had rusted, The rust pits were about .050 deep. After welding
up the ports they Skimmed .010. A previous rebuild had removed .010 so the total
became -.020 plus the -.025 skim on the head for a whopping total of .045. The
Cometic gasket is made of a composite material with steel embedded. Unlike steel
gaskets it compresses some under load. The .051 gasket should compress down
to about .045 with 54 foot pounds of torque theoretically. In this picture you
can see the gasket just before the head went on. I used aircraft grade permatex
gasket dressing on all the engine gaskets.
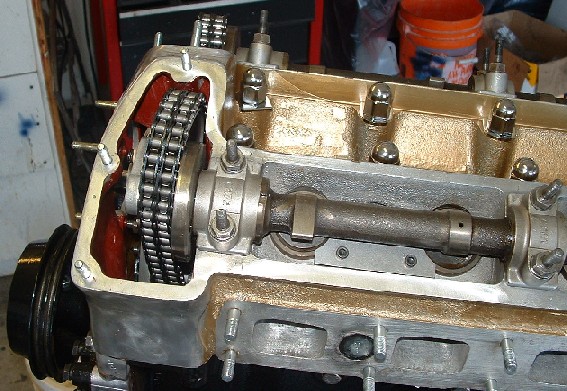
The head went
on without issue, The next step was setting up the timing. The cams had been
positioned to be exactly in the correct position when the caps cam caps were
torqued. You can see the notch in the cam exactly in the center. of the front
bearing cap. The engine is exactly in the top dead center position and the cam
chain mounting disks must be popped out of the gear to line up the bolt holes.
To do this, pop the gear onto the cam and tap it back with a brass drift until
it is full on the cam, then pop the wire keeper off the front and pull the center
out of the gear. Rotate the center until it lines up with the bolt holes and
pop it back into the toothed gear. This is hard to understand unless you are
doing it but is a really important thing to get right, and difficult to figure
out unless you've done it. Once the center is back in the gear and bolted up
put the wire keeper back in and put safety wire on the bolts.
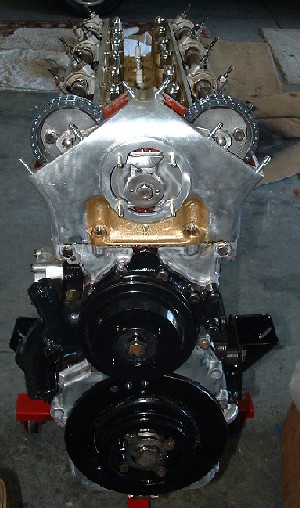
Here you can
see the the timing chain gear bolts properly setup and the timing chain tensioner.
You'll need a special tool to tighten the timing chain. I was fortunate enough
to be able to borrow one! Thanks Dick! I have the flywheel and water pump on,
but just have the water pump pulley stuck on for fit testing. I also bolted
up the motor mounts and oil filter housing.

Here is a
shot just before I put on the external oil pipe. I am putting new copper washers
everywhere and topping those off with some gasket sealer for good measure.
After the oil pipes I'll put the valve covers and torque them down. That is
about it for this page. I will continue the rest of the motor construction
on the next installment
Next up, Clutch, transmission install and Engine install!!