Engine back in the Car!!
Getting the
engine in was really easy from below. I've removed the engine from the top and
this was much better overall! I did this work in 2 days about 10 hours a day.
20 hours total.
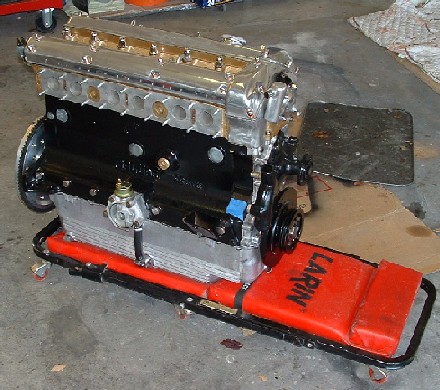
The first
task was getting the engine off the stand and get it mated up with the transmission.
I replace all of the original clutch parts, clutch disk, aluminum flywheel,
and friction plate. The original clutch parts were working when I tore the
car down but I didn't really want to risk having a clutch go out once the
car is back together. Its money well spent.
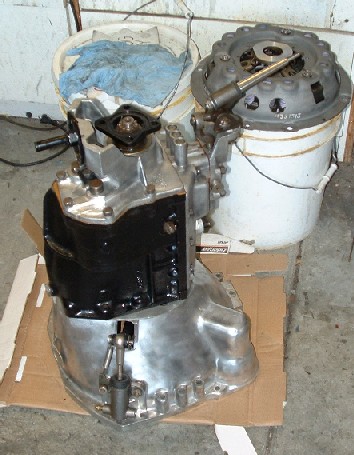
I had already
put the transmission back together and installed the clutch slave and throw
out bearing. You can see the new Friction plate ready to go on in the background.
Before I installed the fly wheel I bolted the clutch friction plate up with
the flywheel and balanced it as best I could. To my eye it seemed well balanced
right out of the box. I also tapped out the Metric threads and went with larger
3/8" NC thread bolts to hold the friction plate to the aluminum flywheel.
Aluminum is very soft and fine threads will strip out quite easily if over torqued.
The larger course threads are better for high stress applications.
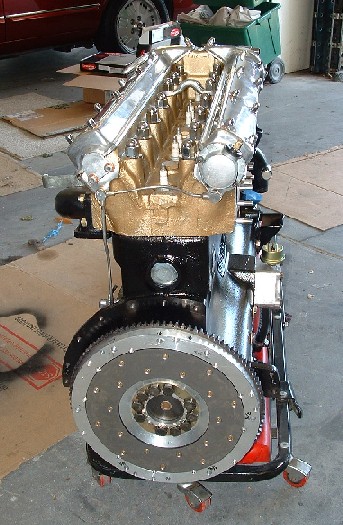
I replaced the original pilot bushing and flywheel alignment pins. I bolted
up the flywheel and torqued it down to 150 foot pounds. The next step is to
bolt up the clutch disk, and friction plate. To do this you need a special
tool, (not shown) to align the clutch disk in the center of the pilot hole.
Once the disk is aligned tightening down on the friction plate cover locks
the disk in place.
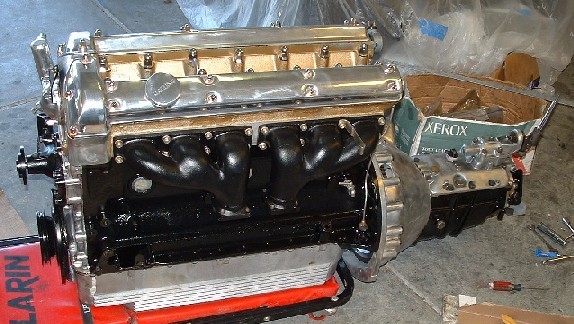
I had positioned
the engine on the dolly so I could slide the transmission on easily. I did this
by myself with some blocks of wood under the tranny and a good bit of sweat
and cursing. She is all mated up now. I still need to put on a few small parts
like the lower bell housing cover and brackets.
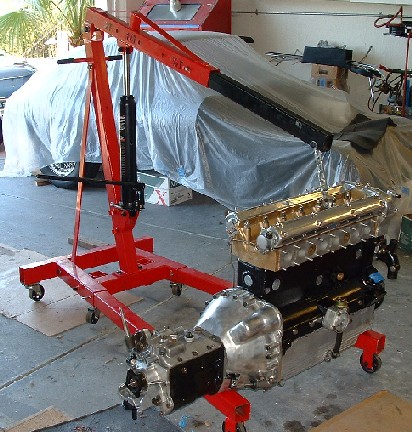
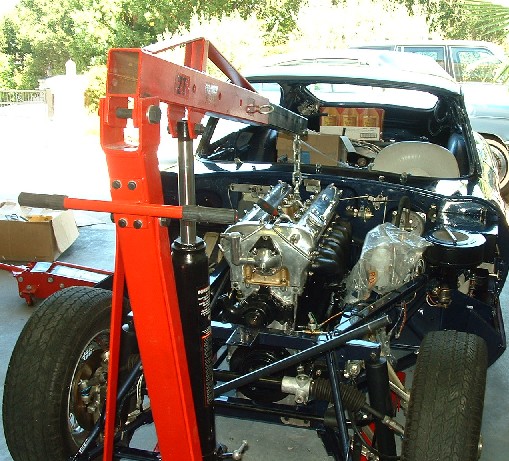
Engine
cranes are a great thing! Here I'm getting the motor ready to go on the car.
I will put the starter on, and the rest of the small parts around the transmission.
I'll also do some testing to make sure everything is turning freely before
I install the motor.
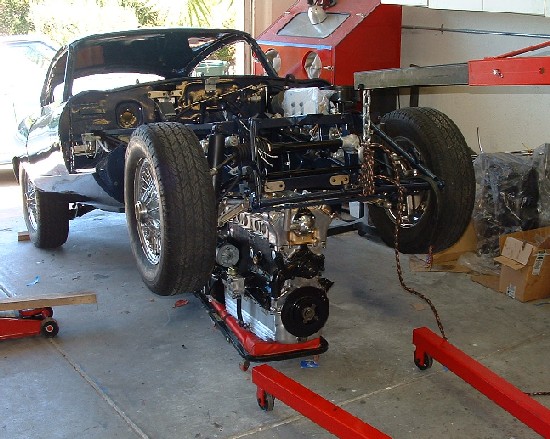 I first had to
jack the car up with the floor jack to get the shifter and transmission to go
under the picture frame. My hoist isn't deep enough to reach the car with the
engine between its legs. I very carefully pulled the car up with the crane attached
to the bonnet mount. This is probably something I wouldn't recommend, I had a
new CJs bonnet mount which seemed pretty strong and the car without engine isn't
really that heavy.
I first had to
jack the car up with the floor jack to get the shifter and transmission to go
under the picture frame. My hoist isn't deep enough to reach the car with the
engine between its legs. I very carefully pulled the car up with the crane attached
to the bonnet mount. This is probably something I wouldn't recommend, I had a
new CJs bonnet mount which seemed pretty strong and the car without engine isn't
really that heavy.
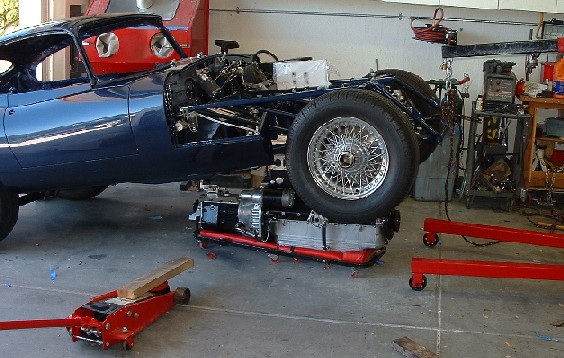
The
rolling back board was way beyond spec. with 600 pound of engine and transmission,
however it held up, and made life allot easier positioning the engine. After
the engine was back under the picture frame I'm ready to start lowering the
car over the engine.
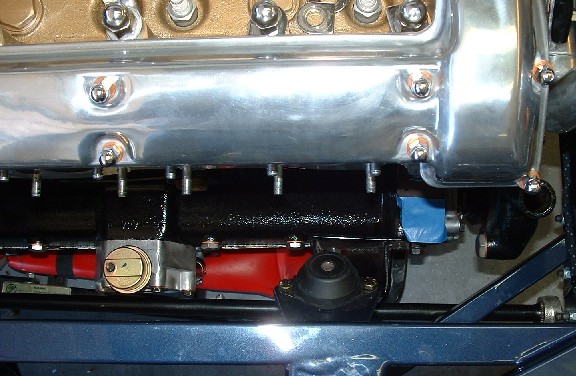
Here you can
see the transmission coming up from below. The drive shaft will push back just
enough to allow the flange to slip by. Its a tight fit but manageable.
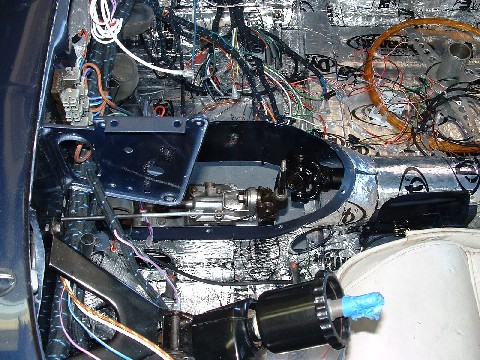
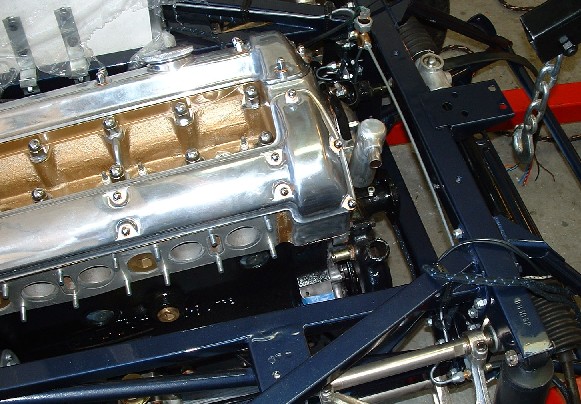
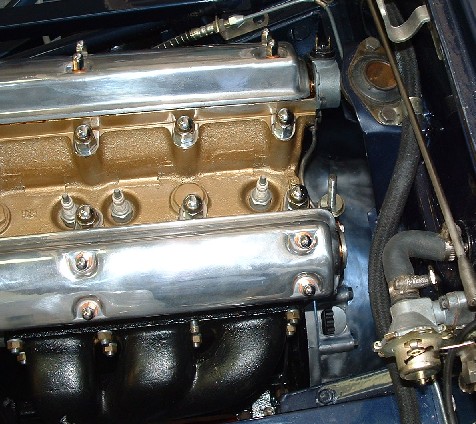 The engine stabilizer
link is easily seen here. Its a tight squeeze behind the motor to line up the
link. I used new top and bottom washers on this and chased the threads out on
the link so it was easy to spin the bottom washer up to meet the bottom of the
mount. After the engine is up and in place I tightened up the bottom nut until
the engine is locked into place, and then the top nut was tightened as well to
completely lock the engine in. I used a little red lock tight on this to make
sure the nuts don't back out.
The engine stabilizer
link is easily seen here. Its a tight squeeze behind the motor to line up the
link. I used new top and bottom washers on this and chased the threads out on
the link so it was easy to spin the bottom washer up to meet the bottom of the
mount. After the engine is up and in place I tightened up the bottom nut until
the engine is locked into place, and then the top nut was tightened as well to
completely lock the engine in. I used a little red lock tight on this to make
sure the nuts don't back out.
With the engine
fully under the car I lowered the car back onto its wheels and reset the engine
crane to lift the engine in place. I discovered that the front engine lift point
I had on the second row of studs from the front was not a good balance point
for the complete engine so I put a rear lift hook further back, on the second
row from the back studs. This turned out to be the perfect balance point to
lift the engine vertically.
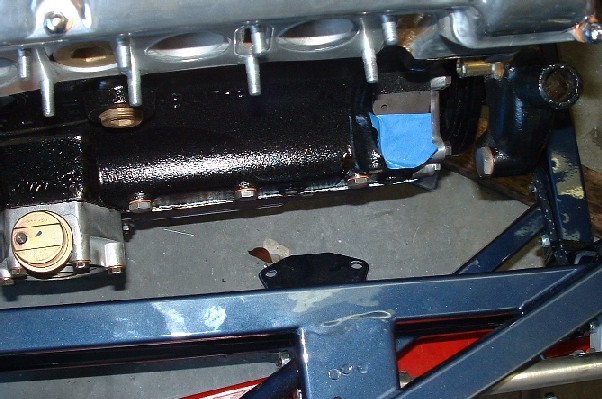
One small
over sight on my part was the engine mounts. These are clearly not going to
make it past the mount points on the car. Fortunately they are removable. Next
time I'll just leave them off. It was a simple matter to get them off.
After removing
the mounts the engine lifted up into place and I bolted the mounts back on.
I also removed the rubber engine mounts and put them onto the engine side mounts.
Then just lined up the holes on the sub frame with a screw driver and installed
the bolts.
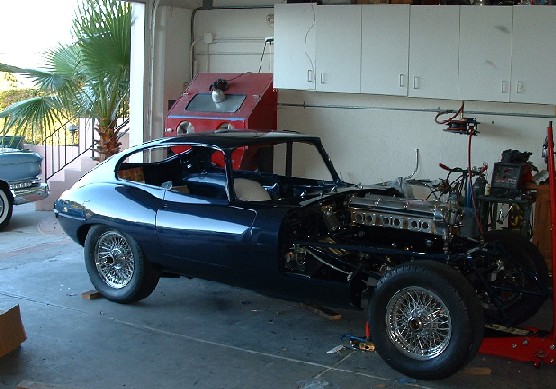
Its all bolted
in now. I was able to do this without any damage to the paint surprisingly.

Now for the
hard part, the transmission support spring unit went in easily but the cross
member support was a real bear. I ended up having to take the front suspension
apart and reset the torque arm to get this in place. The brace was slightly
to wide after all the powder coat and paint. I had to grind down the ends of
the support slightly. Working under the car getting this part in was not much
fun and took almost two days to get it tied in and re install the front suspension.
I think If the part had fitted properly I could have avoided the torque arm
reset, by using dummy shafts as described in the shop manual.
After getting
the cross member in its back to all the little details. Electrical system, cooling
system, Exhaust, brakes and clutch bleeding, fuel lines, Carbs, choke, gauges.
Its really looking like a car now. I can almost hear it running!
Next up,Getting it ready to run!