Click on above photo for a short running video!
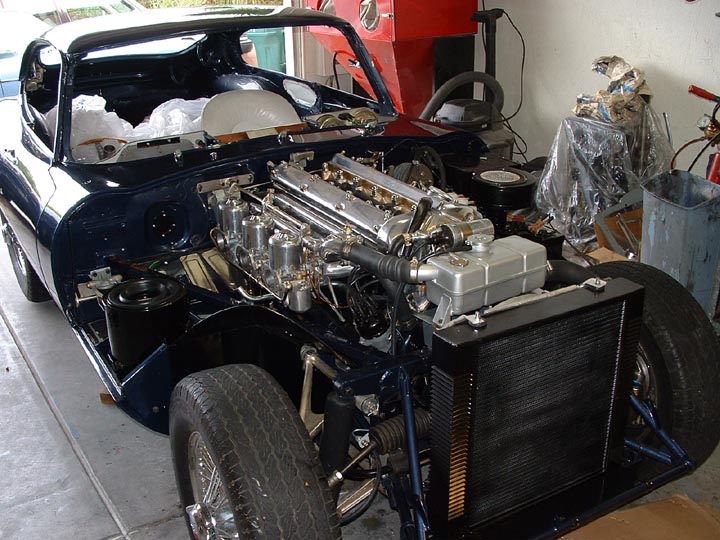
The car started up very quickly after I got everything installed roughly tuned. With the timing and carbs set, it ran surprisingly well. I had several issues which required an engine pull. Major oil was leaking from the transmission, coolant leaks from under the head. A strange problem where the car wouldn't go into neutral. I later found a single major mistake which was the key to the transmission leak and shifting problems. Click on the picture to watch a video of the car running on the first day I got it back on line!
Click on above photo for a short first drive video!
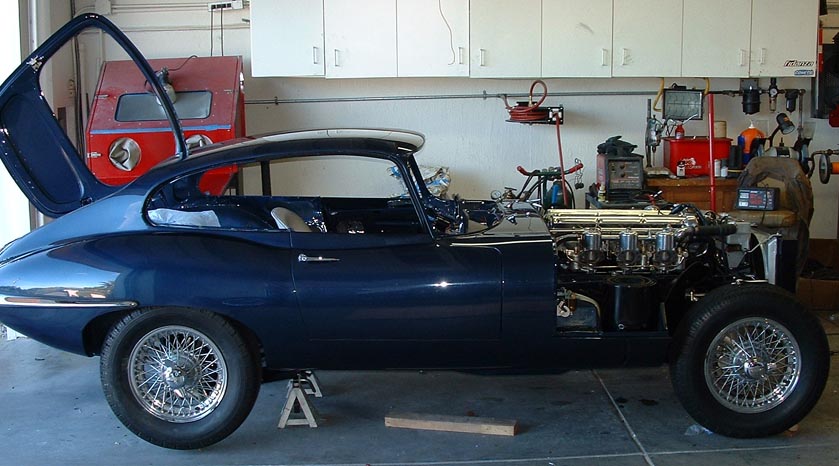
After a few hours of tweaking with the timing and carbs , I was able to take the car for its first very short drive! I did a static set on the timing about about five degrees ahead of TDC. The carbs were set based on the shop manual. I have some fine tuning to do but this will happen later. The really confusing problem I had was that the car wouldn't go into neutral. It shifted between all gears forward and reverse gears, but was stuck in a forward gear. I had checked all the gears and neutral before putting the transmission on the bell housing, at that point it all was fine. I completely rebuilt the transmission so I was naturally worried that I had something incorrectly installed. I fooled around with the transmission while the car was up on jack stands and running, and at some point. I heard a "clunk" while the car was running. everything seemed ok after it and the next thing I knew the car would go into neutral??? Not wanting to look a gift horse in the mouth I assumed something had slipped into the correct place. What I didn't know was that my transmission had solved the shifting problem by breaking the bell housing! Click on the picture above to see the first drive.
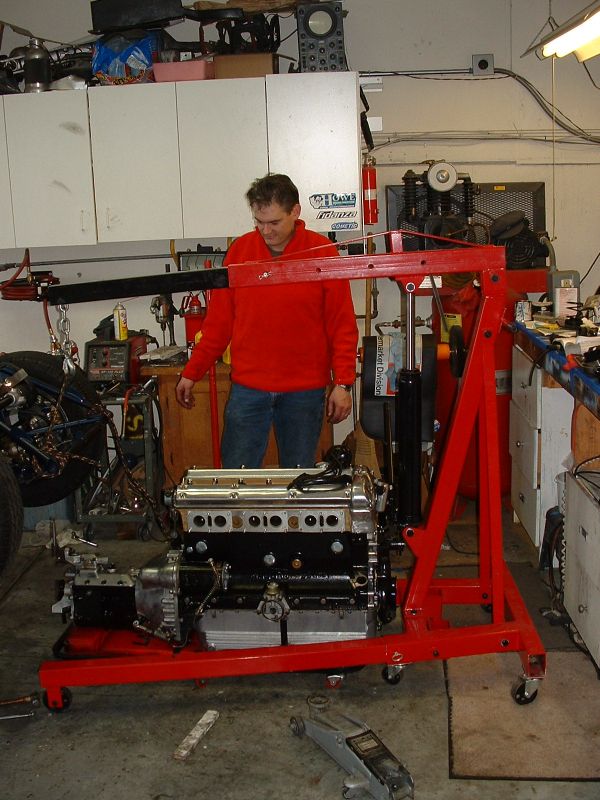
The first thing I noticed after the "clunk" was that instead of a slow leaking from the transmission out of the bell housing. It was suddenly a "fire hose" leak, until the transmission was dry. This should have been a tip off that something bad had happened. The car now shifted perfectly but I can't run the transmission dry for long before worse things happen. I tried a few things to slow the leaking but finally came to the reality that the engine had to come out. In late December I broke down the engine and pulled it with some help from my Dad. I'll go through that process in the next couple pictures because many E-type owners have emailed me with questions about how to pull a motor from the bottom, refer to this along with the previous engine installation from below page.
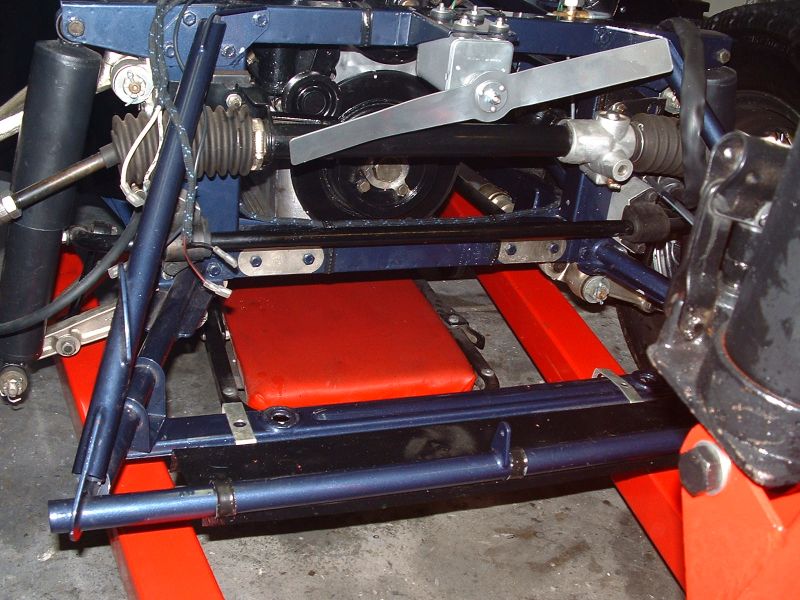
Most parts come off pretty quickly. The carbs come off as one unit, The distributor, Generator, Radiator, wiring etc. After these items you must remove the pulley from the water pump. The oil filter housing and center tap. The center tap must come out so the engine can clear the suspension torque arms. Release the rear engine damper at the back of the block.
The exhaust manifolds can stay with the head. However the dipstick and its holder must unbolt to clear the sub frame rail. The coil clearly has to go. I would say its easier to remove the crankcase breather assembly, however its not a must.
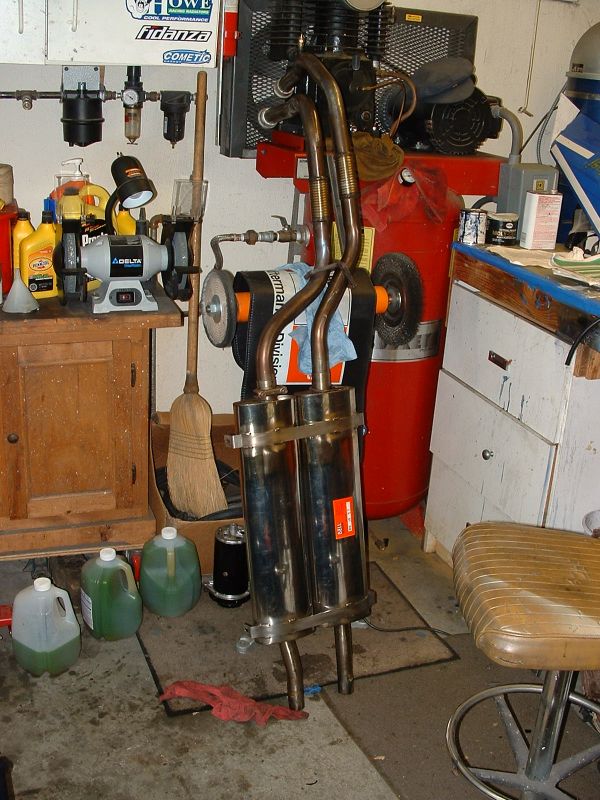
After all of the parts are removed from the top of the engine, the painful part of engine removal begins. It is a real pain to get the exhaust system out, its a must to release the transmission mounts on the bottom of the car and the suspension plate between the frame rails and the engine and transmission. It is absolute agony dropping the mufflers and getting the header pipes out from below. r Remember to disconnect the clutch master cylinder at the flex line where it joins hard line on the upper sub frame bracket. Don't forget to disconnect the drive shaft, speedo connection and reverse switch wire.
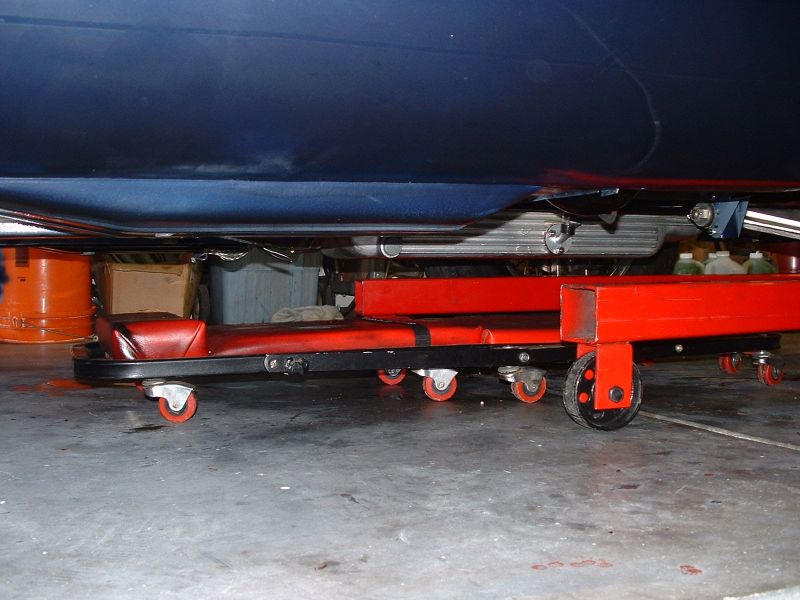
I roll a creeper under the engine to make the engine moveable once its out. These were never designed to take this kind of weight, but so far this one is holding up.
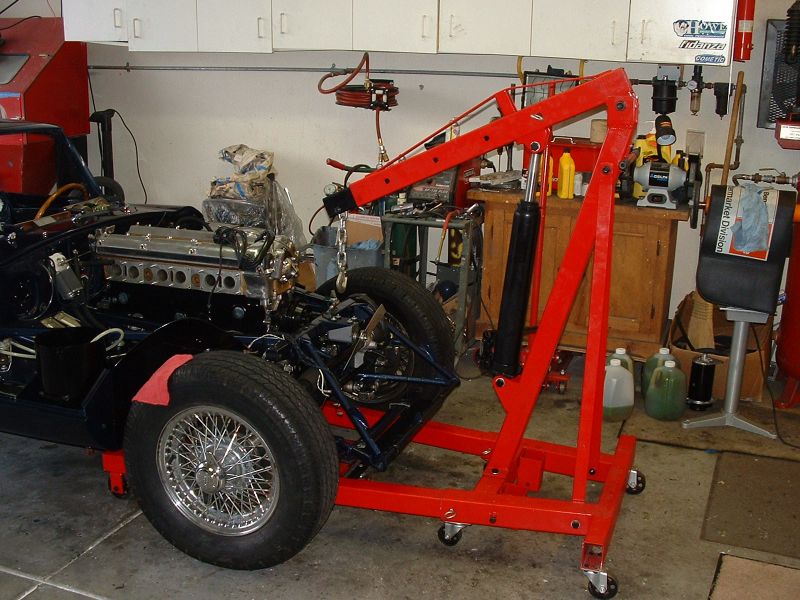
Now that we have something for the engine to roll on, lift up on the engine until you feel it is supported by the crane, then remove the motor mount brackets from the block. Pull the bolts out of the rubber engine mount and remove the engine mount brackets, while the engine hangs on the crane. At this point you should be ready to lower the engine slowly down onto the creeper. You probably will have to pull the engine forward some to get the output shaft from the transmission to clear the body. At some point as the motor comes down it is likely you'll need to push the engine back some again to get the starter to pass the torque arm mount points on the sub frame.
Looking good, nothing got damaged and we are ready to it out of there.
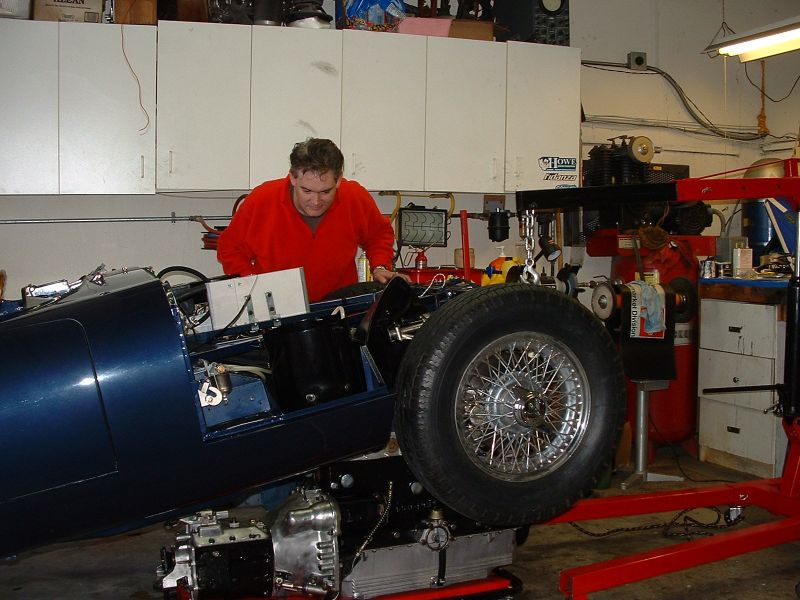
After the engine is down on the creeper, remove the crane and attach it to the bonnet mount points as shown. I just use a bit of rope and made sure I wrapped it around the point at the end where the 3 pipes meet. I wouldn't recommend this if you have an old rusty original bonnet mount frame. or if it has been damaged. I didn't see any major flex, but I'm sure it is lifting more than it was designed to take. Once the car is up high enough just roll the engine out between the legs of the crane.
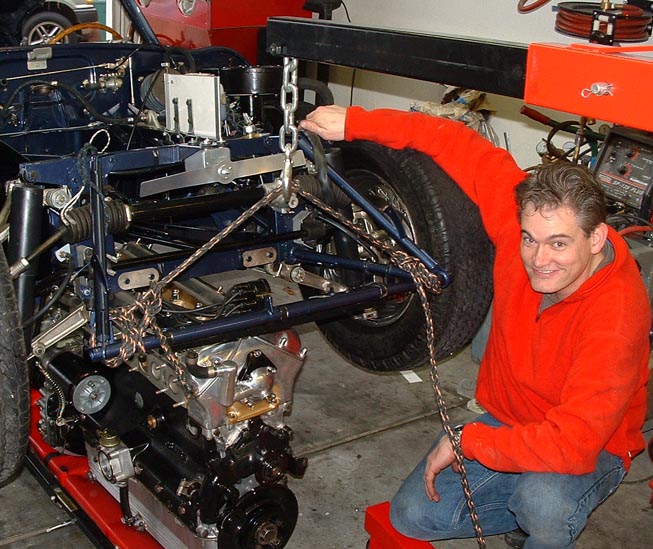
This sure makes it look easy. Thanks to my dad for taking these pictures. If you didn't know better you'd think I was having fun.
My crane isn't deep enough to get the engine out completely so I get it out past the end of the block and before the shifter clears the front of the bonnet mount. Then I put a floor jack under the body and remove the crane. I then have space to roll the engine the rest of the way out.
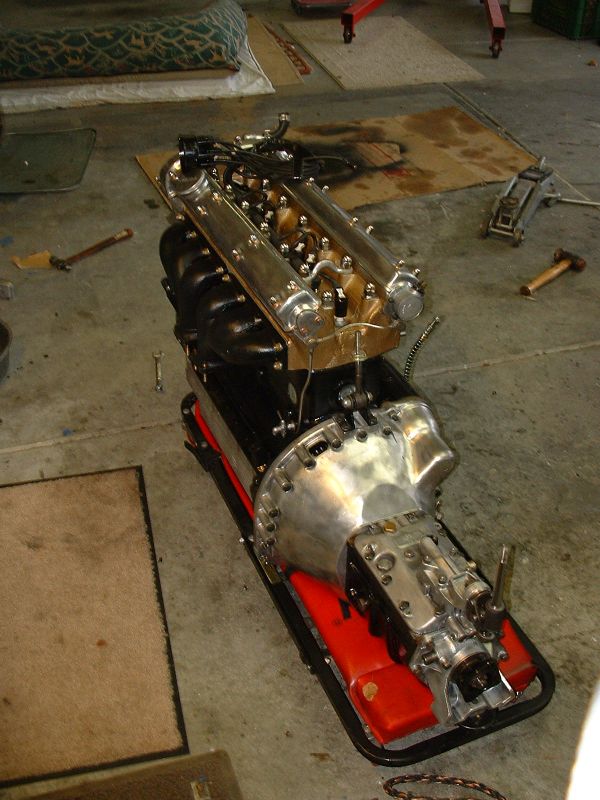
There she is out again darn it! Now its time to get the engine and transmission apart so I can see what the heck went wrong.
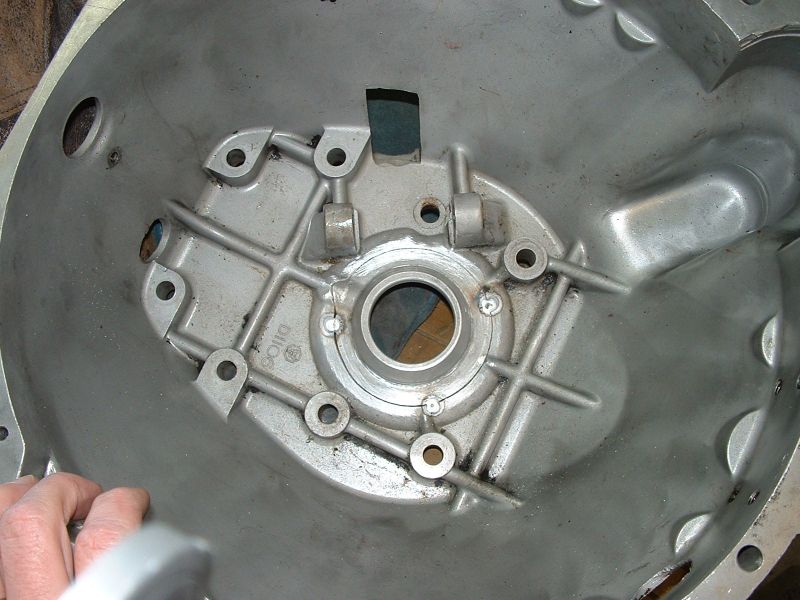
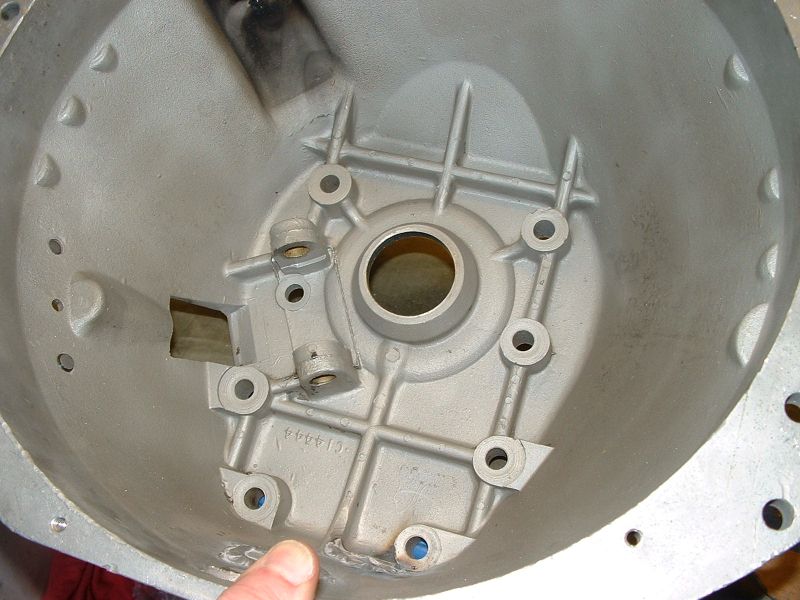
Unfortunately I didn't take pictures as I was taking the transmission off the bell housing but this is what I found. You are looking at a broken bell housing which I attempted to repair. The 3 little spots are tact welds. It became clear that it was not an easy repair because the seal needs to be perfect down to the thousandth around the transmission input shaft. The center area around the transmission seal broke on this unit because I had an incorrect seal installed. I bought this seal from one of the usual's"as correct". When I went to install it it fit perfectly on the outside of the bell housing, unfortunately this wasn't where it should have gone. It should have installed from the inside in the hole you see in the center. The result of having the wrong seal was that when I bolted the transmission to the bell housing the large nuts on the input shaft were pressed against the seal. This caused several bad things to happen.
This is the outside where I put the wrong seal on the original housing, with a seal in the center hole, there was no room for the nuts on the end of the input shaft, and pressure on the input shaft nuts caused the end play to be eliminated in the shaft, which caused the neutral shift problem previously mentioned. The two nuts on the input shaft pressing on the seal eventually caused them to thread them up the shaft as the engine turned. The nuts put pressure on the bell housing and eventually broke the center out. This was the clunk I heard, while working on the car. Once the bell housing broke, oil was able to flow from the transmission out into the bell housing.
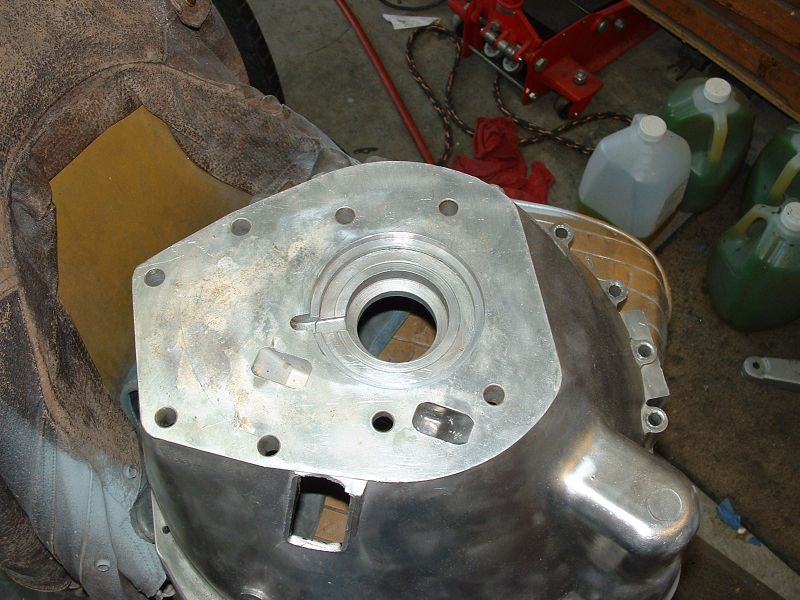
First I tried to have the bell housing fixed but after this proved to be impractical, I found a replacement on Ebay. The replacement was in rough shape, but I fixed it up and put the correct seal in this time. Here you can see the inside of the new bell housing. ready for a seal. Interestingly this bell housing was not exactly like the original. It had a different flange at the starter. It probably came from an earlier sedan or XK.
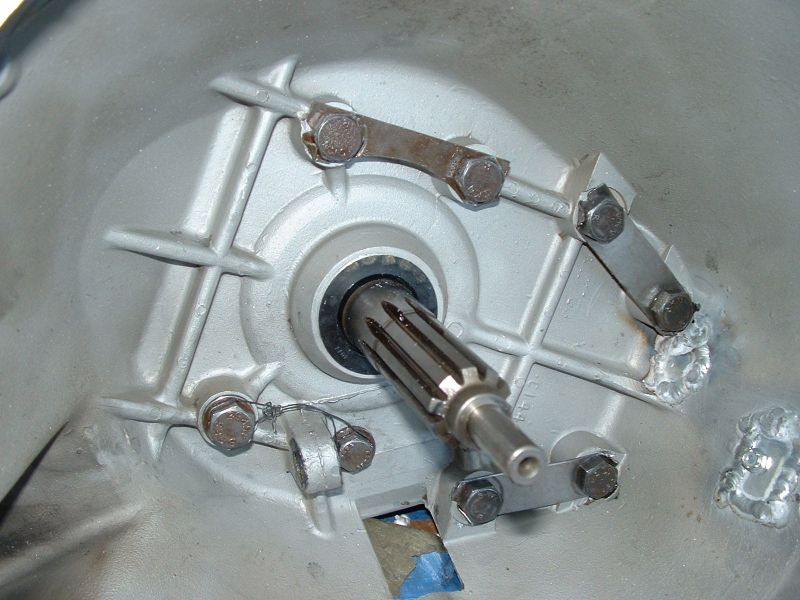
The correct seal installed from the inside, here the transmission is mated up. Notice the safety tabs and wires. You can also see some of the extra holes I had welded up. It won't be long now, I just need to get the clutch fork installed and mate it to the engine.
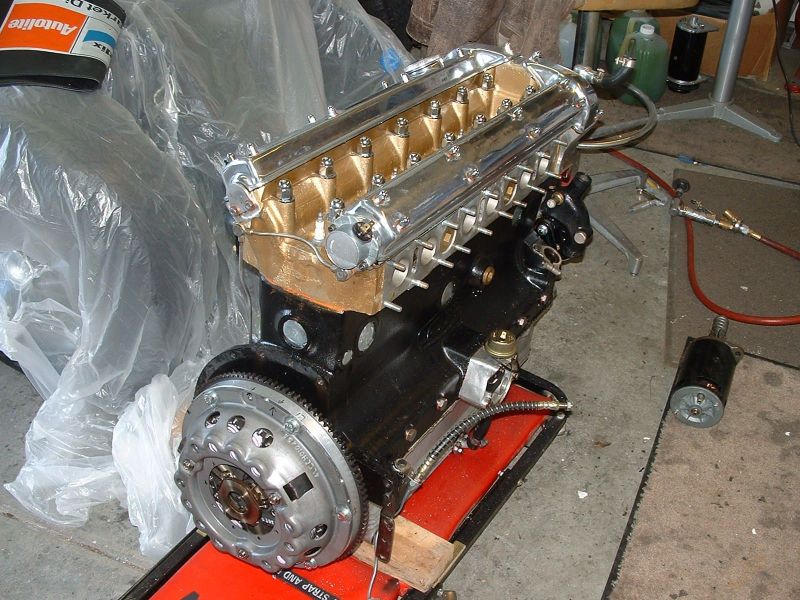
Everything is ready. I use a 2x4 to lift the engine up a bit on the dolly so the transmission with thread on and off easily. Its grunt work but goes quickly.
I put the engine back in in one day, next I reset the torque bars to get the tie plate in between the sub frames. I am told you can avoid having to release the front suspension by using tapered dummy pins in the flanges, I don't have a set so had to release the front suspension, install the tie plate, and bolt it all back together! Not a fun job.
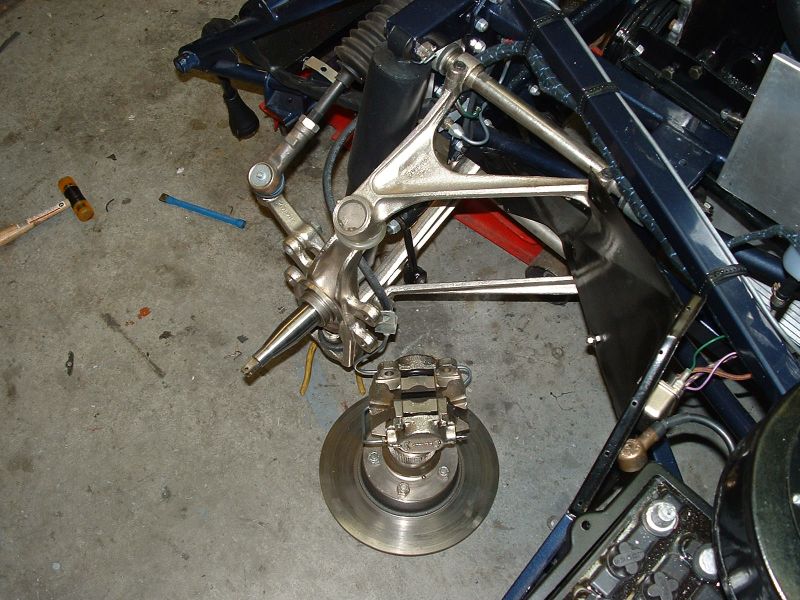
After jacking the car up I use a turnbuckle system to compress the torque bars enough to get the shock and lower ball joint to come out. First you have to remove the rotors and calipers. You can see in this picture that I've done this without removing the brake lines. No need to bleed the brake system!
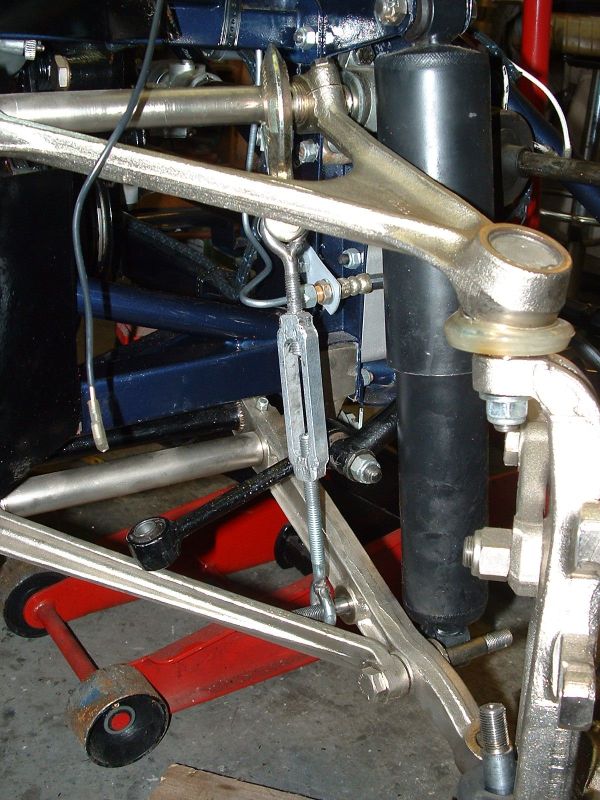
Here is a close up of the turn buckle system I came up with. This is a standard 3/8" hardware store turn buckle, I welded the loops closed. My first turn buckle was aluminum, it stripped out after several uses and I replaced it with steel. These torque bars create huge amount of torque especially when you pull them up enough to get the lower turn buckle out.
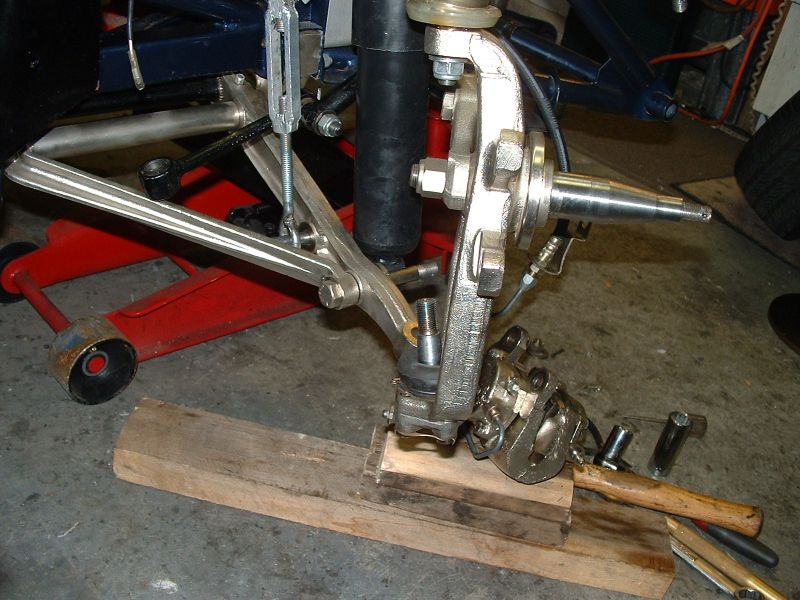
Once the lower arm is off the ball joint, release the turn buckle to let all the torque off. After the torque is off putting the tie plate in under the car is straight forward. I always replace the bolts that are used in the Torque bars, they take allot of abuse, I use grade 8 bolts.
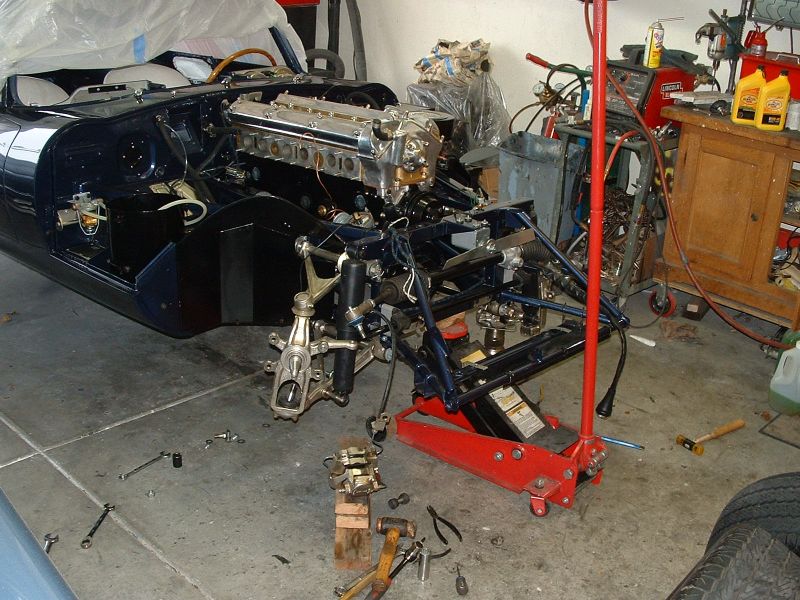
Now that the tie plate is in place, it all goes back together. Putting this back together was about a 3 hour project. Clearly I'm not following correct safety procedures here. I should have jack stands under the car instead of letting the hydraulic jack be the single point of failure. Guess I'm just a cocky kid that doesn't know anything about safety.
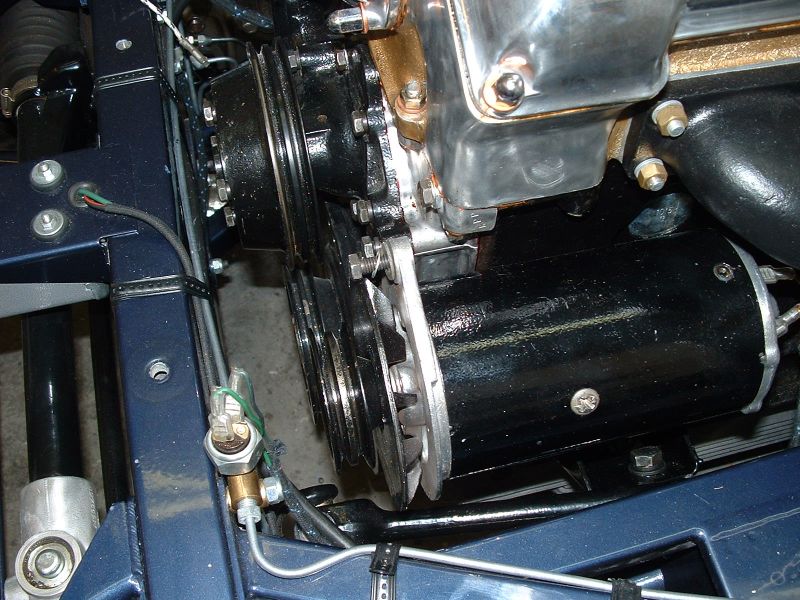
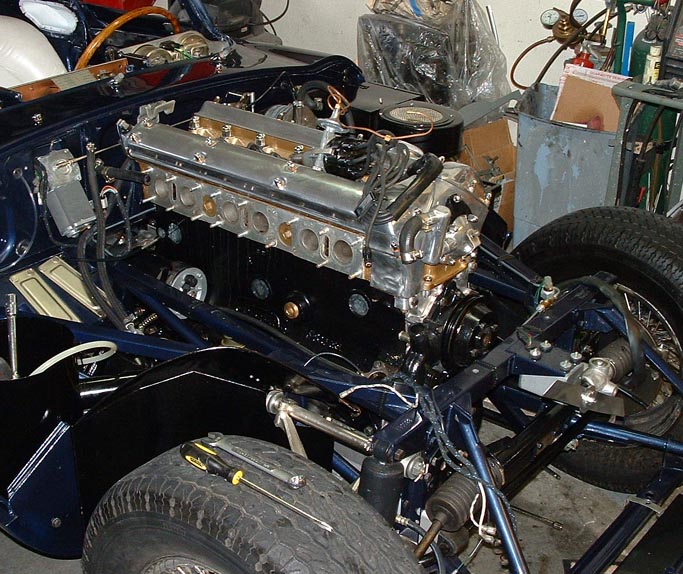
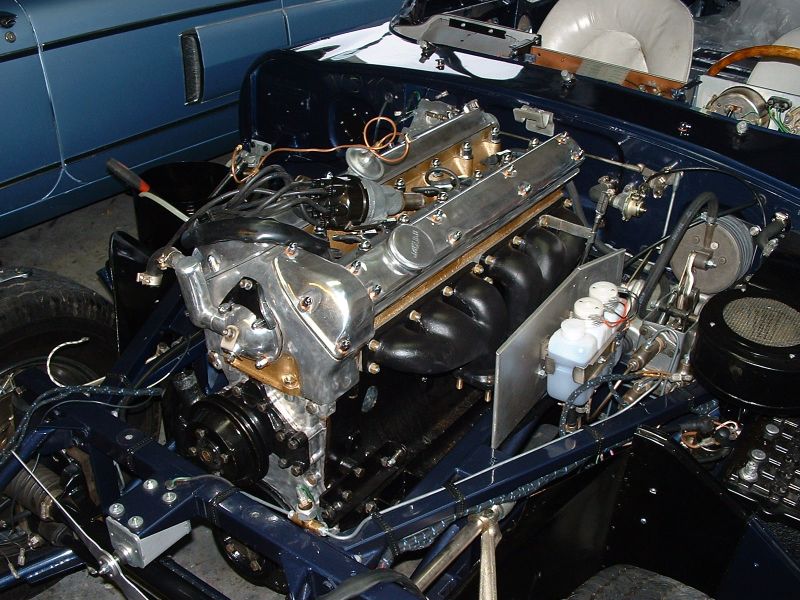
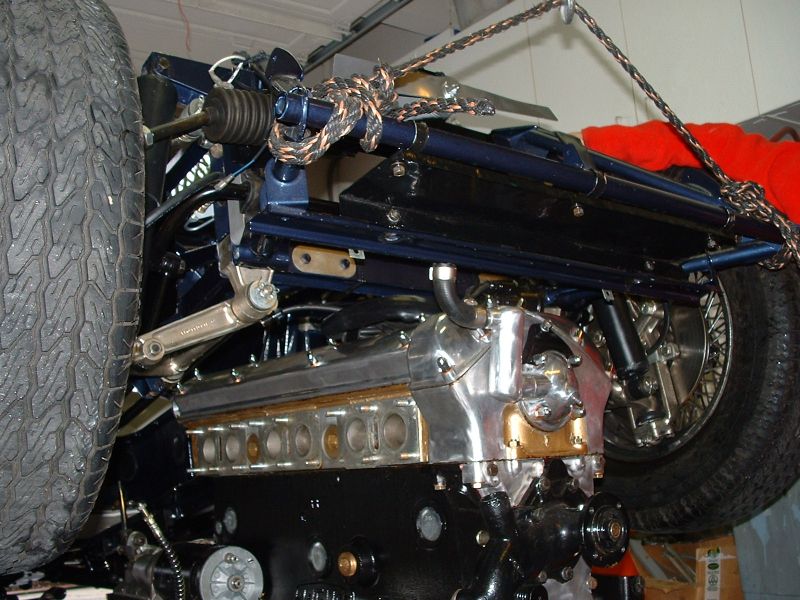
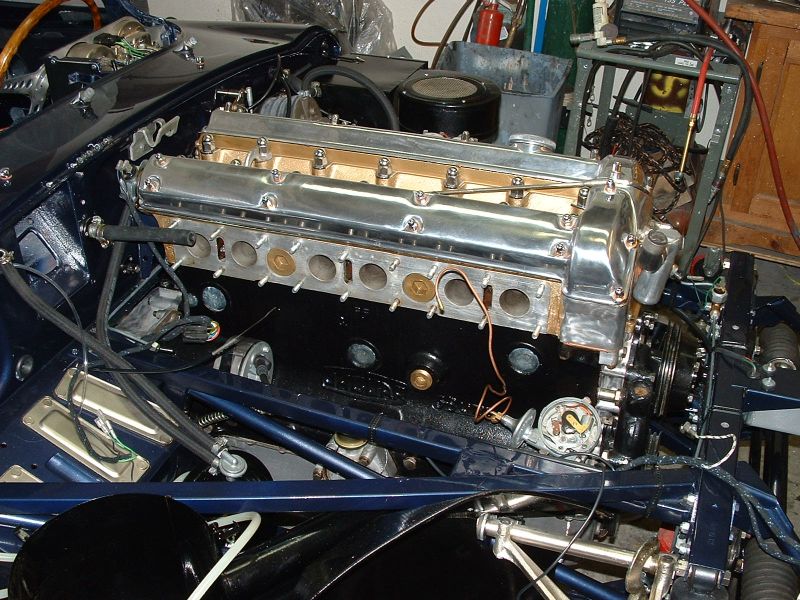
Here is just one last shot of the engine going back together after the suspension is done. I took this to show the correct relationship between the Generator, crank and water pump pulleys. She was running again after a few more hours of tinkering, and this time zero leaks, no oil, no water, no nothing dry as a bone! Now that I'm beyond this stage the next page should be much quicker in coming and include putting the bonnet on, some carb fine tuning tips (If I learn any), and more detail work leading up to the Interior. I also will be repainting the front doors after a shop rash disaster. Hope to match the paint perfectly. If not I may have another painting the car web page coming up :(
.
That's It for now Next up Bonnet mounting and finial fitting, fine tuning, more chrome, electrics?!