Problems and Set backs !
Car restoration is really just a series of problems to be solved. When a car is going back together this becomes painfully clear. I have slowed down to a crawl on the restoration over the summer of 2006. I'm almost 5 years into the restoration and the car runs and drives fairly well. At this point every part that goes back requires a battle. Things don't fit, things are missing, things are determined to be incorrect and must be done over. Parts are ordered but found not to be good quality. It goes on and on and on.
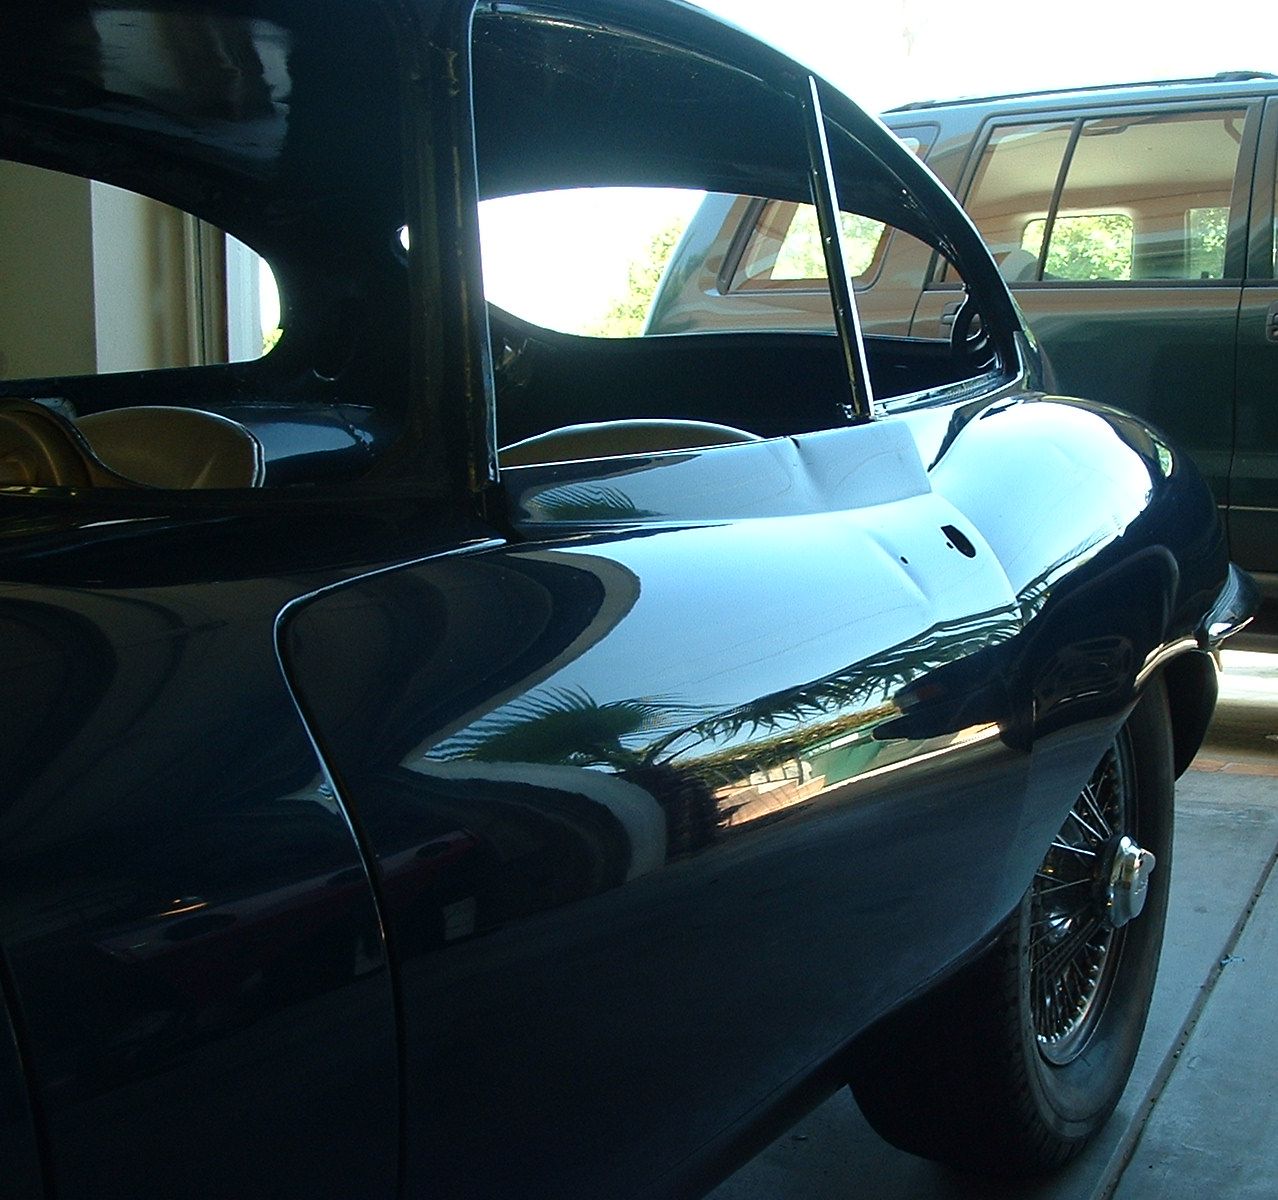
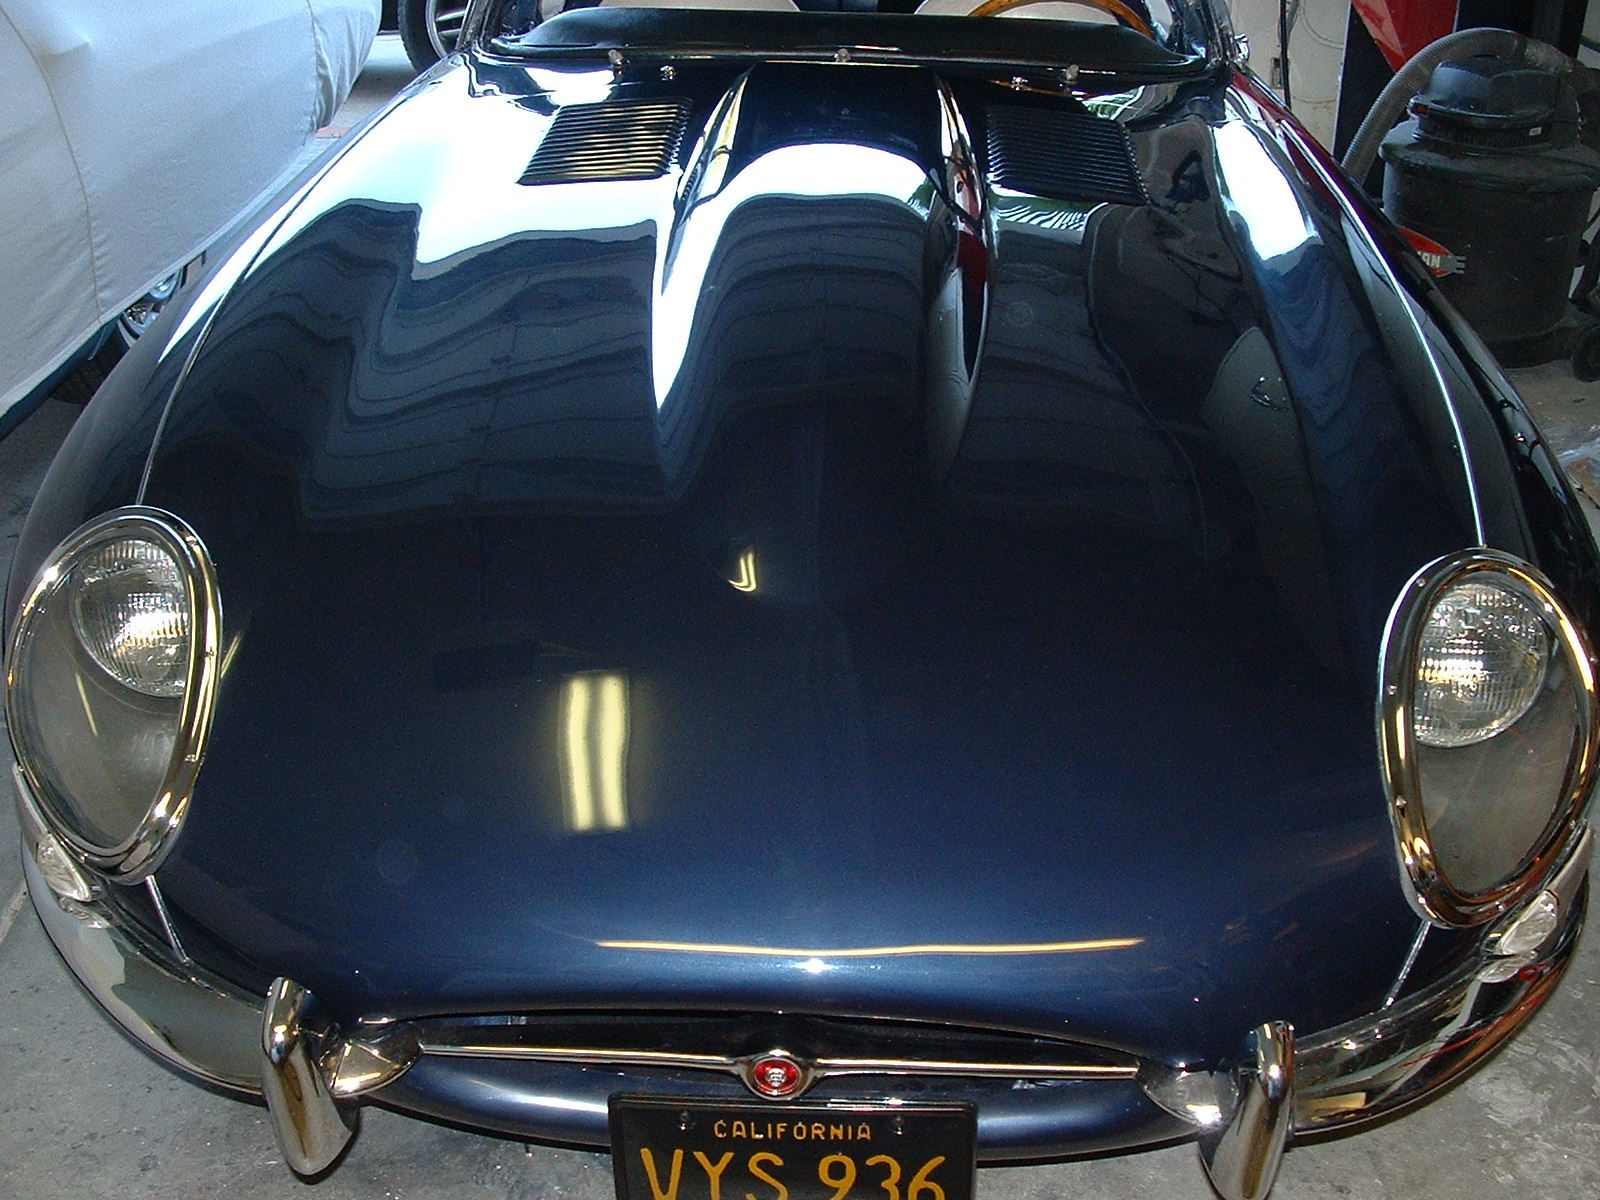
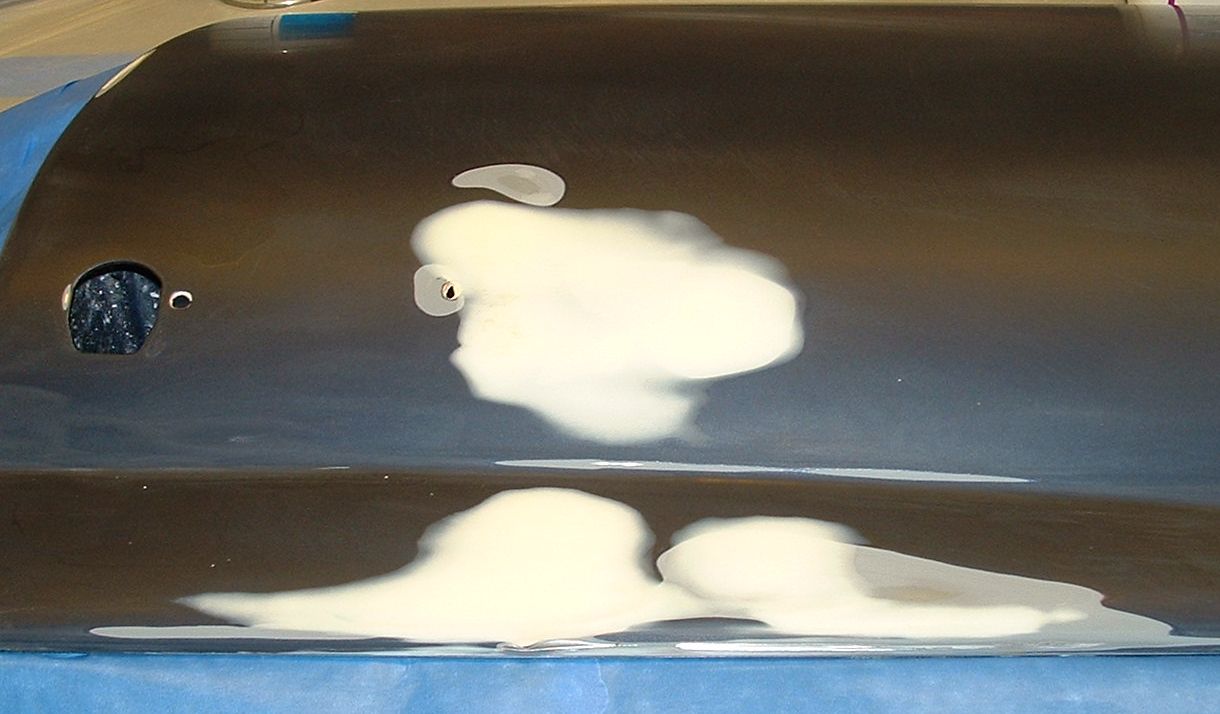
One morning I came down to the garage on the way to work and noticed that the sorry crap press wood cabinets on the garage wall had collapsed. I almost had a heart attack when I went over and saw a pile of wood, paint and cleaners on the car. The picture above shows the resulting damage, this was done through a car cover. The two small dents in the door, were enough to make me physically sick after the two year painting process. I could not believe my stupidity. I had been watching the cabinets sag for some time, but never expected them to fail completely. Just plain old blind stupidity and laziness on my part. Fortunately there was no damage to the body, just the door. I had a paint less dent guy try and fix this first, but it was beyond him. The bend at the top of the door was right on the edge, the steel in these cars isn't nearly as easy to work as the newer metal. After putting this off for sometime and working on other parts of the car I eventually repainted both doors and replaced the cabinets. More about this later.
Instead of focusing on the paint, I worked on getting the car running and driving properly, Jerry Mouton came by and helped me get the carbs and timing dialed in. I was having all kinds of problems getting the engine to run properly, it seemed to start well and idle correctly, but had no power, we found out after much toil, that the exhaust cam off a few degrees. I had done a compression check on the motor and found the compression was only 60 psi. Typically you want to see 160 psi on these cars. Jerry was able to sort the cam problem out in no time and then we went for a drive. Unfortunately, this wasn't the end of my problems, the rear brakes were sticking and wouldn't disengage fully. To fix this I had to take the brake pedal box out and reset the pedal on the brake control shaft. Jerry again knew exactly what the problem was and left me to execute. Jerry has a 64 FHC which is as perfect as a regularly driven car can be! He is a wealth of knowledge on E-types and a darn nice guy!
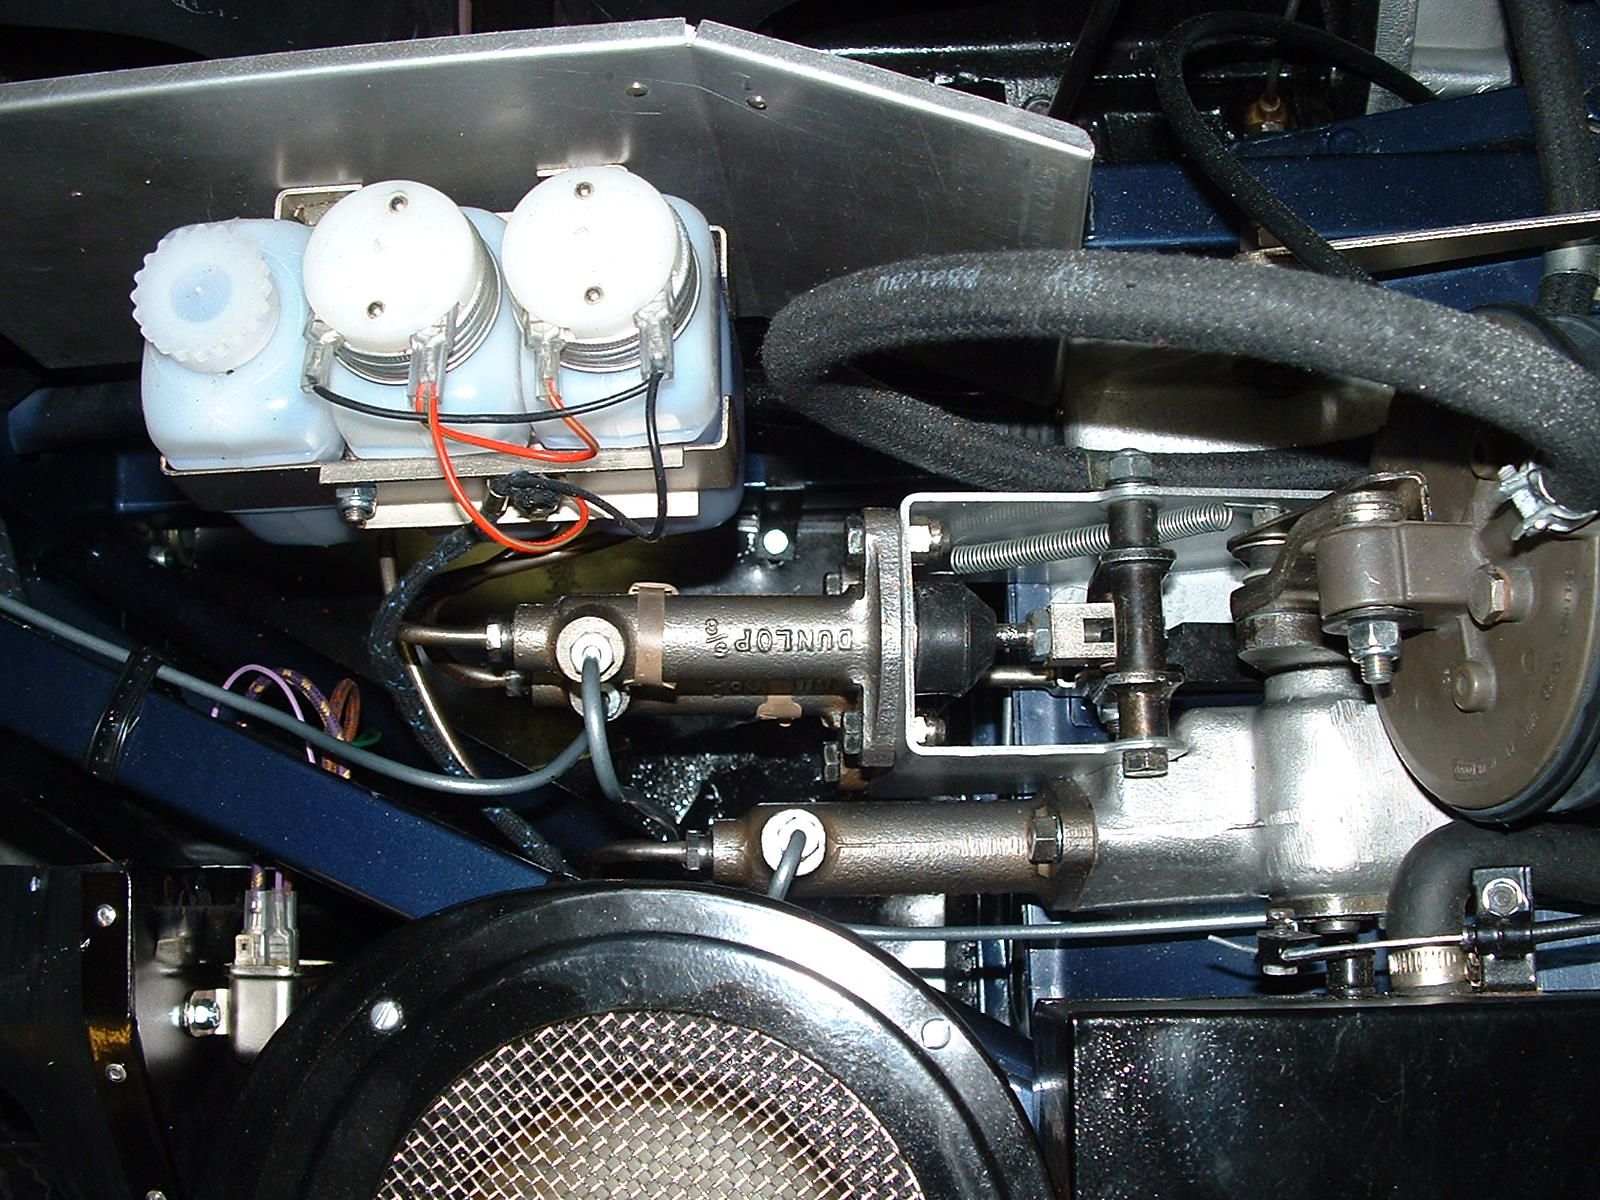
Here is a close up of the brake pedal box. This is not a fun part to take off, first you must drain and re-bleed the entire system and remove the master cylinders from the housing to get the unit out. The heater box can stay in, but I had to drain the fluid reservoirs and remove them to get enough room to get the pedal box out. After removing the box, I had to fool around with the pedal location on the main shaft. The pedal fits on with splines and there is no obvious correct position for this, you just have to play around with until you can tell that the top master cylinder is able to fully retract when the pedal is in the off position.
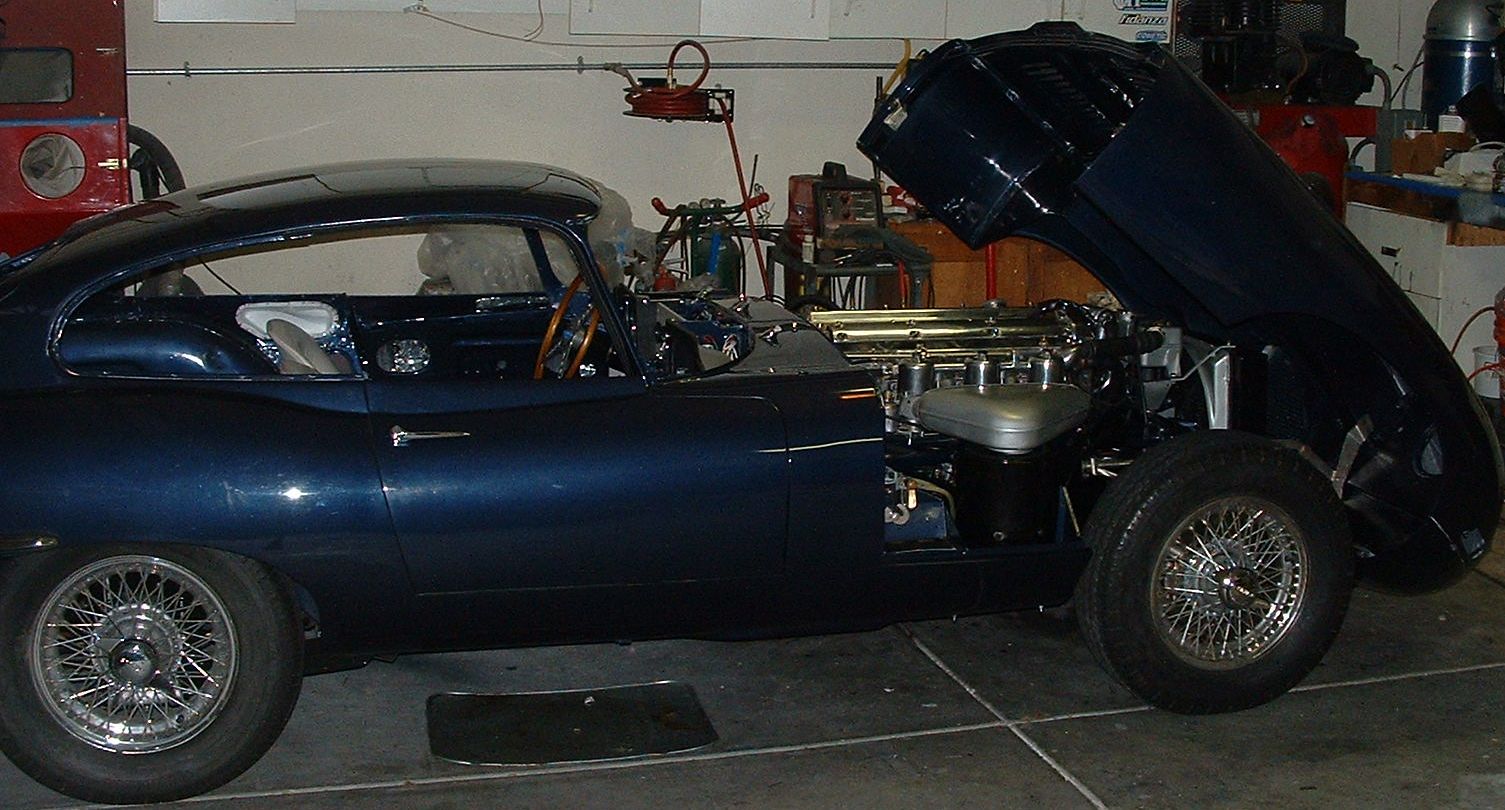
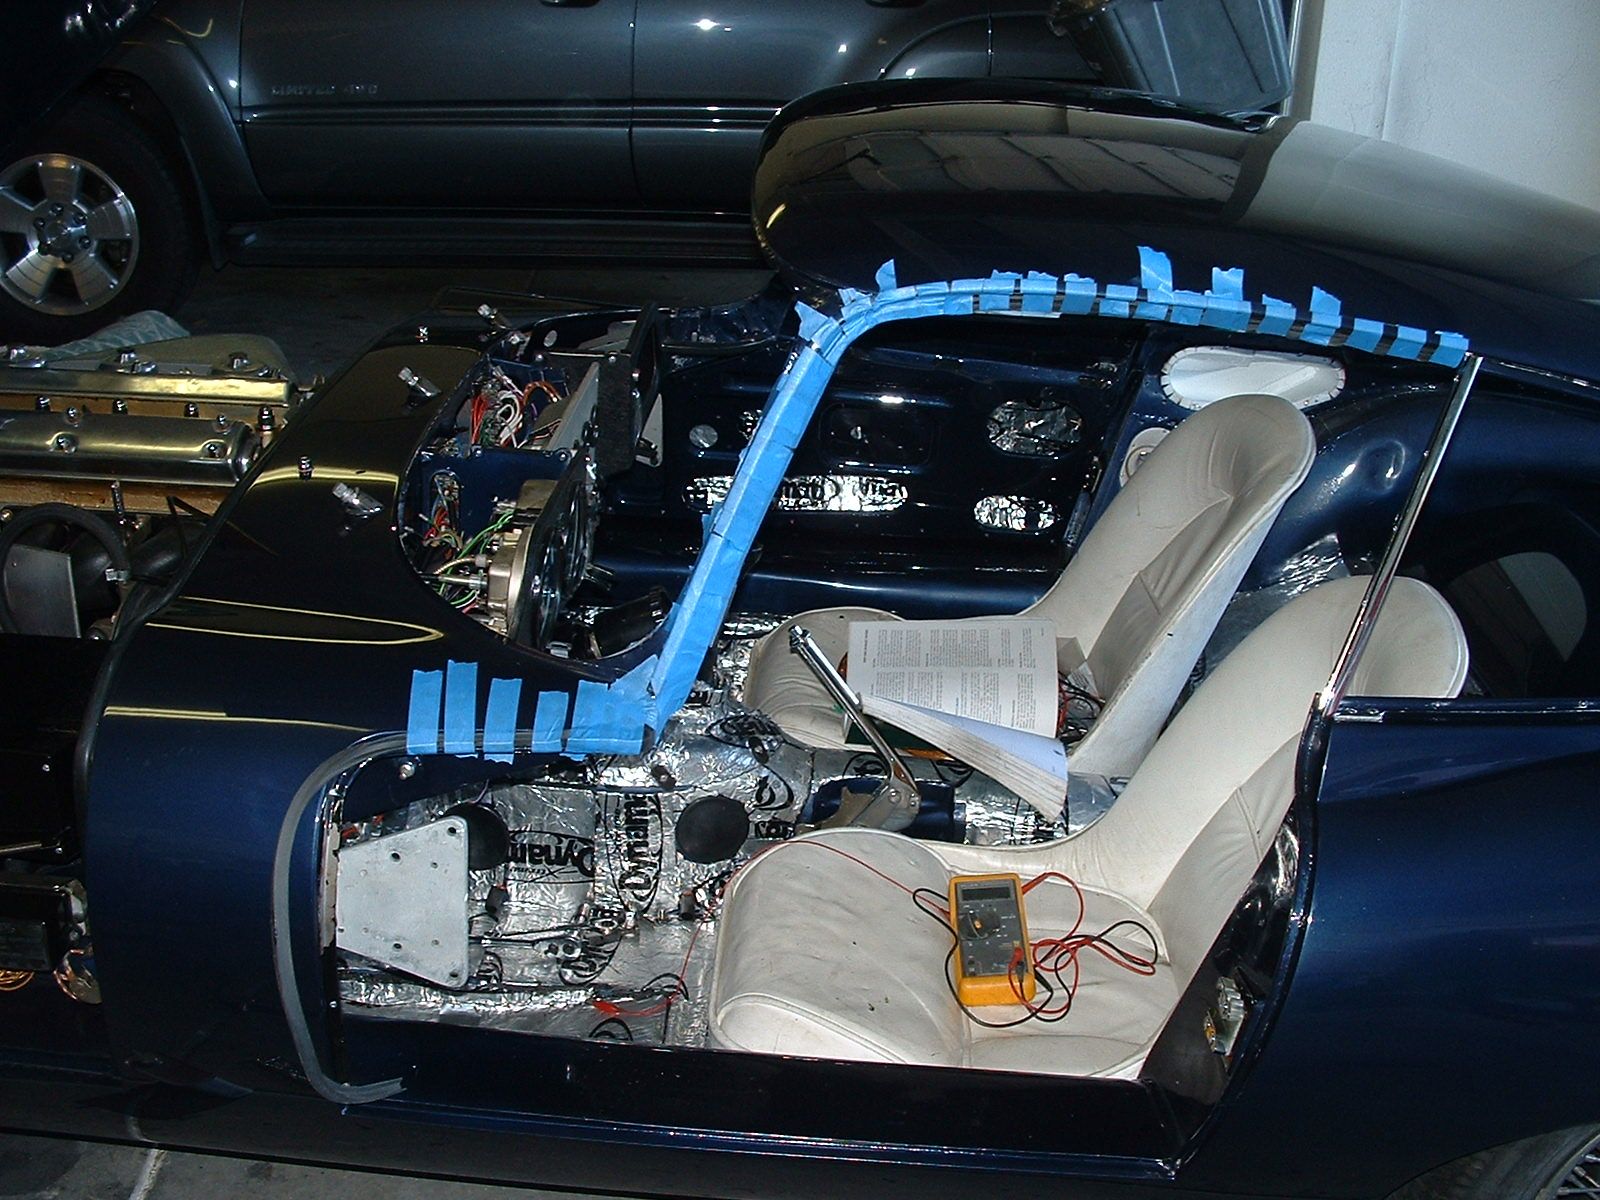
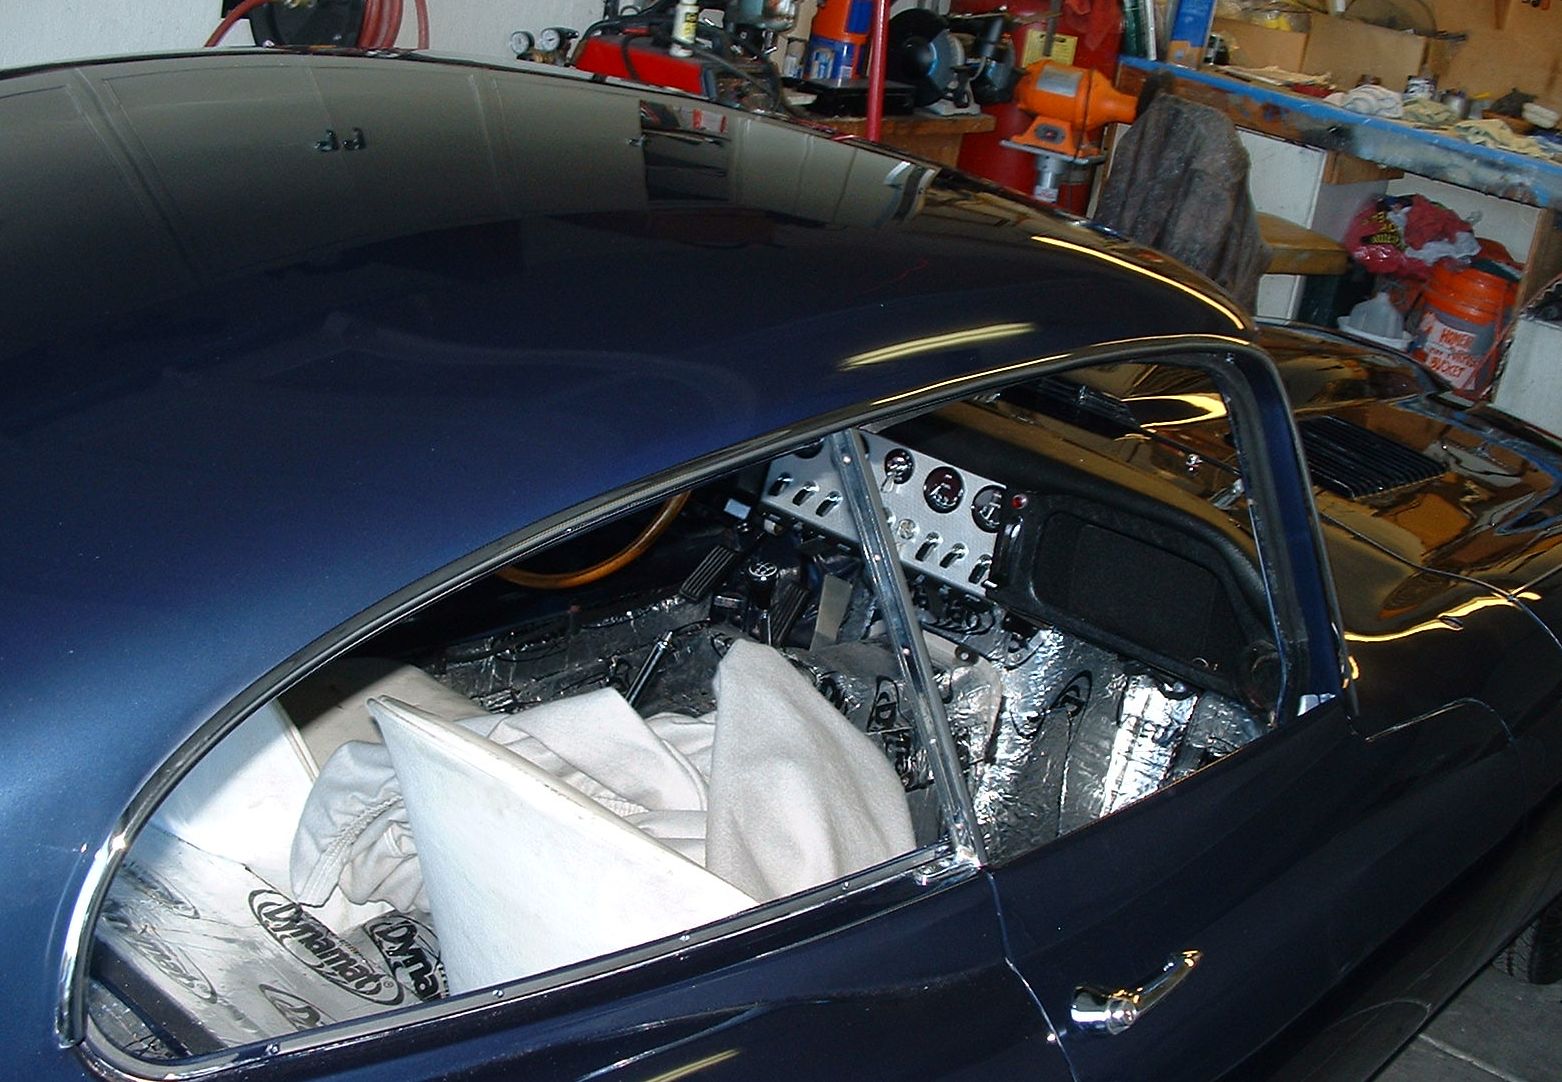
Jerry also helped me get the bonnet back on the car. This is really a two person job. I've done it before solo, but would not recommend it especially with fresh paint. After the bonnet was mounted I spent a few evenings getting it lined up properly. I had to make a few minor adjustments to things in the engine compartment to get it to close without rubbing on anything. Its a tight fit, but overall it went on surprisingly well and I noticed very little change in the gap at the body now that the engine is in.
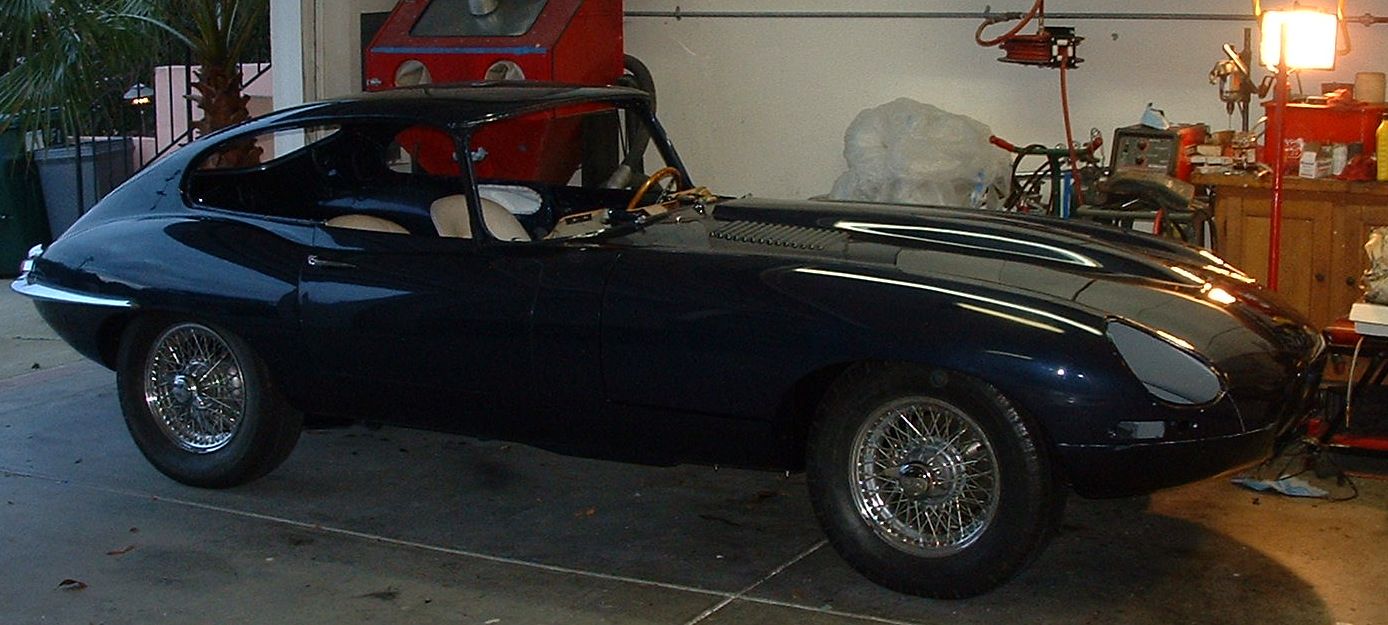
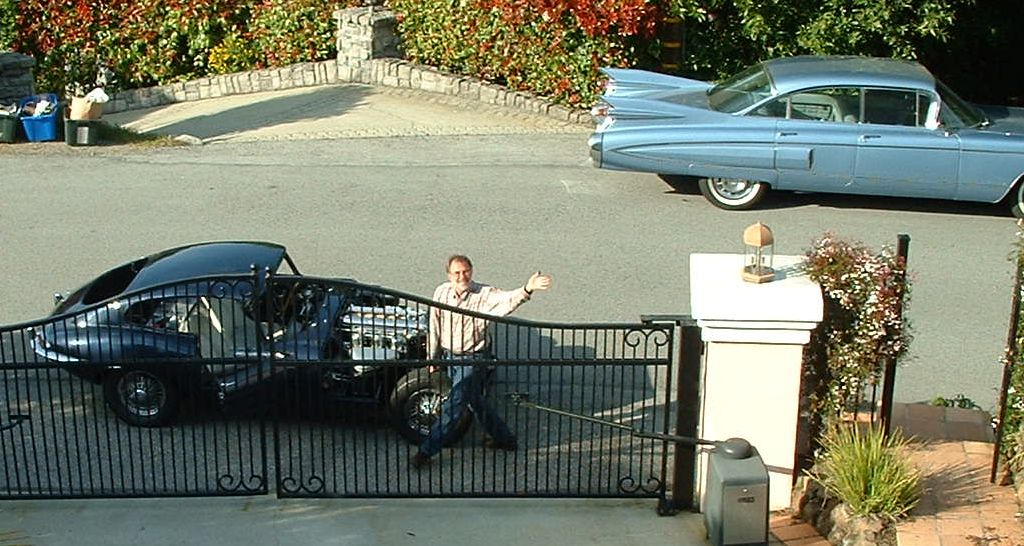
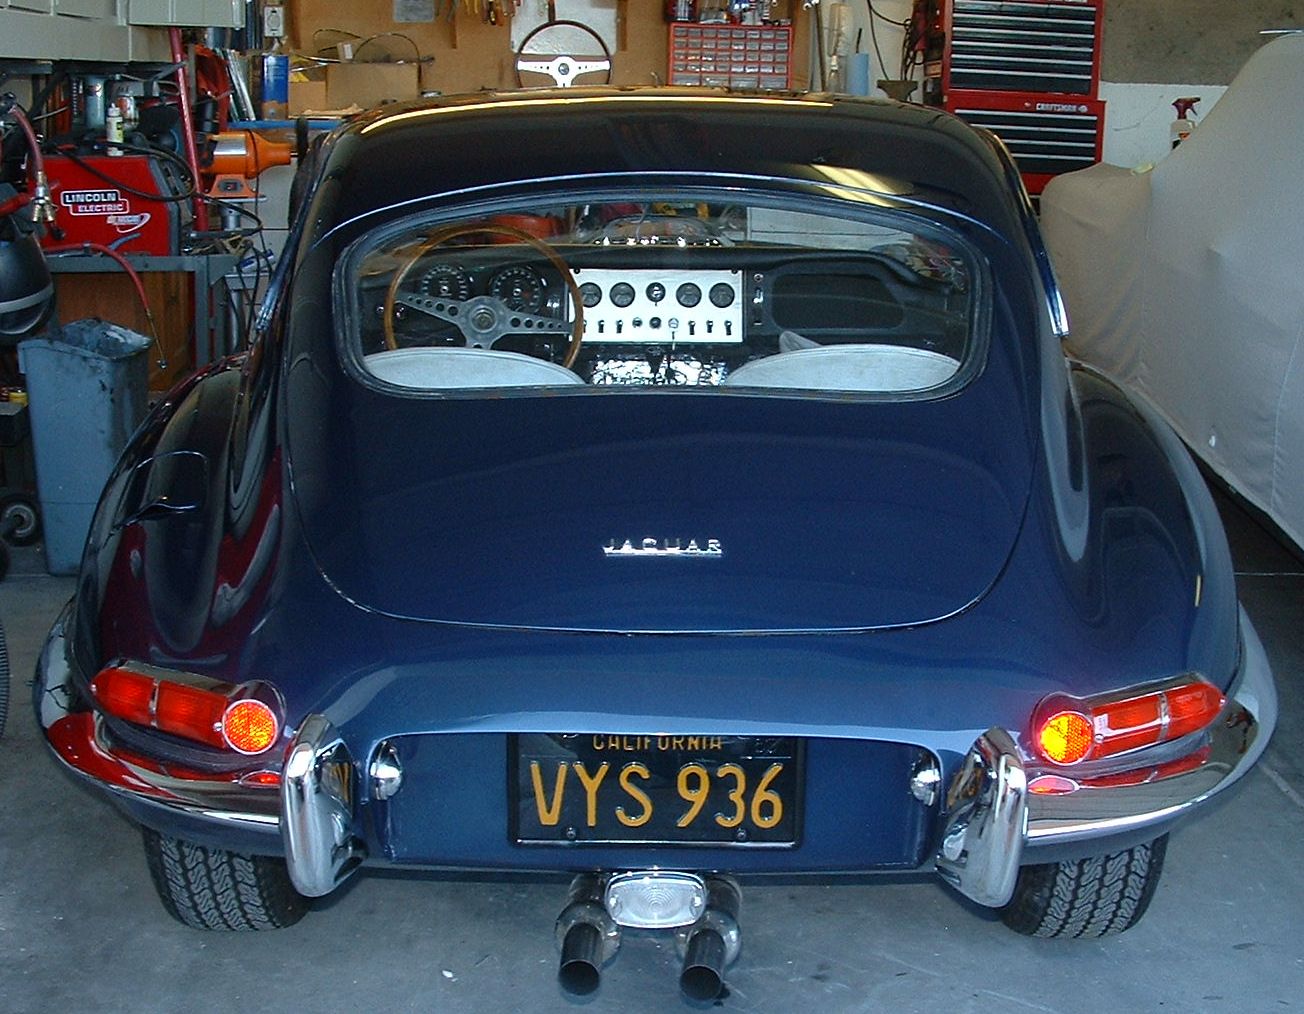
Its looking more and more like a car now. Lots of chrome yet to go on but helps make up for some of the setbacks seeing this.
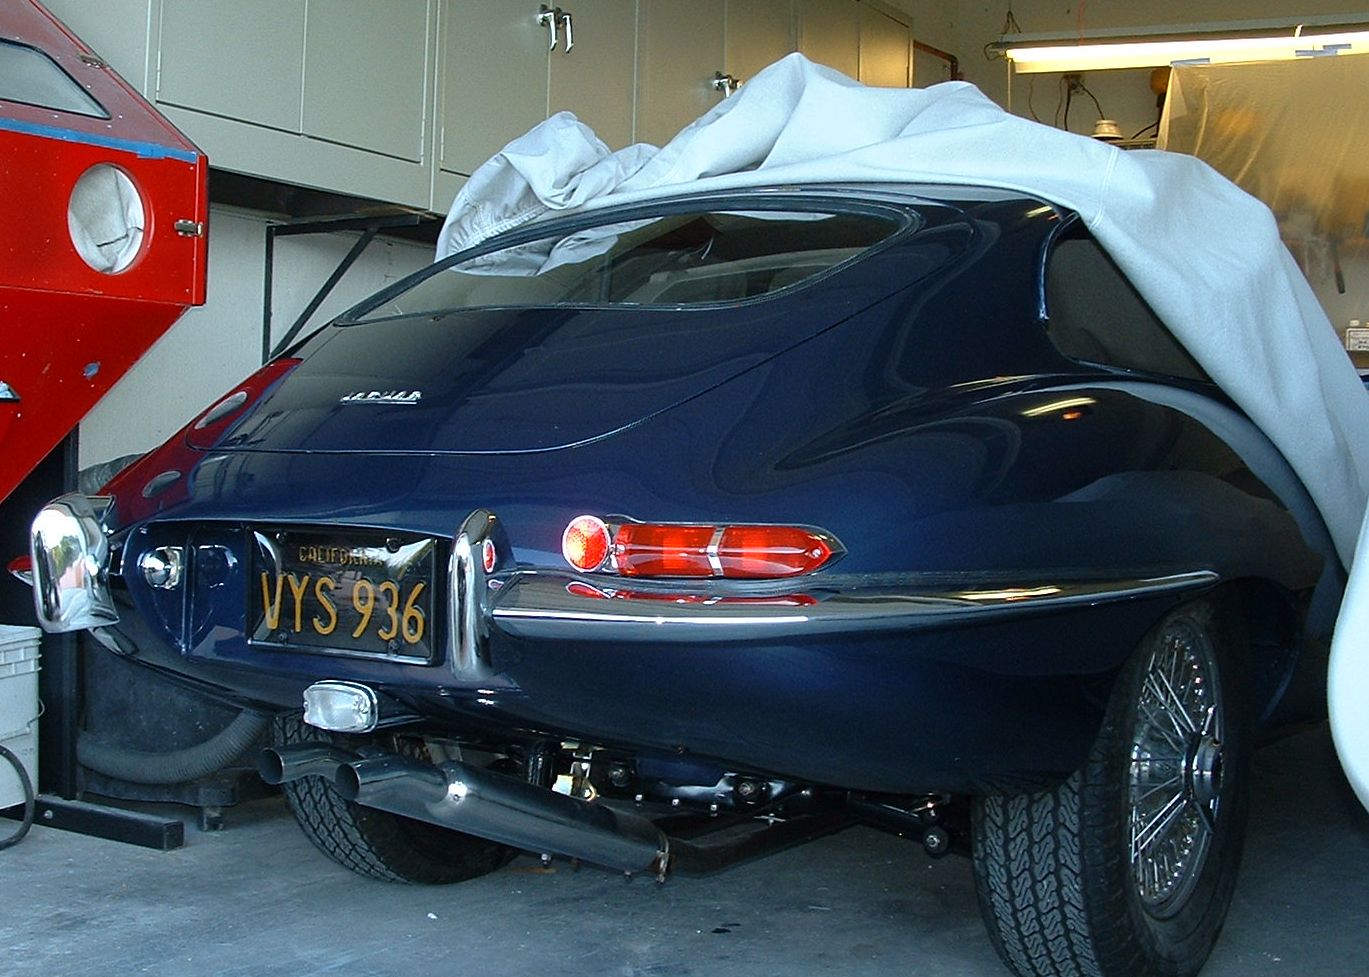
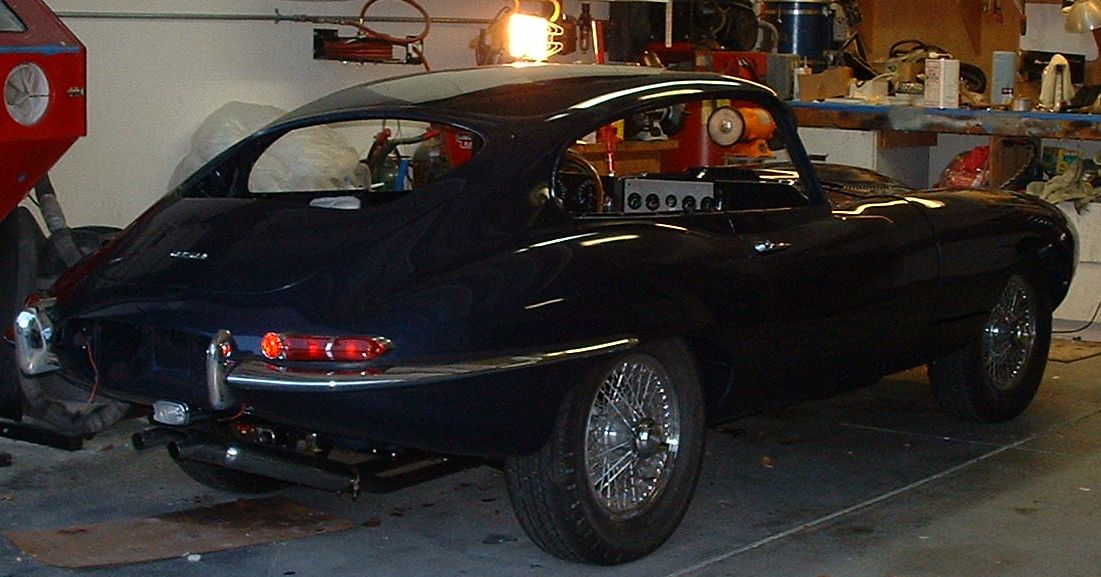
Well the back is looking ready for the road. I had a heck of a time with the chrome shop I had been using a local shop in San Carlos. They lost the License plate light surrounds, while re plating a batch of parts. These are the ones that say Lucas 705. They are not easy to find these days but I was eventually able to find a set on Ebay for about $50. Needless to say I won't be recommending this shop.
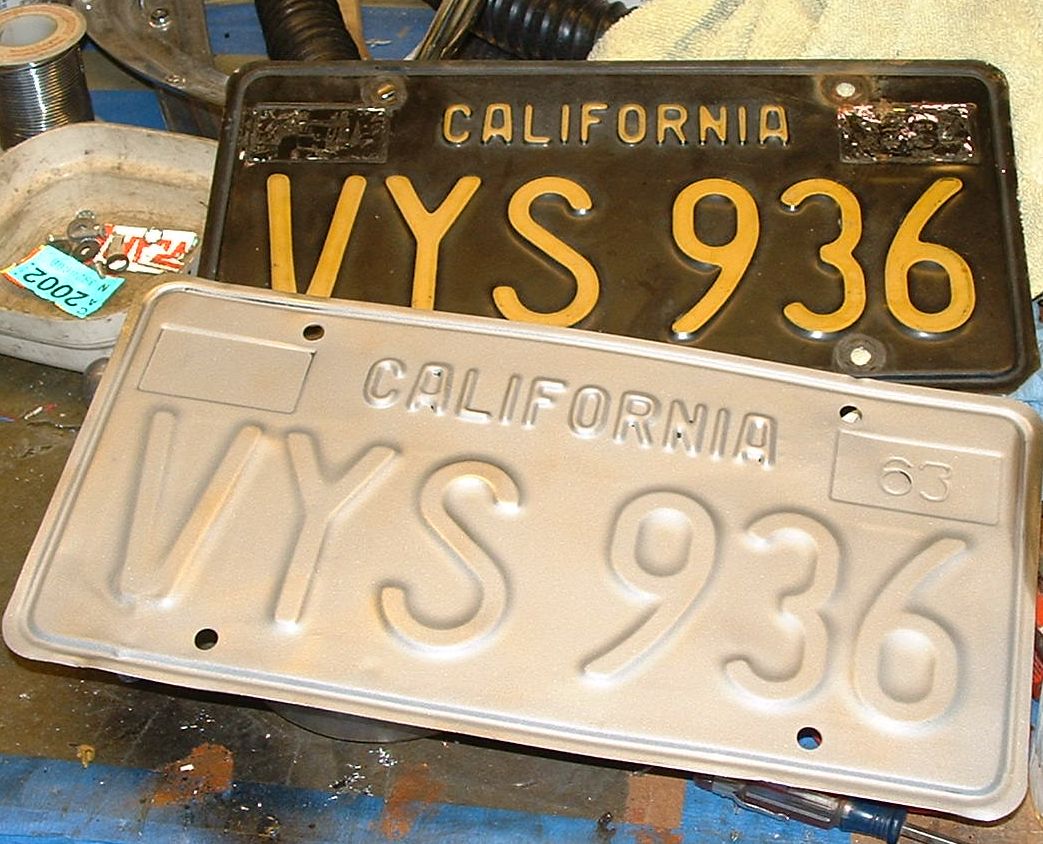
I looked into sending the license plates out for repainting but decided instead to do this myself. First I bead blasted them then repainted and hand painted the yellow on. I found that making a small roller out of rubber hose was the best way to get the yellow letters on with minimal touch up.
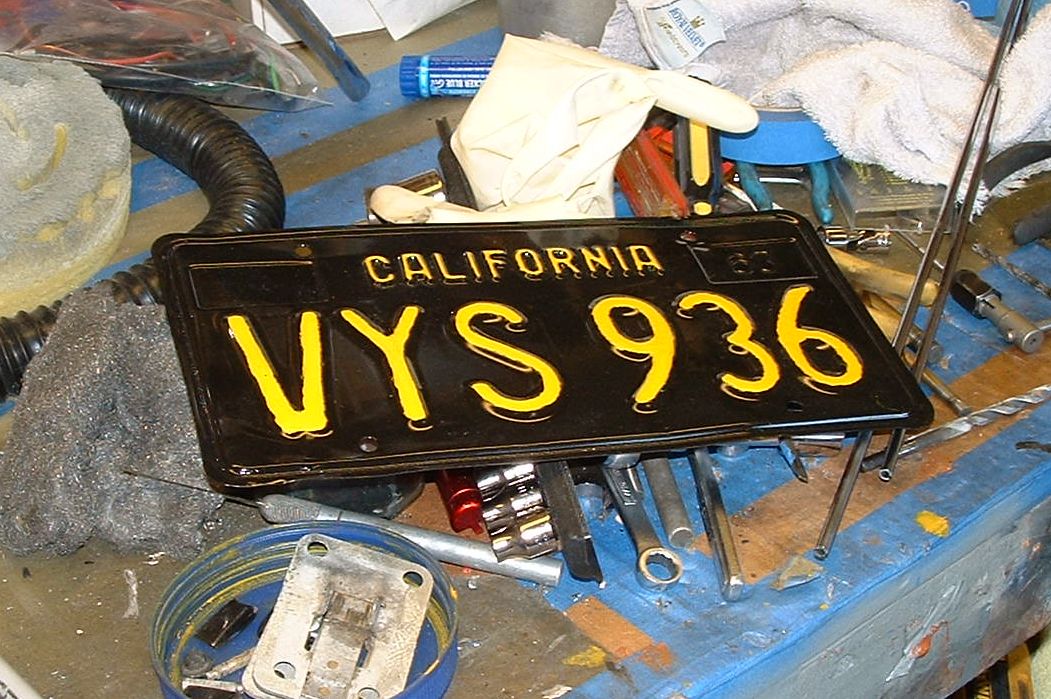
Here is a plate almost done, you can see there are still some rough edges to clean up, but with time and a steady hand I was able to smooth out all the edges and make them look nice.
 The blinkers and bumpers went on pretty quickly as I had fitted them all prior to painting, The hardest part was keeping avoiding scratches. masking tape is key to avoiding this while finial fitting. I put tape down where ever I thought there was a good chance for scratching. Wiring up the bonnet was also not a complex or difficult job. Just takes time and some patience.
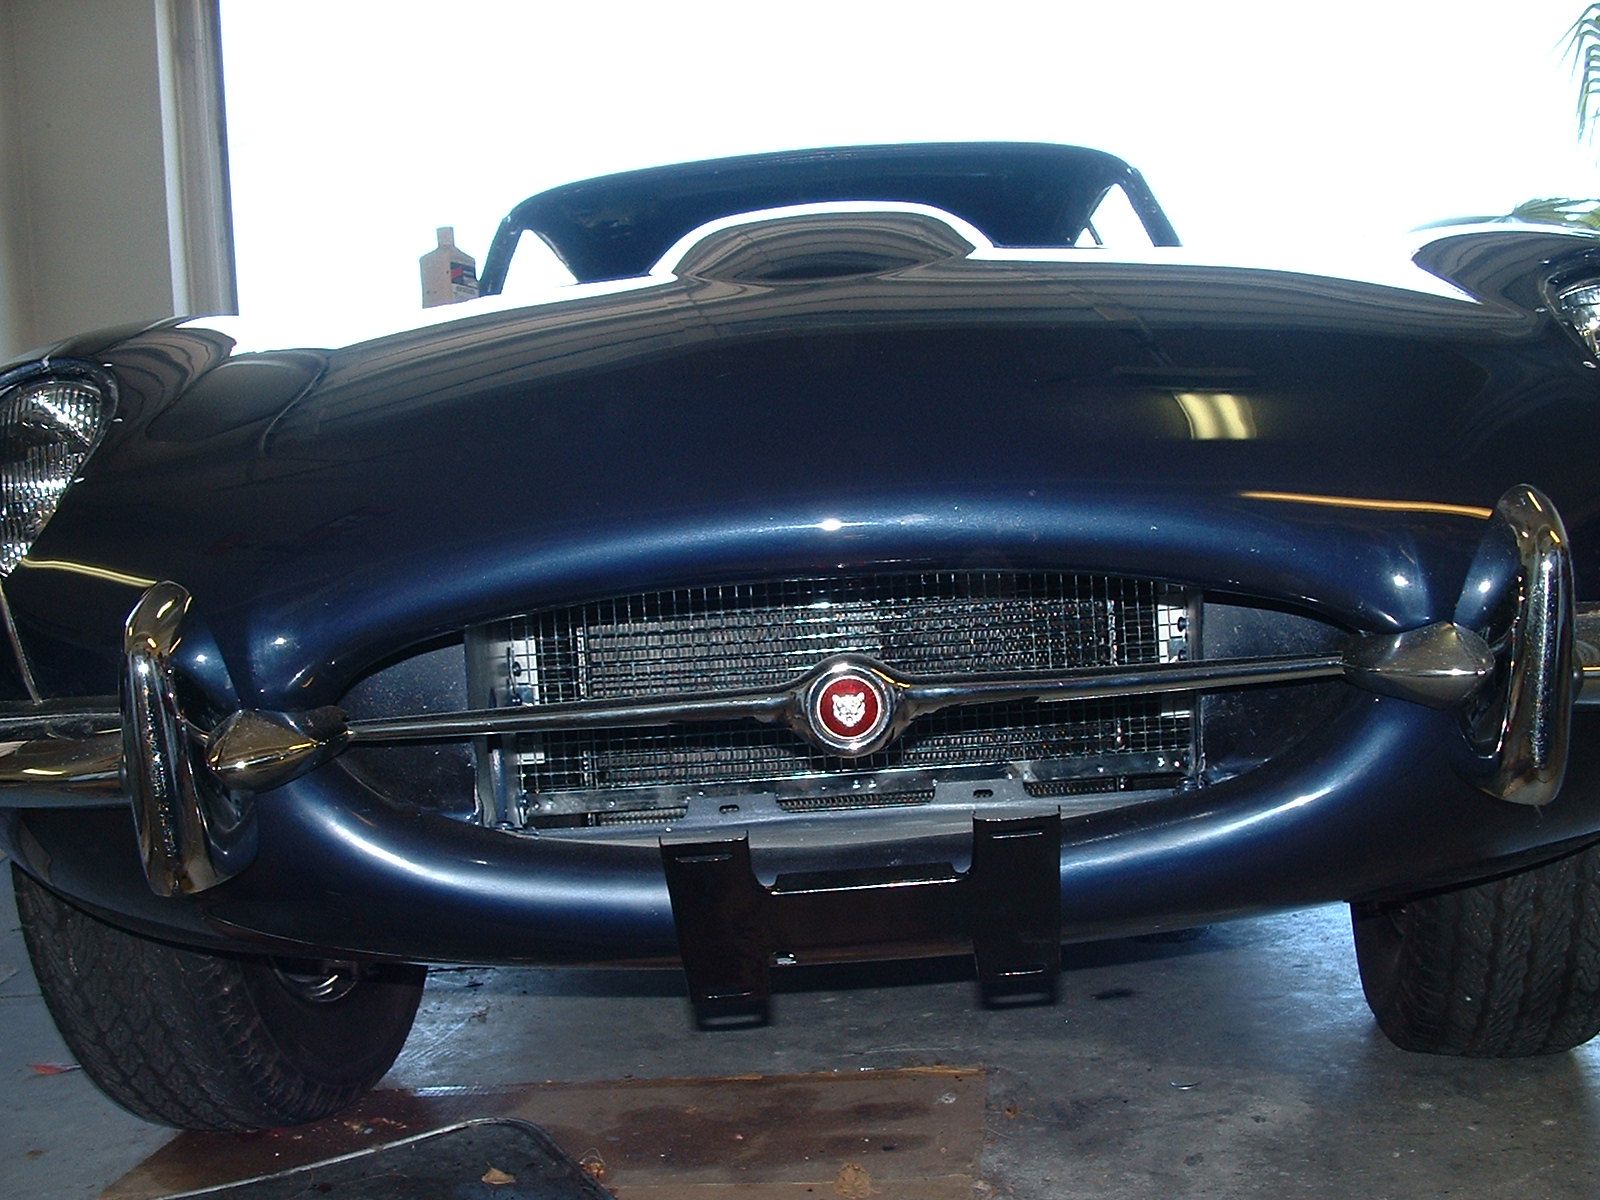
Getting the motif bar and bumper over riders all straight and firmly in place was a challenge, Its exacting work where one slip of a wrench or screw driver can really ruin your day. I opted to go with the front license plate on the car as would have been required in CA in 63. I had the original plate mount, but had to replace the tilt linkage. Also note the nice clean radiator rock guard.
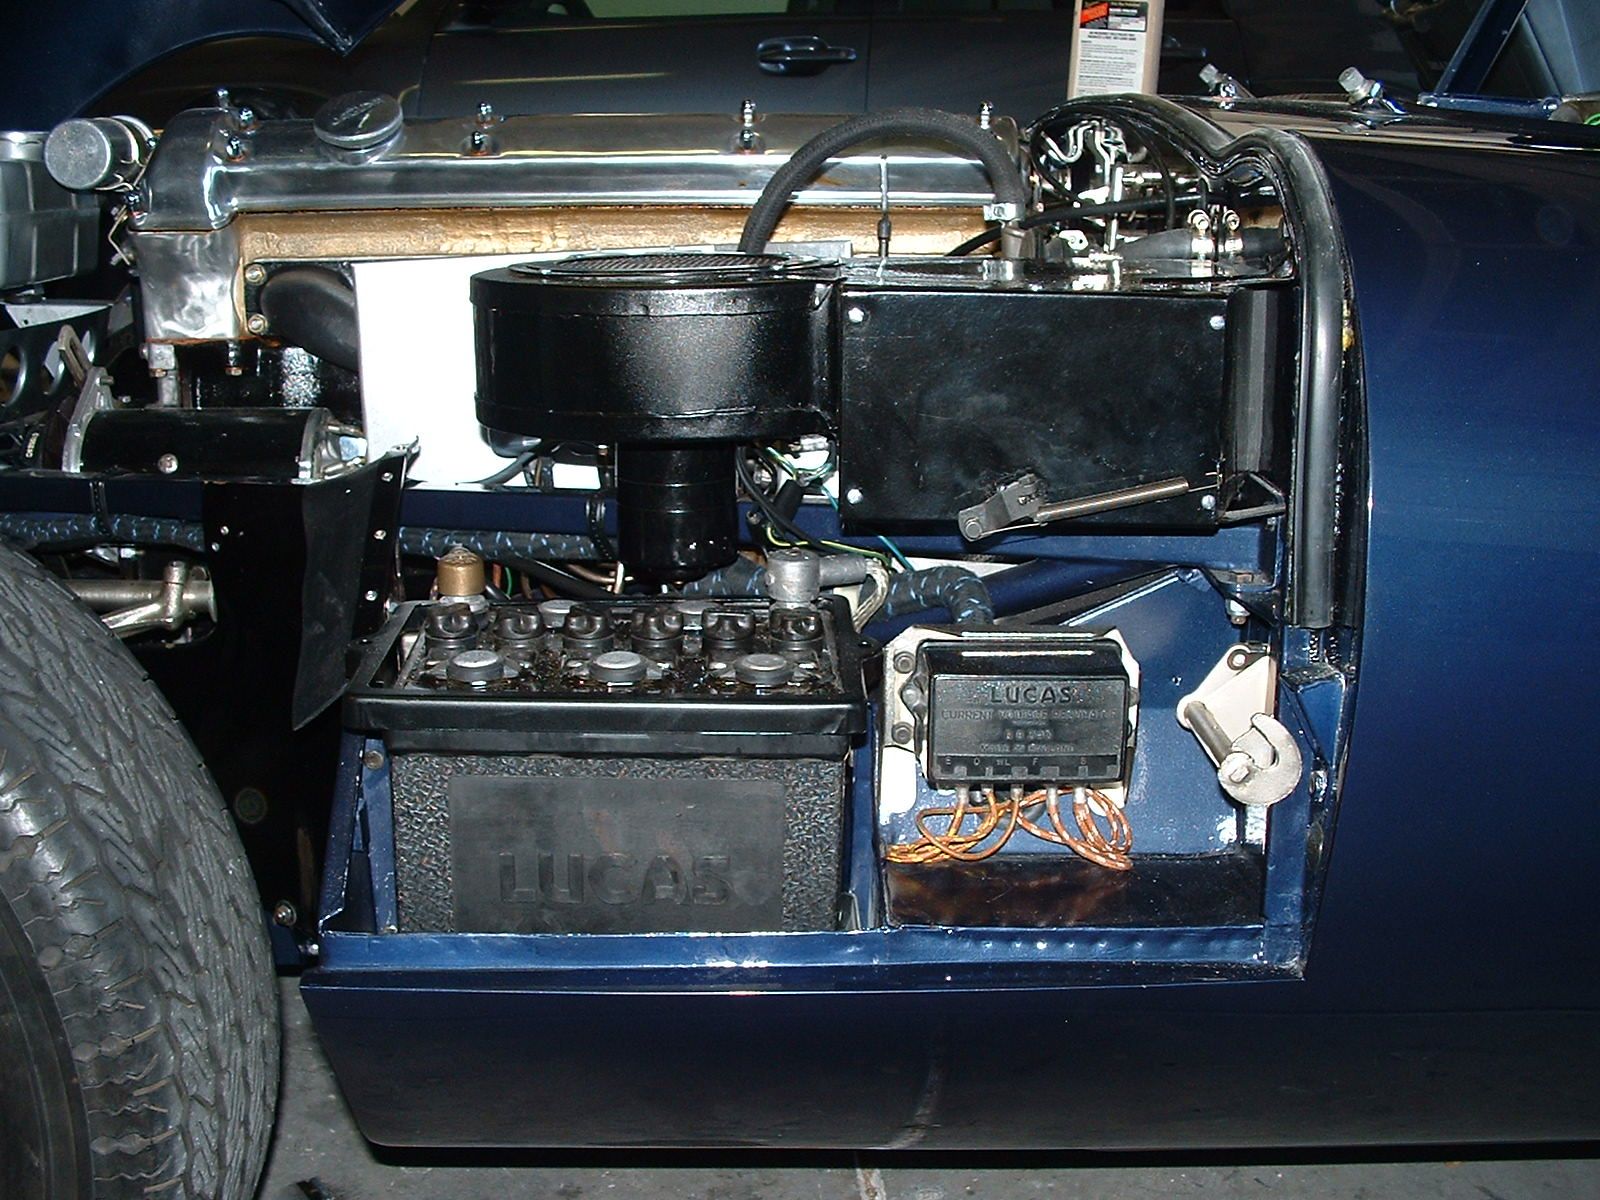
I went with a maintenance free vintage replacement battery. In the past I've had vintage replacement lead acid batteries that always seem to be weak and leak acid. This unit has a gel cell in side but looks totally stock! They aren't cheap but work great! The last thing I want is rust and paint damage when a lead acid battery starts going.
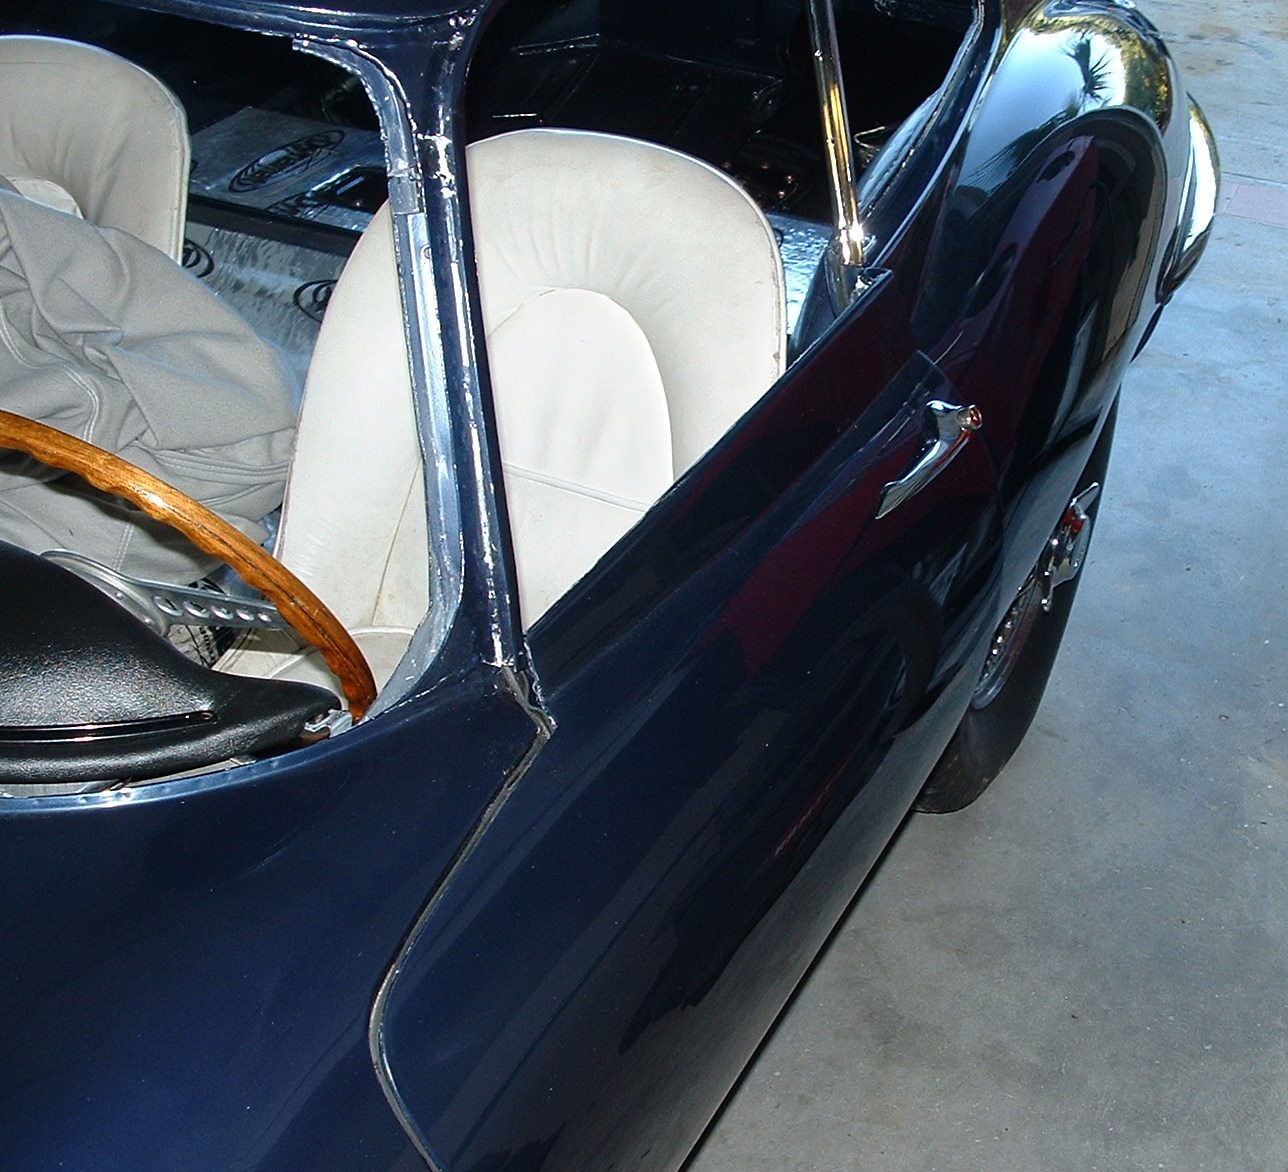
Weather stripping going on, I found you really can't take to much time doing this. Removing weather stripping is a major pain once its glued in. The adhesive is nearly impossible to get off, better to do it right the first time! I find that the doors are really hard to close after putting the strip in. I'm told over time the rubber compresses and closing the doors gets easier. I had a few weekends of electrical troubleshooting, nothing complex just lots of tracing and checking the various electrical legs. I installed a new wiring harness so there were all kinds of loose wires to be sorted. I'm sure this electrical work will be never ending, but for now its mostly working!
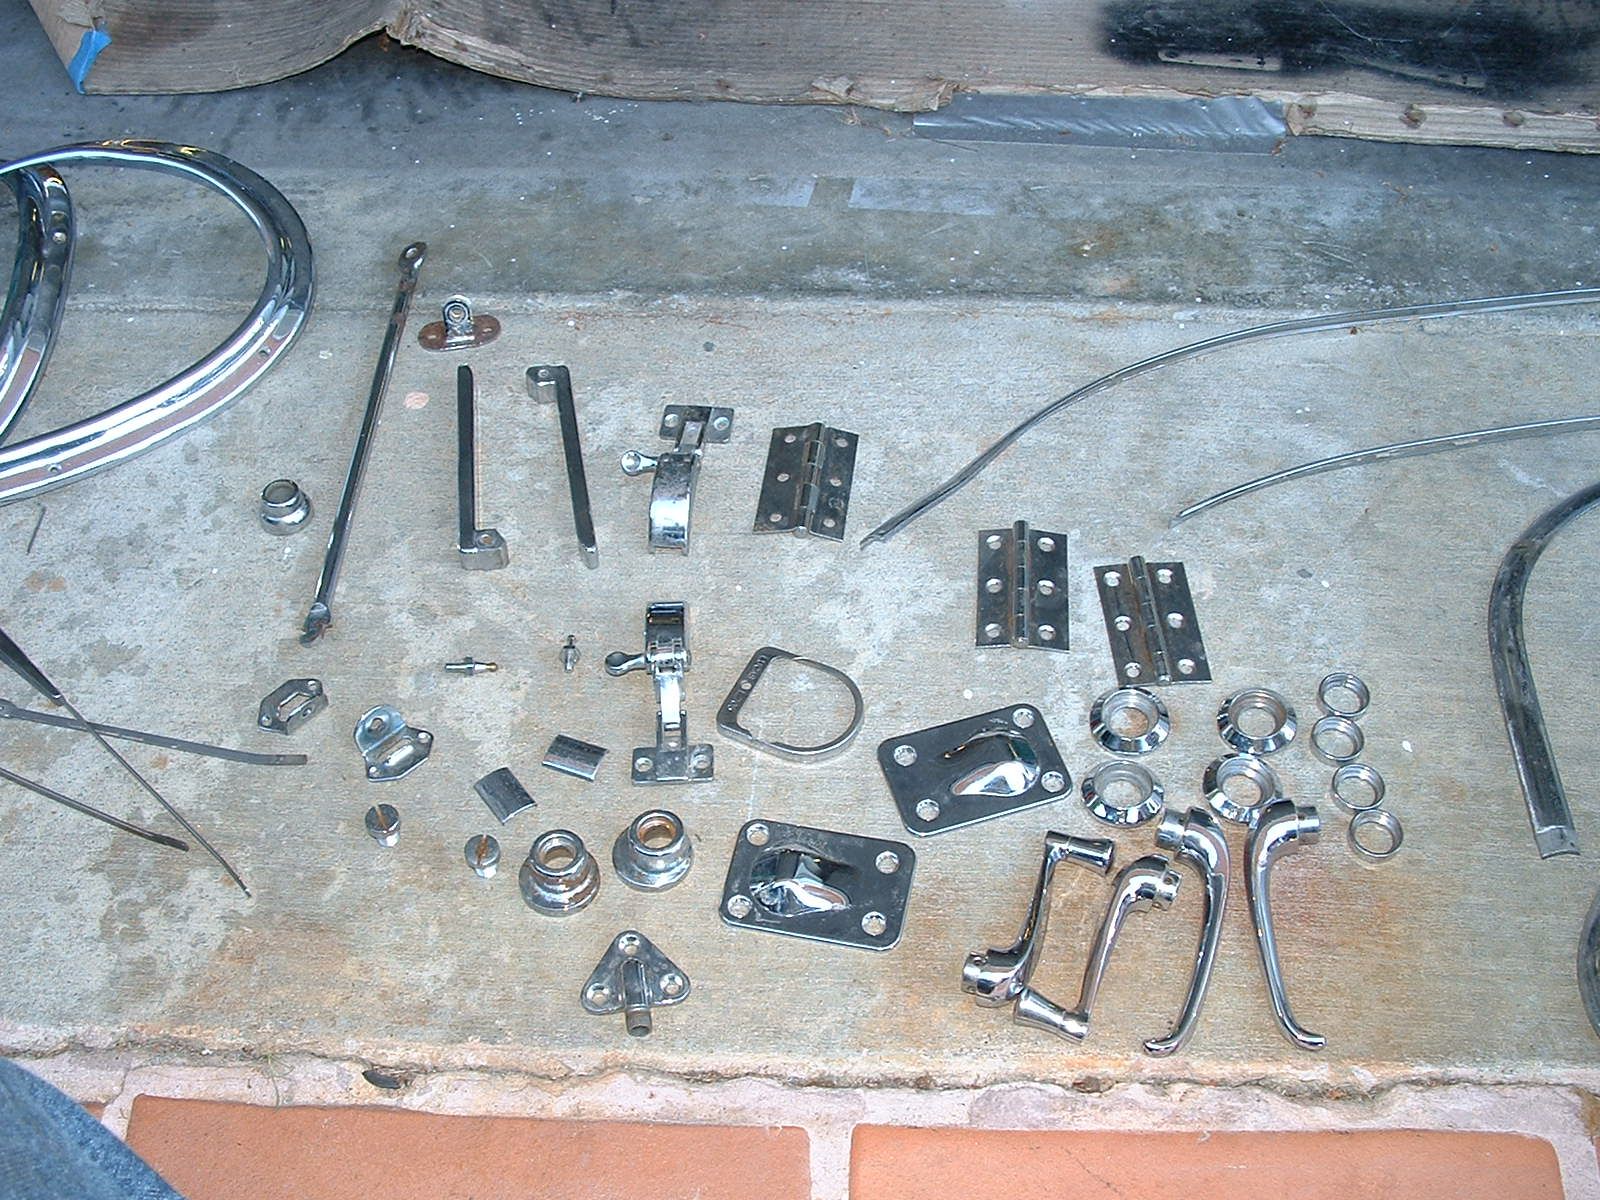
While all of the mechanical and electrical troubleshooting was going on, I sent some more chrome out for plating. I always take pictures of every part before going to the shop. If there is any question about what was brought in, I send them the photos. Over the years I have had many parts lost by sub contractors and can't tell you how much aggravation this has caused.
I had a professional glass installer come to put the in the rear deck glass. Now that I've seen it done, its likely I could do this in the future. There are a couple of special tools required which I didn't have. I really didn't want to break my original Triplex rear glass. This car has all the original glass. I'm sure some was replaced years ago but it all has the correct logos. I am not sure if I'll go with the original windshield and side glass but the rear glass and vent windows are in good shape.
The sugar scoops were slightly challenging, but it was just trial and error. I painted these with an Eastwood gray detail paint which has been recommend by several E-type owners as the closest match to the factory gray paint.
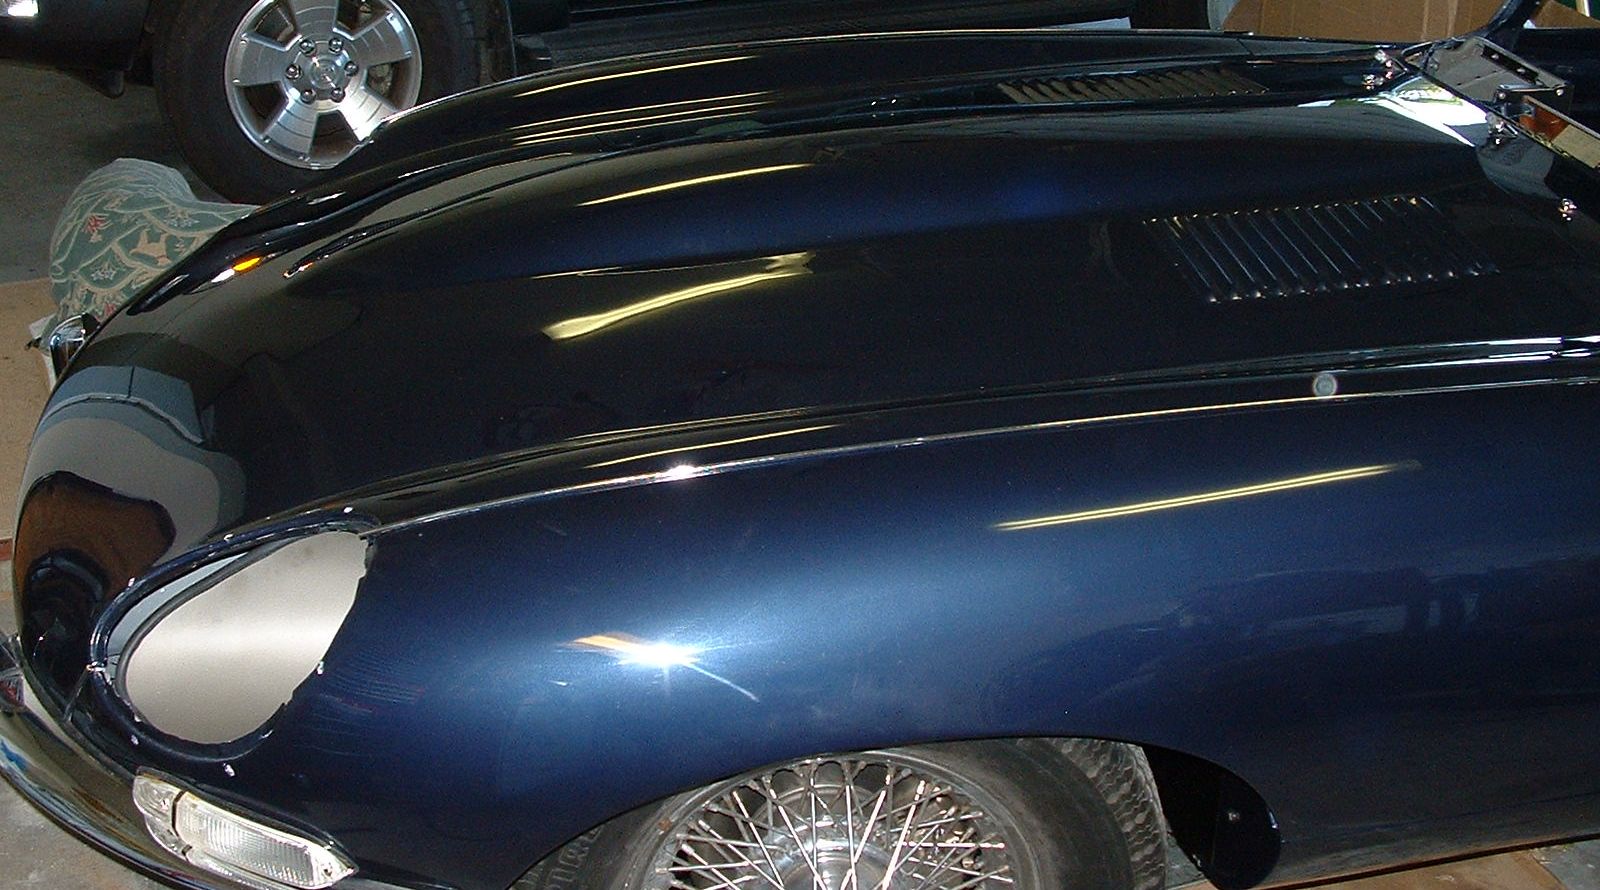
The chrome strips on the bonnet were also simple enough to install, the hardest part is getting them in without damaging any paint. I used a hacksaw blade to clean out the channel between the bonnet center section and the wing. Masking tape was a must have supply for this job.
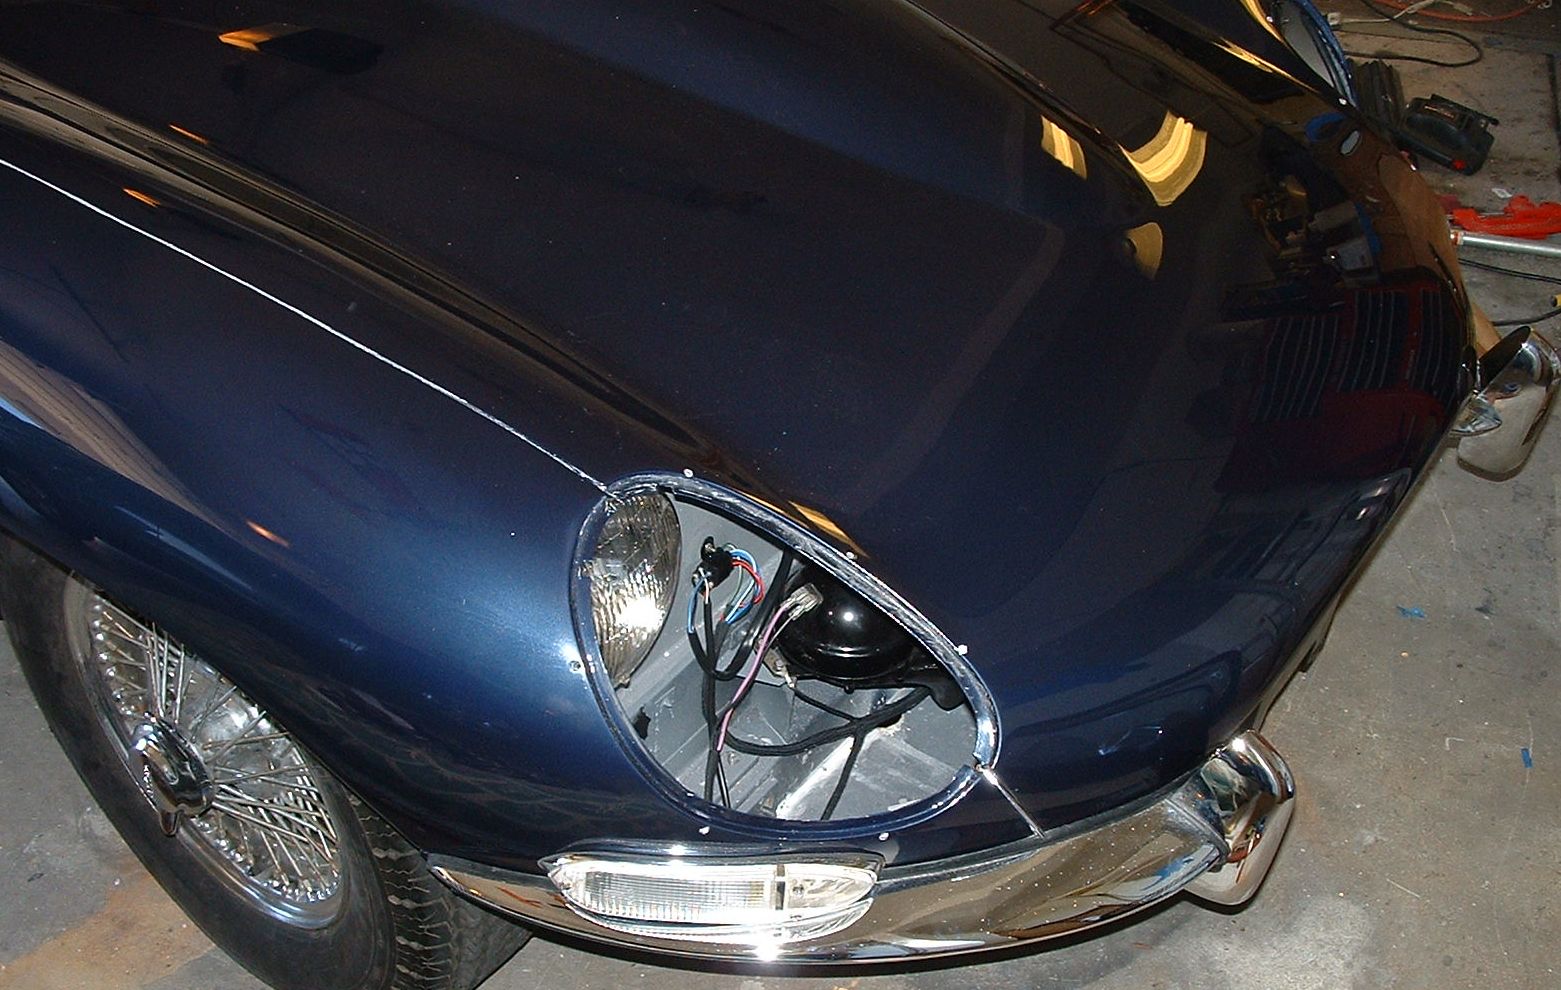
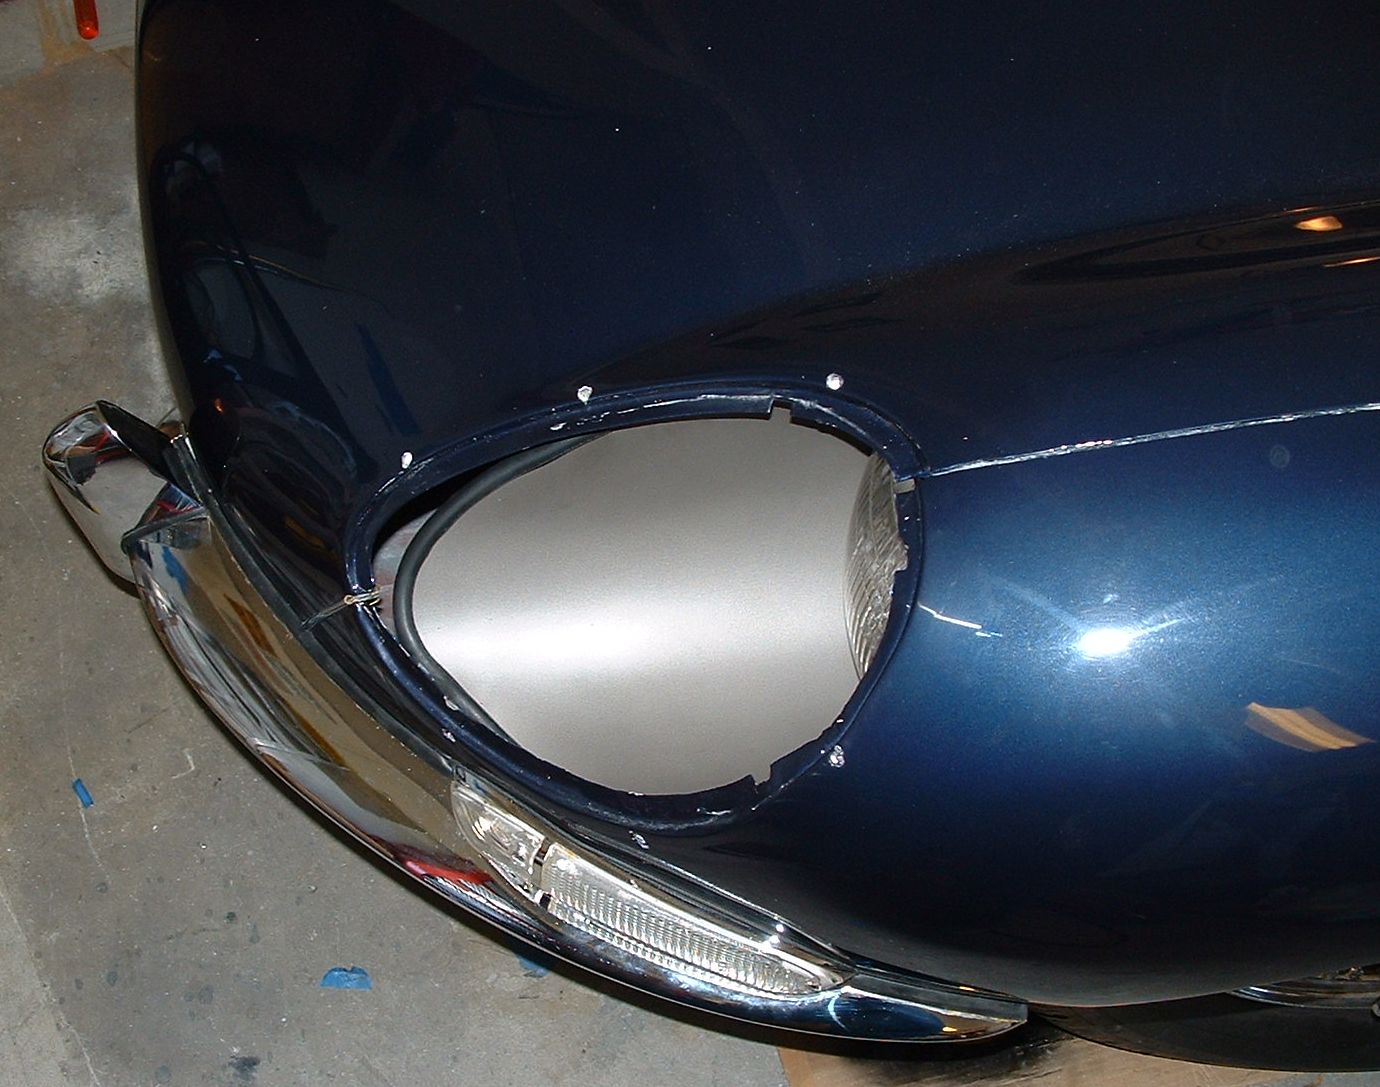
After the chrome came back from the shop, I quickly got the covers on the headlights and installed the front license plate. Its almost street legal now. I'm sure I will have to take the covers off to adjust the head light angle at some point but for now I just eye balled it on the front wall of the garage.
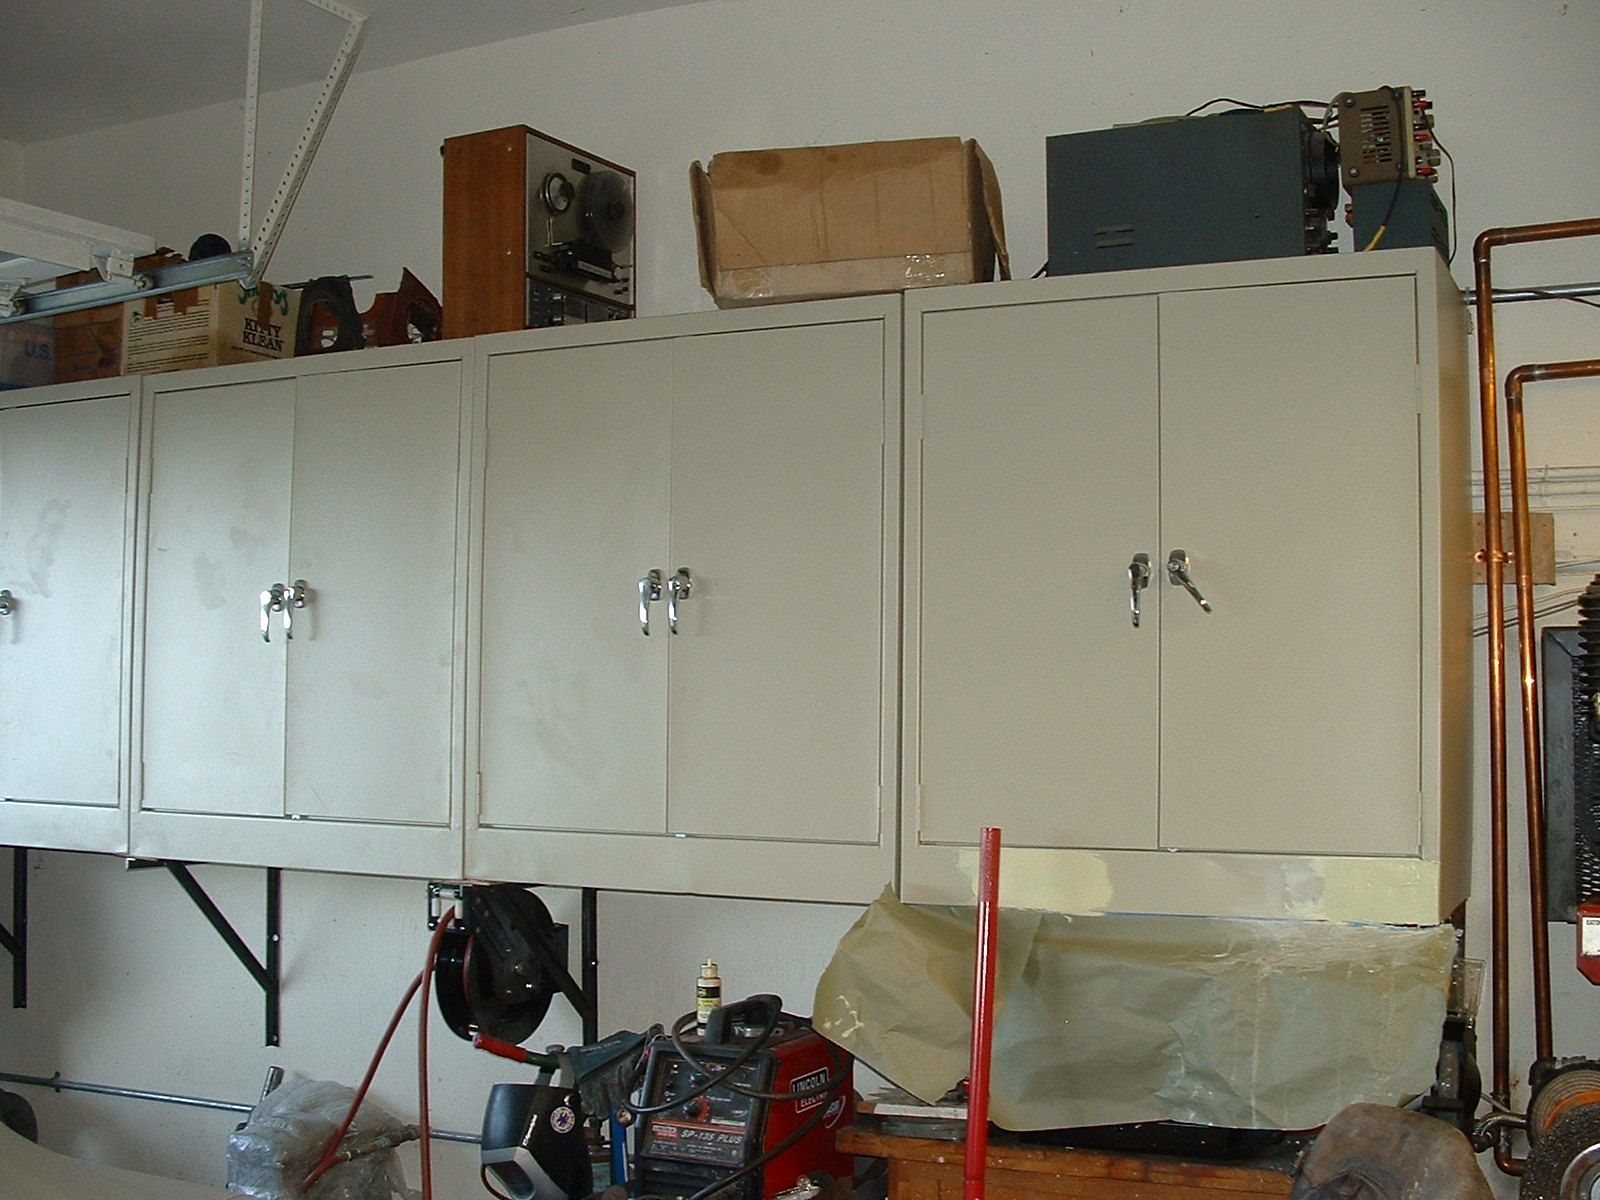
Here is the solution I came up with for the cabinets that fell on the car! Steel cabinets mounted on the wall and with shelves bolted into the one foot thick steel and concrete wall. I built the shelves out of one inch angle iron and lag bolted each cabinet into the studs in the upper part of the wall, I also had the shelves supporting from below. It isn't going anywhere. I tested each cabinet by hanging on it once it was in place. 200 pounds or more will be fine. You can see a little plastic filler on the right cabinet. This is to repair some minor shipping damage. These cabinets were fairly inexpensive. about $170 each plus shipping. The shipping was almost as much as the cabinets. They are actually lighter than the press wood crap that failed in the first place and are rated for over 100 pounds per shelf. Perfect for storing those heavy car parts and paint. Storage is in short supply in my house so these cabinets were critical to have before I could continue further on the car. The cabinet project took a couple weekends.
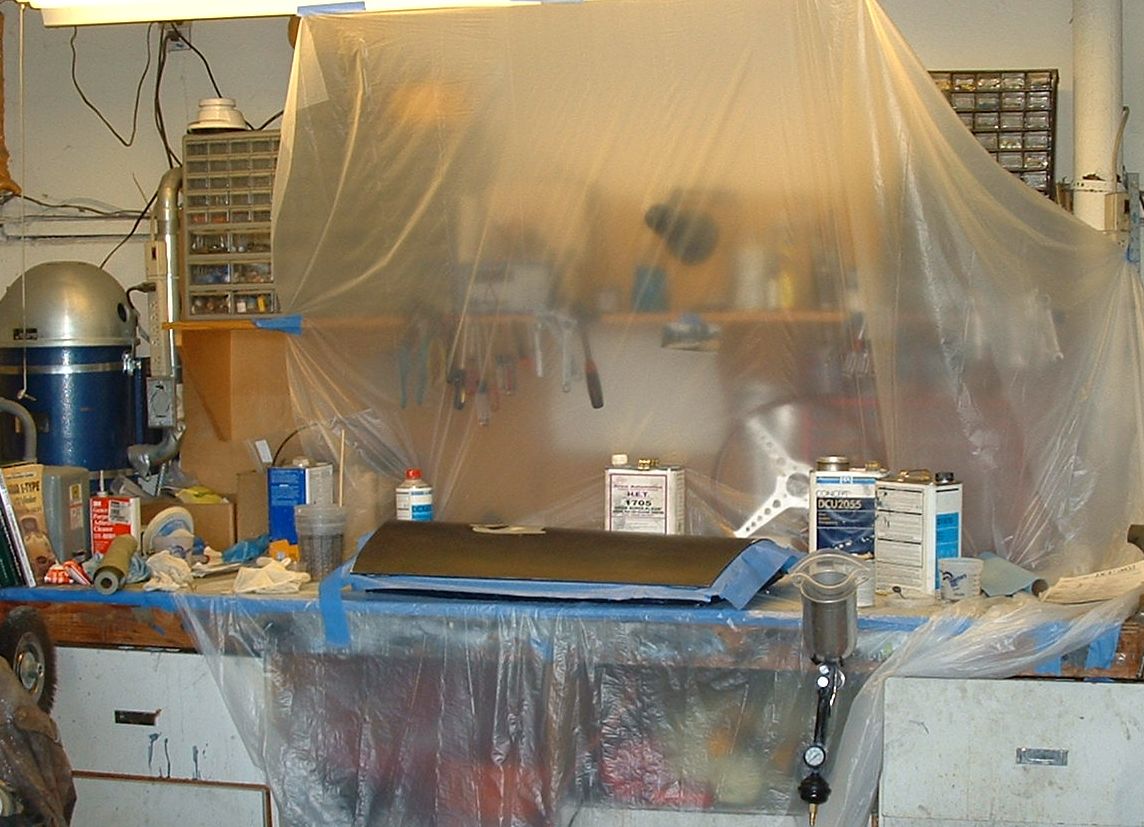
On to the repaint, I opted not to build the full tent this time, I really couldn't see doing this for just a door re shoot. Instead I cleaned up everything as best I could in the shop and put up this drop sheet. I dinged out the damage as best I could with the hammer and dolly and skimmed on a small amount of plastic glazing compound.
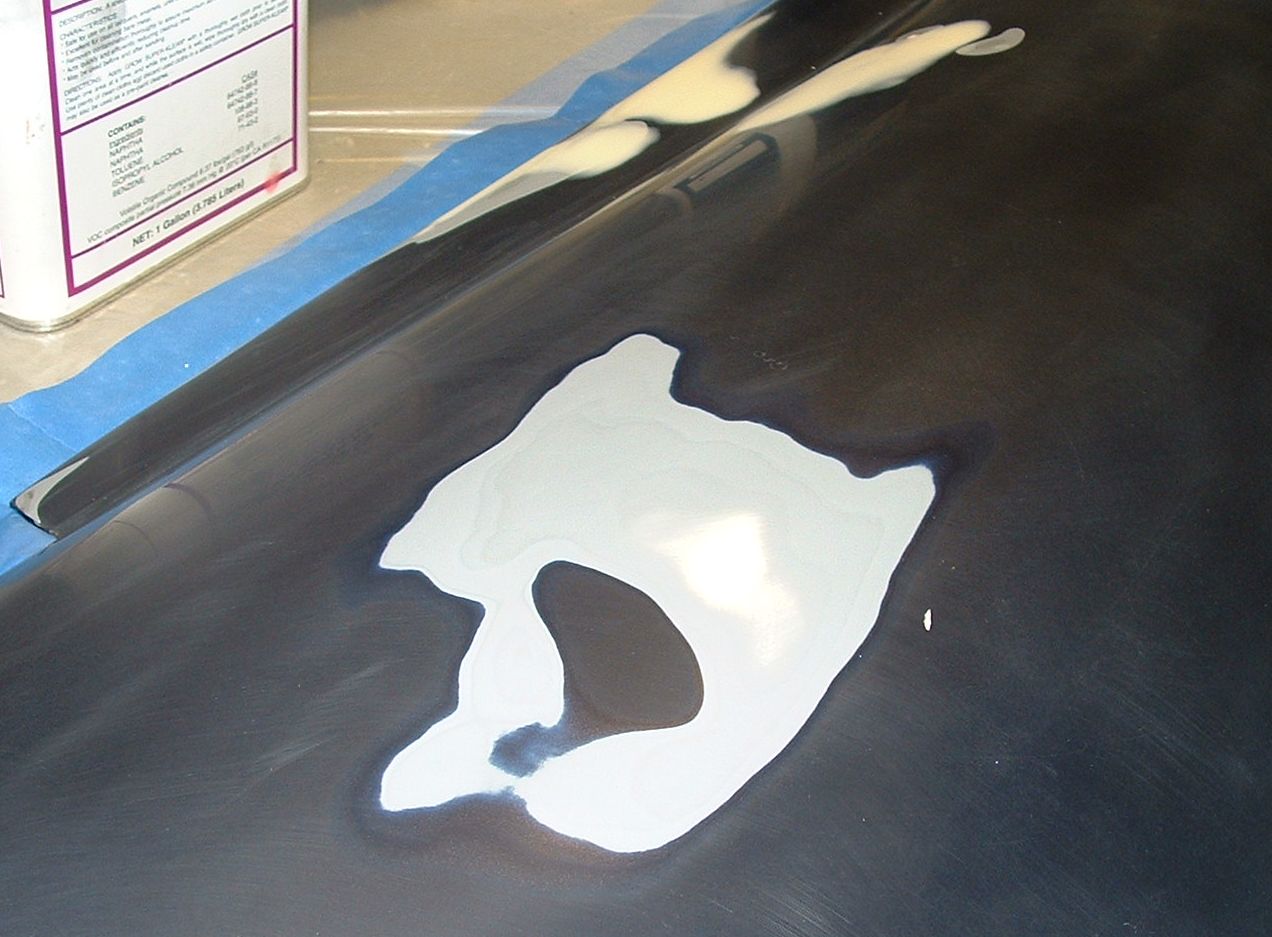
Here you can see one of the areas in the door where a cabinet door landed. It is a very small dent, but noticeable. I simply sanded out the color and clear until it was flat. Then shortly after this picture, I shot a new coat of NCP 280 high build primer. Its really important when shooting Deltron color to have a sealer coat. Don't shoot it on top of older cured color or clear. There is some reaction with the reducer and the previous base coat which cases crazing.
Here is the major damage area on the door. Notice the plastic filler I had to add to get the lows out. Its a very thin skim, but really beyond my hammer and dolly skills. With dents like this the metal stretches and causes high spots as well as low. I was fortunate that I could tap the high spots down and sand them out in the clear, base and primer coats. This doesn't look like much but was several hours of blocking to get right. I shot primer over it all and sanded out again as I mentioned above. When shooting base and clear you really have to be super careful about this, when there is clear coat left on the base coat, you can scuff it and shoot more color on top. However if you sand into the color, you need a sealer coat of something before you can shoot more color.
Here is the door all finished. I shot two coats of color and three coats of clear after the sealer coat. The color match was perfect. I had an extra pint of paint mixed at the same time I got the rest of the color and used the exact same gun and technique to put the color and clear on this time. I was lucky, with metallic's you can never be sure what will happen on a re-shoot.
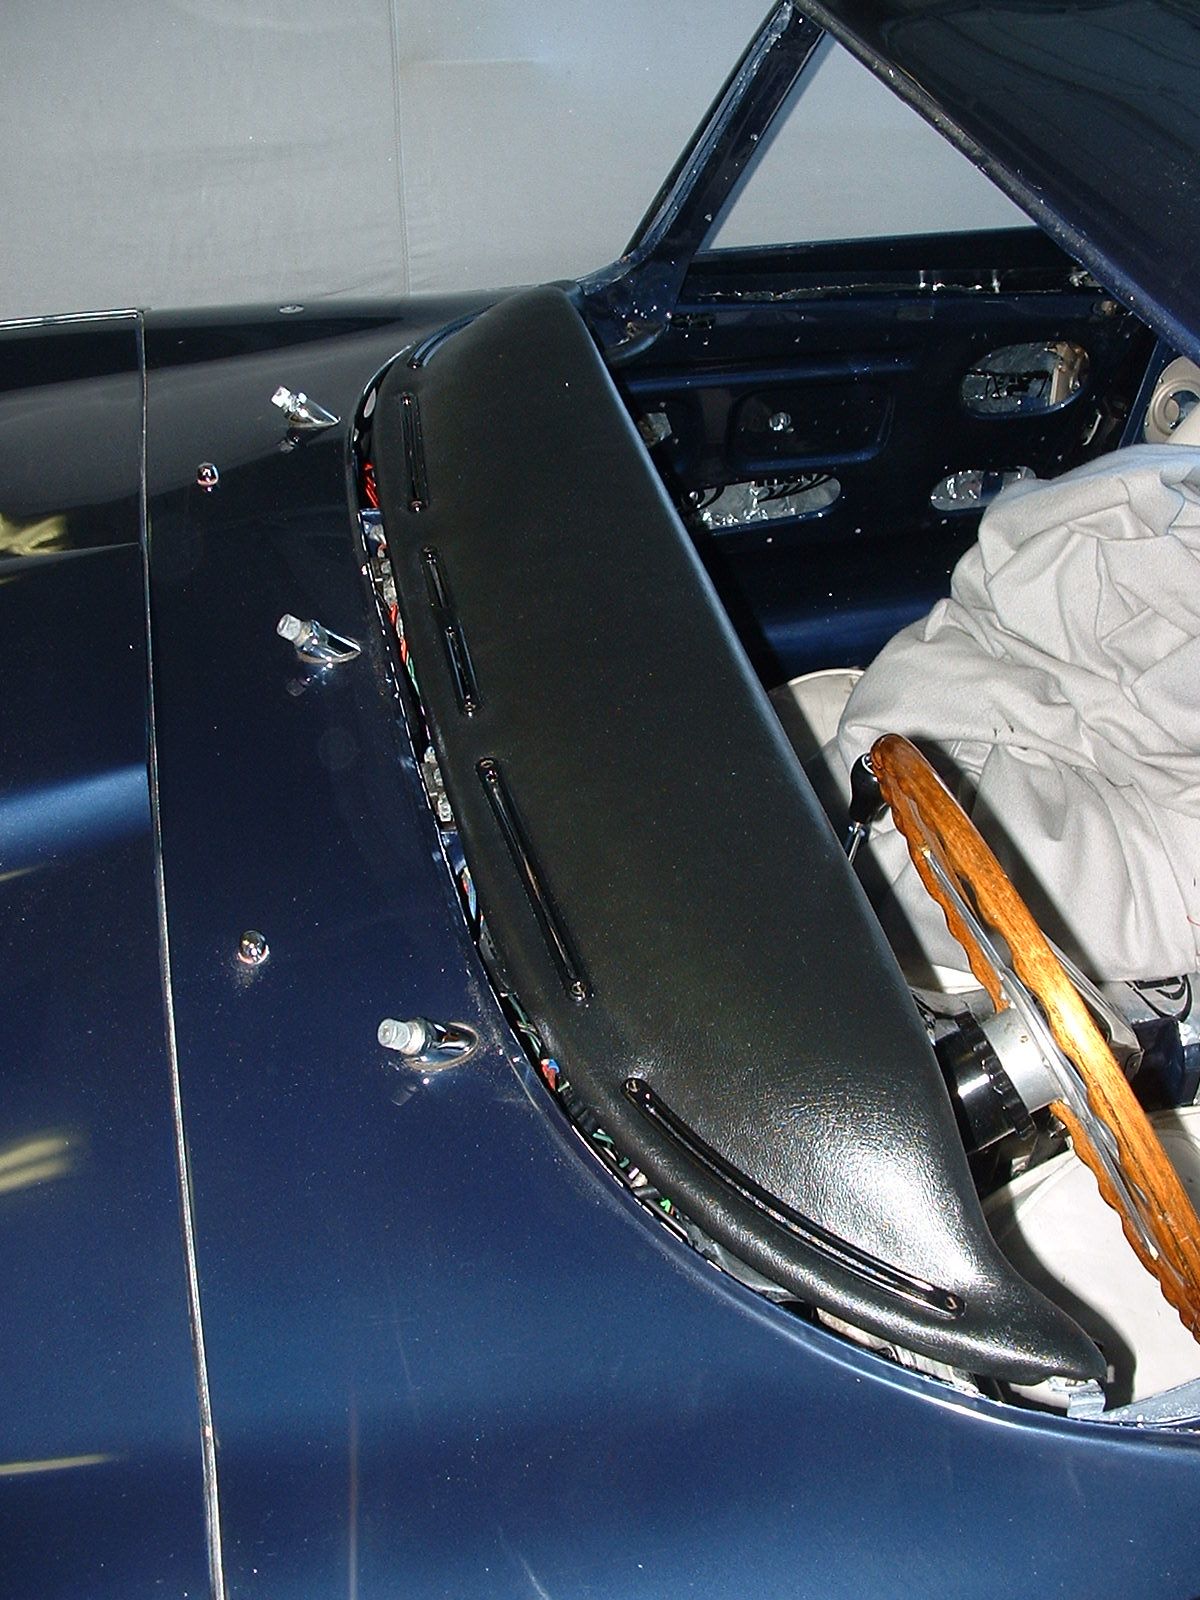
Another background activity was getting the dash recovered. It came out pretty well i think. I won't finial fit it until the windshield is in but this is good storage for it and keeps the dust off the wiring.
Here I am trial fitting the chrome drip rail cover. It will have to come off until after the door glass is in, but I was happy to find it went right on as it had come off. Often this kind of part won't fit well after re plating.
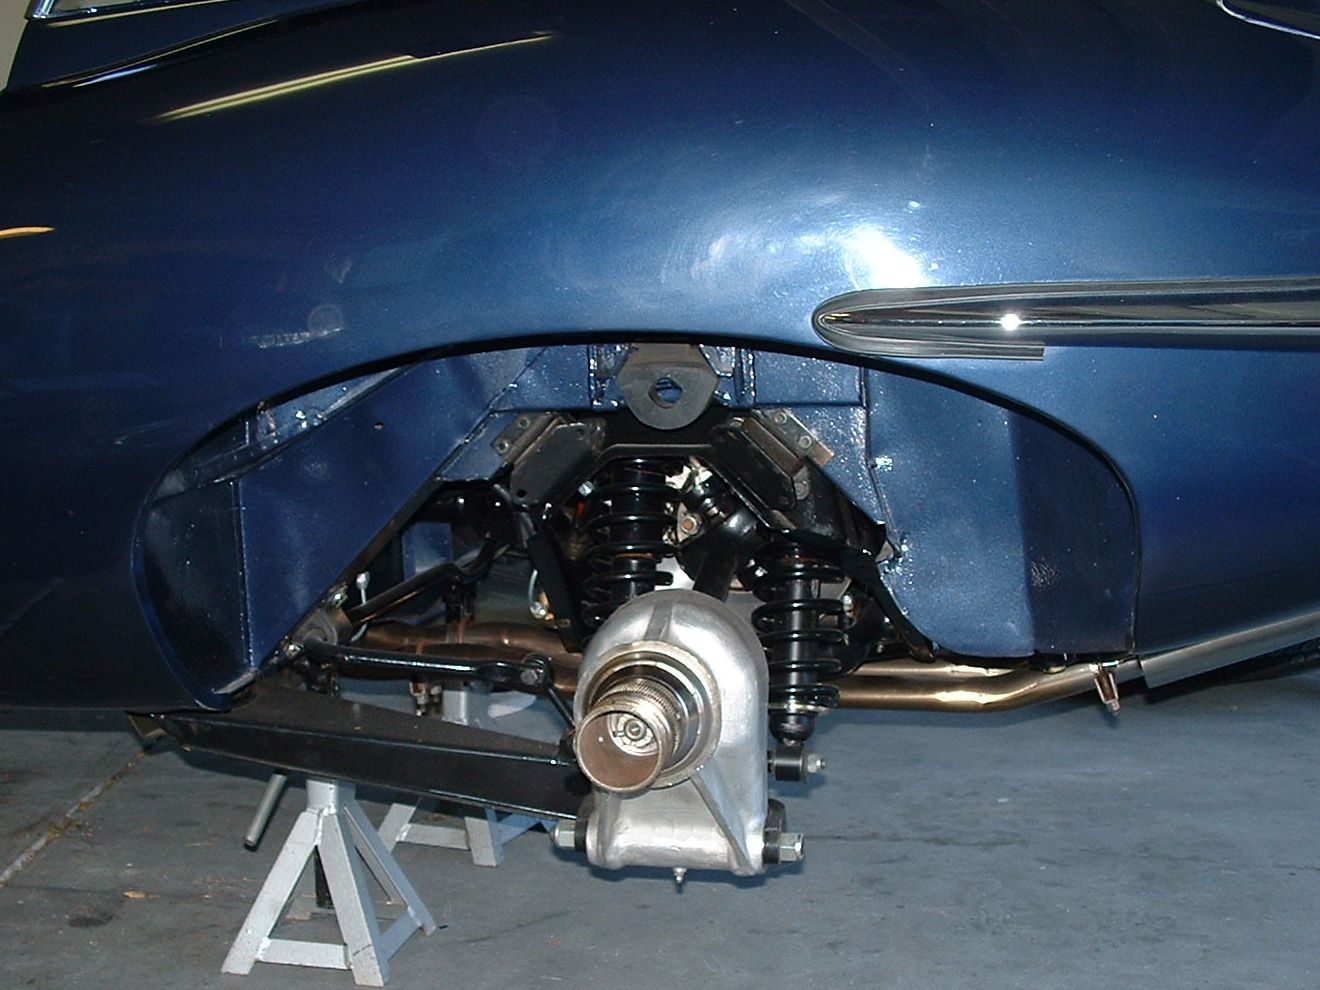
Here is a quick shot of the IRS, I was bleeding the rear brakes at the time. Bleeding the rear brakes on an E-type requires removing the front shock. Its not an easy job so I made sure I got all the air out in the first try.
At this point i have driven about 3 miles, around the block. I'm sure I'll spend many more weekends fine tuning but I am pretty sure that things are close. As soon as I get done with the interior and put the glass in I'll take it for alignment before getting into the finial fine tuning. I still need to get new wire spokes and tires, but for now I'm going to get the interior and glass in.
Next up, Interior Installation!