Body Problems
This part part
of the process is around 80 hours work. This includes building a trolley and cutting
all the rusted areas out of the body. It also includes stripping allot of the
paint, and undercoating. I did this over a about a month in June 2002.
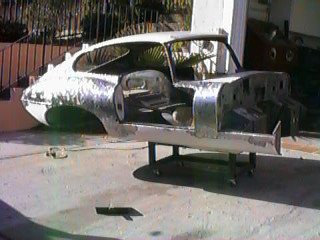 After every nut
bolt and screw was removed from the shell, I needed to be able to move the shell
so built a trolley. What I found is that the balance of the trolly wasn't good
the center of gravity is pretty far back on the shell and so the trolly wasn't
a good idea. Next time I'd drop this step all together and go straight to the
rotisserie. I'll cut this trolley up for parts and after the bottom is painted
I'll build a new trolley which bolts to the car on the rear suspension and sub
frame mount points.
After every nut
bolt and screw was removed from the shell, I needed to be able to move the shell
so built a trolley. What I found is that the balance of the trolly wasn't good
the center of gravity is pretty far back on the shell and so the trolly wasn't
a good idea. Next time I'd drop this step all together and go straight to the
rotisserie. I'll cut this trolley up for parts and after the bottom is painted
I'll build a new trolley which bolts to the car on the rear suspension and sub
frame mount points.
 Even though this
trolley wasn't great it worked well enough to move the shell out of the garage
and start stripping the paint. This I discovered was a huge project, and a big
waste of time. After going through many sanding disk. I took the whole thing out
for Sand blasting. I focused instead on finding the bulk of the body damage and
rusted areas and I cut out any sections which would need to be replaced before
sending out to the blaster. There is no reason to pay the blaster to blast metal
that will be replaced later, and the more access the blaster has to the inner
body the better. Next time I do a car restoration I'll go even further in the
stipping out of metal before sending out. I should have cut the trunk tub out
and possibly all of the floors and both cowls etc.
Even though this
trolley wasn't great it worked well enough to move the shell out of the garage
and start stripping the paint. This I discovered was a huge project, and a big
waste of time. After going through many sanding disk. I took the whole thing out
for Sand blasting. I focused instead on finding the bulk of the body damage and
rusted areas and I cut out any sections which would need to be replaced before
sending out to the blaster. There is no reason to pay the blaster to blast metal
that will be replaced later, and the more access the blaster has to the inner
body the better. Next time I do a car restoration I'll go even further in the
stipping out of metal before sending out. I should have cut the trunk tub out
and possibly all of the floors and both cowls etc.
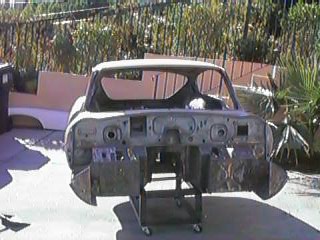
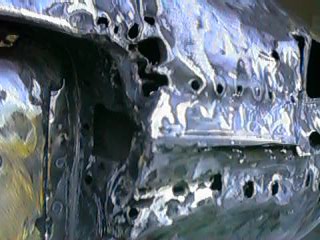
 The rear end had
been crushed in a serious way. Previous body work left and dozens of holes used
to pull out dents. All of this was covered by over an inch of bondo. I had no
idea when I first saw the car that this damage was even there. This is typical
though with cars which are 40 plus years old. Seems like every person doing restoration
I talk to has a similar tale.
The rear end had
been crushed in a serious way. Previous body work left and dozens of holes used
to pull out dents. All of this was covered by over an inch of bondo. I had no
idea when I first saw the car that this damage was even there. This is typical
though with cars which are 40 plus years old. Seems like every person doing restoration
I talk to has a similar tale.
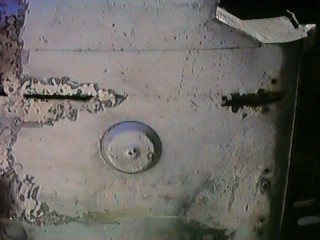
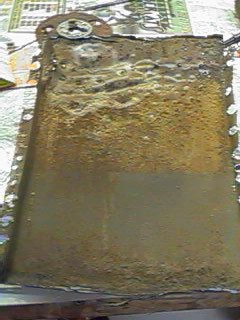
The trunk tub
is a rusty mess. I'm glad these are being reproduced. I'd hate to have to fix
all of this rust. The area all along the wheel wells is paper thin, and rust
pin holes are all across the bottom. Paint still covers most of the problems
in this picture.
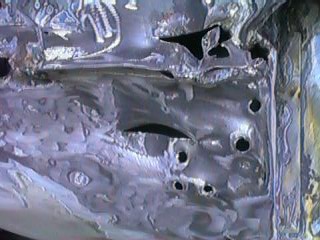
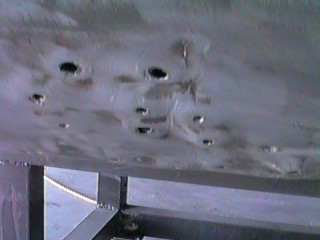
 Hard to believe
all the things bondo can hide. This is the rear quarter panel on the driver's
side behind the door. Its been drilled and pulled but has a big crease right in
the middle of the panel. Fortunately I can get to the panel from behind and will
be able to hammer and dolly out allot of this. Some shrinking of the crease will
also be required, and a good bit of lead.
Hard to believe
all the things bondo can hide. This is the rear quarter panel on the driver's
side behind the door. Its been drilled and pulled but has a big crease right in
the middle of the panel. Fortunately I can get to the panel from behind and will
be able to hammer and dolly out allot of this. Some shrinking of the crease will
also be required, and a good bit of lead.
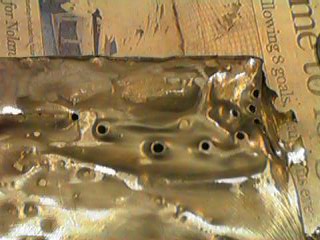
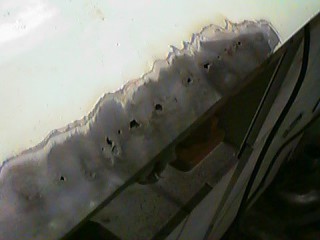
 If you thought
the last bit was bad, this is a close up of the boot and license plate area. Hard
to believe that some bodger could leave this like this and just bondo over it
all. I'll be spending many hours correcting this. Replacing all the rear sheet
metal will be the only real solution. The other side of the trunk is just as bad.
If you thought
the last bit was bad, this is a close up of the boot and license plate area. Hard
to believe that some bodger could leave this like this and just bondo over it
all. I'll be spending many hours correcting this. Replacing all the rear sheet
metal will be the only real solution. The other side of the trunk is just as bad.
 What a mess, it
was quite a crunch. I'll need the upper deck, license plate frame, Trunk tub inside
supports and joining plates, and new tail light surrounds.
What a mess, it
was quite a crunch. I'll need the upper deck, license plate frame, Trunk tub inside
supports and joining plates, and new tail light surrounds.
 Unlike many of
these cars the sills weren't majorly rusted! Damage was another story. Both sides
had been bent up in accident(s). Previous repairers did a wonderful job of drilling
and pulling out the dents. I'll cut this section out before sending the car to
the blaster. This is on the passenger side under the door.
Unlike many of
these cars the sills weren't majorly rusted! Damage was another story. Both sides
had been bent up in accident(s). Previous repairers did a wonderful job of drilling
and pulling out the dents. I'll cut this section out before sending the car to
the blaster. This is on the passenger side under the door.
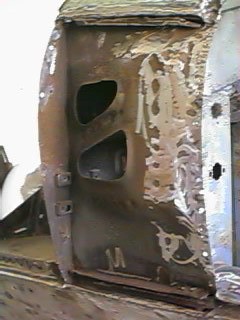
 This is what was
left of the cowl on the driver's side. Bondo hid the problems, This is an easy
part to replace, but will require blending in with lead once welded into place.
This is what was
left of the cowl on the driver's side. Bondo hid the problems, This is an easy
part to replace, but will require blending in with lead once welded into place.
 Same panel from
the other side. Rust hand been working through the bottom. In addition to the
damage on the top. Yet another part on my sheet metal order list.
Same panel from
the other side. Rust hand been working through the bottom. In addition to the
damage on the top. Yet another part on my sheet metal order list.
 The upper cowl
suffered some damage too. This will be easy to fix, but points to overall body
twisting cause by a serious wreck.
The upper cowl
suffered some damage too. This will be easy to fix, but points to overall body
twisting cause by a serious wreck.
 The rear of the
car on the driver's side also had some hidden damage. Nothing hard to fix, but
all the problems add up to allot of time. What else is new.
The rear of the
car on the driver's side also had some hidden damage. Nothing hard to fix, but
all the problems add up to allot of time. What else is new.
 Both door skins
had rusted through. The drain plugs clog very easily trapping water. Both will
be stripped and re skinned.
Both door skins
had rusted through. The drain plugs clog very easily trapping water. Both will
be stripped and re skinned.
 Only light surface
rust on the inside of the panel, except for the bottom where the cowl meets the
sill. The lower cowl rusted through along the seam. This is one of the areas which
collects road dirt on all E-types. When I cut the panel out I found about 2 inches
of dirt in the botom of this panel. Not sure how it gets in but dirt absorbs water
in places like this and rust is the result.
Only light surface
rust on the inside of the panel, except for the bottom where the cowl meets the
sill. The lower cowl rusted through along the seam. This is one of the areas which
collects road dirt on all E-types. When I cut the panel out I found about 2 inches
of dirt in the botom of this panel. Not sure how it gets in but dirt absorbs water
in places like this and rust is the result.
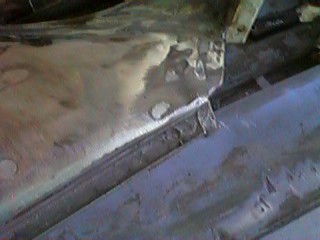
 Behind the door
is another one of the dirt collector areas. I cut out the rusted area before sending
the shell out for blasting and more dirt and rust. I made sure to tell the blaster
to get all the rust out. In this area the rear had rusted through into the wheel
well, this allowed more water and dirt to get forced in.
Behind the door
is another one of the dirt collector areas. I cut out the rusted area before sending
the shell out for blasting and more dirt and rust. I made sure to tell the blaster
to get all the rust out. In this area the rear had rusted through into the wheel
well, this allowed more water and dirt to get forced in.
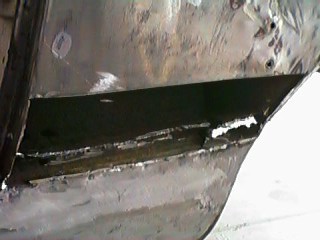
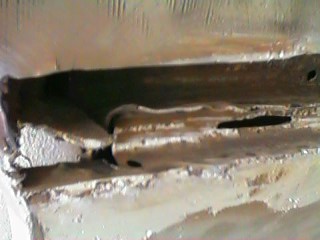 It appeared that
one reason this rusted so much is that there was never any metal stopping water
from the rear wheel well from getting into this panel. A large area was open from
the factory. This is visible on the center left of the picture. When the car is
driven in the rain water is forced into this hole and into the body. When I cut
out these panels. Both were full of 6 inches of dirt and muck from the road. This
dirt held water and contributed to the rust.
It appeared that
one reason this rusted so much is that there was never any metal stopping water
from the rear wheel well from getting into this panel. A large area was open from
the factory. This is visible on the center left of the picture. When the car is
driven in the rain water is forced into this hole and into the body. When I cut
out these panels. Both were full of 6 inches of dirt and muck from the road. This
dirt held water and contributed to the rust.
 This is what
the problem started off looking like, both sides were about the same. The front
cowls showed less rust through but wer about the same. The lead helps cover some
of the damage.
This is what
the problem started off looking like, both sides were about the same. The front
cowls showed less rust through but wer about the same. The lead helps cover some
of the damage.

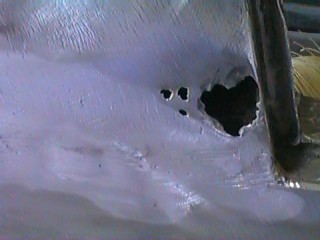
A little blurry,
but this is the kind of minor rust through on the inner panel. I'll end up patching
in a 3 inch plate into the panel where these holes are. This was a good place
to practice welding too. It never will be seen once its done.
Building
a Rotisserie!