More Tear Down!
This part of the tear down is more than half way through the process,
I'd estimate that less than 100 hours of work are left to do here.
 After the Engine
was stored away and out of the picture tear down progressed rapidly, I took many
pictures of the suspension and front end as reference. Removing all the brake
lines, steering, wiring etc. was a quick process but it is always good to take
it slow and document everything.
 Much E-type mail
list discussion has been had over this vacuum reservoir and its original lettering.
Mine has most of this visible, and I'll make a patter of this before stripping
the paint. The original blue isn't looking to bad on parts of the sub frame. Fortunately
I won't need to match the paint from this car. I'm not even sure what color we
will go for in the end.
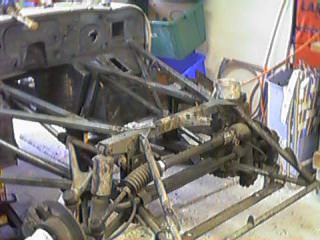
 This turned out
to be a nice shot of the engineless front end. All the steering and suspension
is still in, and looking pretty tired.
 Dozens of small
parts like these covers will need to be tracked and stored. The original color
reproduced etc. The national Jaguar club keeps a listing of all the correct colors
for just about all the parts on E-types in the various periods and models.
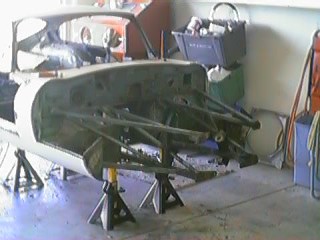
 Strip down is
almost done now. Just a few more parts to go. The natural weight distribution
of the FHC body on jack stands is a little awkward. If you are doing this type
of thing it is easy for the car to tip back on the stands since the center of
gravity is very far back without the front end on. Put a bunch of heavy items
like air tools in the foot wells to make sure it doesn't surprise you and fall
off the stands.
 The body shell
is very light once stripped. I could lift either end with little effort. I'd guess
the entire shell is around 300 pounds. It will be even lighter once I get all
the rust, paint, and lead off of it. Some of the sub frame hardware was pretty
rusty. Water got into the foot well area and the lower sub frame bolts didn't
fair very well. Fortunately the rust wasn't bad enough to be a structural issue.
Many people have told me how lucky this car was from a rust stand pont. Don't
think I could have handled a full floor and sill replacement.
 Here you can see
the rusted area in the front of the floor pan. Its only surface rust on the kick
panel, but the foot well pans are beyond saving. The lighter brown isn't rust,
but rather dirt and old insulation from the original interior. The foot wells
are the lowest areas on the car and so were not only rusted, but also dented up
badly.
 Another shot of
the interior of the shell. I won't bother trying to clean this up. except for
getting all the under coating off. The sand blaster will do the rest. That's another
part of the restoration. Right now I'm just getting the last hardware out and
inspecting the mess.
 Two tired old sub
frames. I had hoped these would be reusable, and rust wasn't an issue, however
the driver's side frame was bent in an accident, so both will go. I haven't decided
yet which brand of sub frame to buy. Martin Robey makes exact replicas, but Classic
Jaguar has a set which is reportedly stronger and overall better constructed.
 Dropping the rear
end was simple enough. Getting all the bolts off was a little challenging, but
nothing a little patience didn't overcome. The rear end is quite heavy so don't
try to lift it without help. I used a dolly and floor jack to move it around before
I tore it down.
 Here's a picture
from the beginning of break down the rear end. The dishes in the foreground are
for temporary parts storage. I usually fill up 5-6 with parts and then bag them
up and enter a detailed description for each numbered bag in a spreadsheet. I
note any damaged, missing parts so I can at a glance tell what needs to be replace
before sifting through each bag.
 Just another rear
end removal picture, notice the fuel line on the floor. The strip down is pretty
much done now, just a few odds and ends to clean up.
 What the heck,
one more picture of the rear end. More dust and road dirt that anyone would care
to see, but not for long.
Body
Problems!