The door and body
leading process is very slow work. Didn't really track the exact hours as it was
part of the body work process, but at least 20 hours per door and another 40 hours
to lead the rest of the body. This car needed allot of lead this work was done
between July and Nov 2002
The door gap on
both doors was pretty messy when the lead work started. A good bit of leveling
work will be needed first on the door and the body of the car, also door aligning
is a must. The hinges must be installed and the latch. Get the door roughly in
the correct position first so that the door opens and closes freely and the rear
edge of the door meets the crease in the fender perfectly.
Here its easy to
see that the door gap is off. I took the doors off and did allot of measuring
on both sides of the car and on both doors to determine what was off. It turned
out that in this case the door skin was about 2-3 mm to long. I quickly fixed
this with the grinder and had to do some touch up welding to fill the edges where
the door edge cut through.
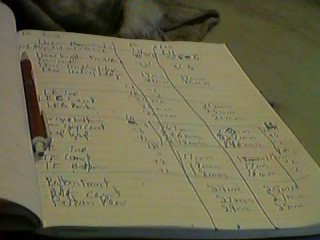
I precisely measured
the door and body in about ten different places, and compared notes. I found that
the body was the same on both sides down to 1-2 mm while the doors, which I had
skinned were different as much as 3-4 mm. So I had to file down the doors to make
them fit perfectly. Fortunately the doors were both larger than they should be
and not to small. The reason for this I'm sure is that when I was folding over
the door skin I didn't have a method to exactly force the crease in the skin in
a particular place. Just folding over the skin yields inconsistant results. The
process to correct this was slow and required many trial fittings of each door.
Do one door at a time vs trying to do both doors in steps.
After I had
trimmed down the areas which were clearly largeer than the door opening, marked
the door alignment as closely as possible when the latch was properly set. I
adjusted the latch a number of times to get the best fit, as well as fine tuning
the hinges. After all this was done I put down tinning butter and started to
lead in the rear door seam. After looking at many close ups of S1 E-Types, I
opted for a 3 mm gap all around with a slightly larger gap on the front door
seam. Don't want to risk that the front edge will scrape on the finish as the
door opens This clearance is pretty tight even with a 3.5-4 mm gap. I'll need
to watch the filler and paint build up on these seams and make sure that it
doesn't narrow these gaps.
The door leading
process is very slow going. I estimate that I put about 20 hours into getting
each door. The door area uses quite a bit of lead too. I used around 5-6 pounds
of lead in each of the door jams to get the 3 mm gap I was looking for. Most of
this lead ended up on the floor after filing.
To get all the
edges perfect a small amount of lead skimmed on the door as well as the body.
I got most of the low spots on the edge of the door up with a pick hammer, but
for the low spots which were behind the edge and other small dents lead was required.
I leaded the door first and then put it on the car for filing. File both the body
and the door at the same time for a perfect contour, and don't worry about saving
lead. Any extra lead will be filed off on the floor and can be re melted for later
use. If I did this over I would probably skip this step and just use plastic or
high build primer to fix these problems. They were pretty minor dents and I wasted
allot of time tying to get the body perfect even though I was going to be having
other ways to fix these problems in later stages of the job.
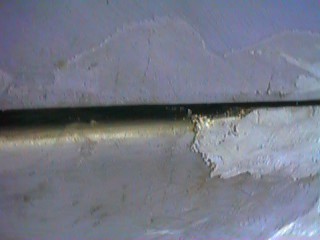
Here the rear
door gap is coming along pretty well. The gap still needs some filing to be 3
mm its about 2 here. Remember there will be paint on top of this which will build
up some on both edges, about 1 mm. This shot was taken before buffing so the lead
and body still looks pretty dull. This is the way things look during filing.
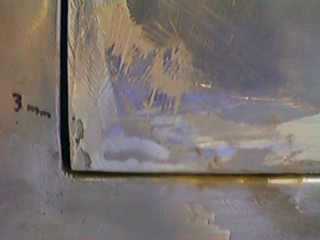
Here the gap on
the front of the door is about right. the door edge is still a little crooked,
but its about 3.5-4 mm. The bottom gap is still less than 2 mm This will need
additional filing on the door bottom and lead on the sill. Also note that the
filing of the front edge has caused some of the lead to peel off. This is a spot
where the tinning wasn't good. The lead peels right off. Always make sure the
tinning is solid before paddling in the lead.
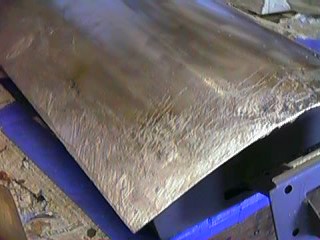
Here the lead work
is just getting underway on the bottom of the door. The gap is first filled almost
up to the bottom of the door and then filed out to the correct level and contour.
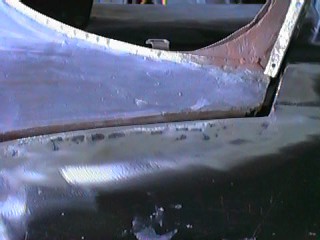
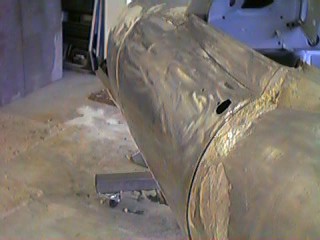
Here the upper
edge of the door has the right curve and gap, but the level of the door is lower
than the edge of the body with the lead filed down. The door will be removed and
the shell pick hammered up to make the level perfect. Looks worse than it really
is in this angle shot.
This shot is after
some lifting of the edge but still a slight problem in the corner. I'll hammer
some more on this before its done. Notice the joint on the front edge by the windscreen
pillar, this will need some major work to grind down the body and patch in some
new sheet metal fixing the contour. This is the way it came from the factory as
best I could tell. The other side of the car met flush with the door skin, so
I'll fix this to be the same. It will ruin the lead work, but I can hopefully
localize the damage and patch the lead work quickly.
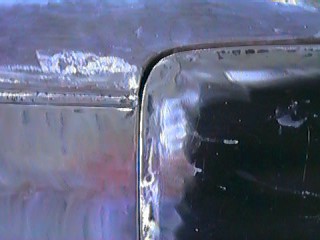
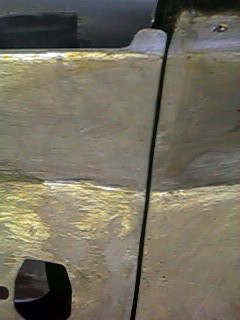
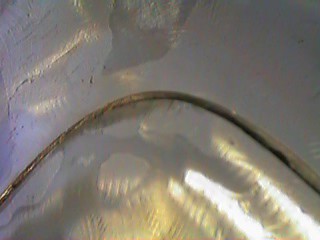
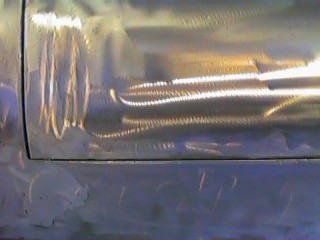
Here the gap and
contour are about right, you can notice the gradual expanding of the gap on the
front edge of the door. Many pictures of these cars from the factory show this
slightly wider front gap.
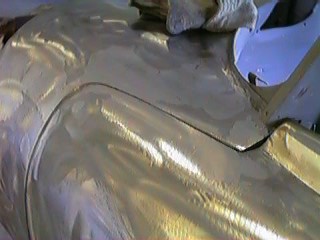
Rear door gap is
about right now. still some minor sanding to do, but this is after scotch brite
dressing and is nearly done.
Bottom edge is
pretty close too. some small work still to be done in the front corner. The corners
always require special attention.
Rear of the bottom
of the door is just about right, some blemishes in the lead under the door show
up but these will be buffed out or primed out in later phases of the paint process.
One door down and
one to go. This took over 20 hours. No wonder they don't build cars like this
any more.
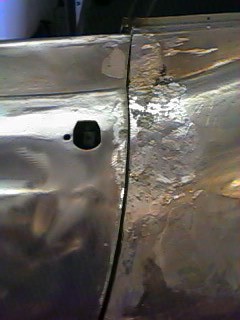
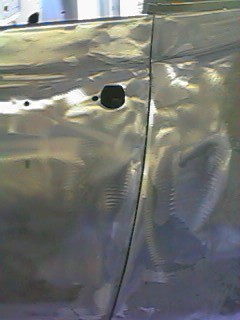
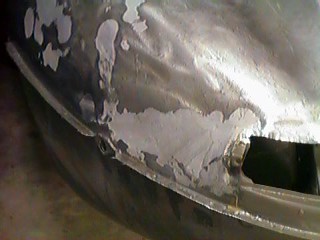
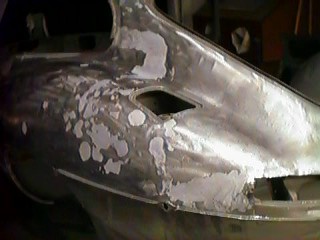
From the first
body problems page I have a before picture of this damage. It was welded up first
and then leaded, will be impossible to detect.
This is a close
up of one of the patches behind the doors after lead. Its almost impossible to
tell there was ever a problem before paint is even applied.
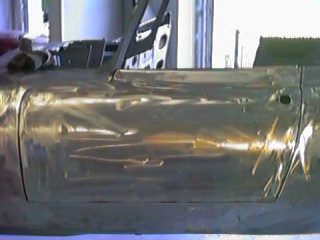
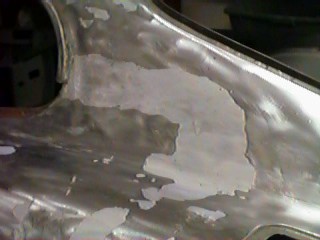
Its easy to see
now all the dents in the fenders which needed to be filled. Lead is really nice
for this kind of filling although much slower to apply and work down than Plastic.
Don't know exactly what went on with this car, but it wasn't easy on the sheet
metal.
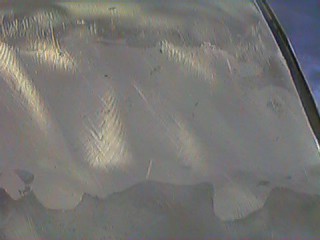
Here is a finished
roof section seam. Will be invisible soon. The next things to do will be more
body work on the bonnet, followed by replacement of the trunk tub and rear deck.
Any questions or corrections feel free to email to me at the address on the bottom
of each page.